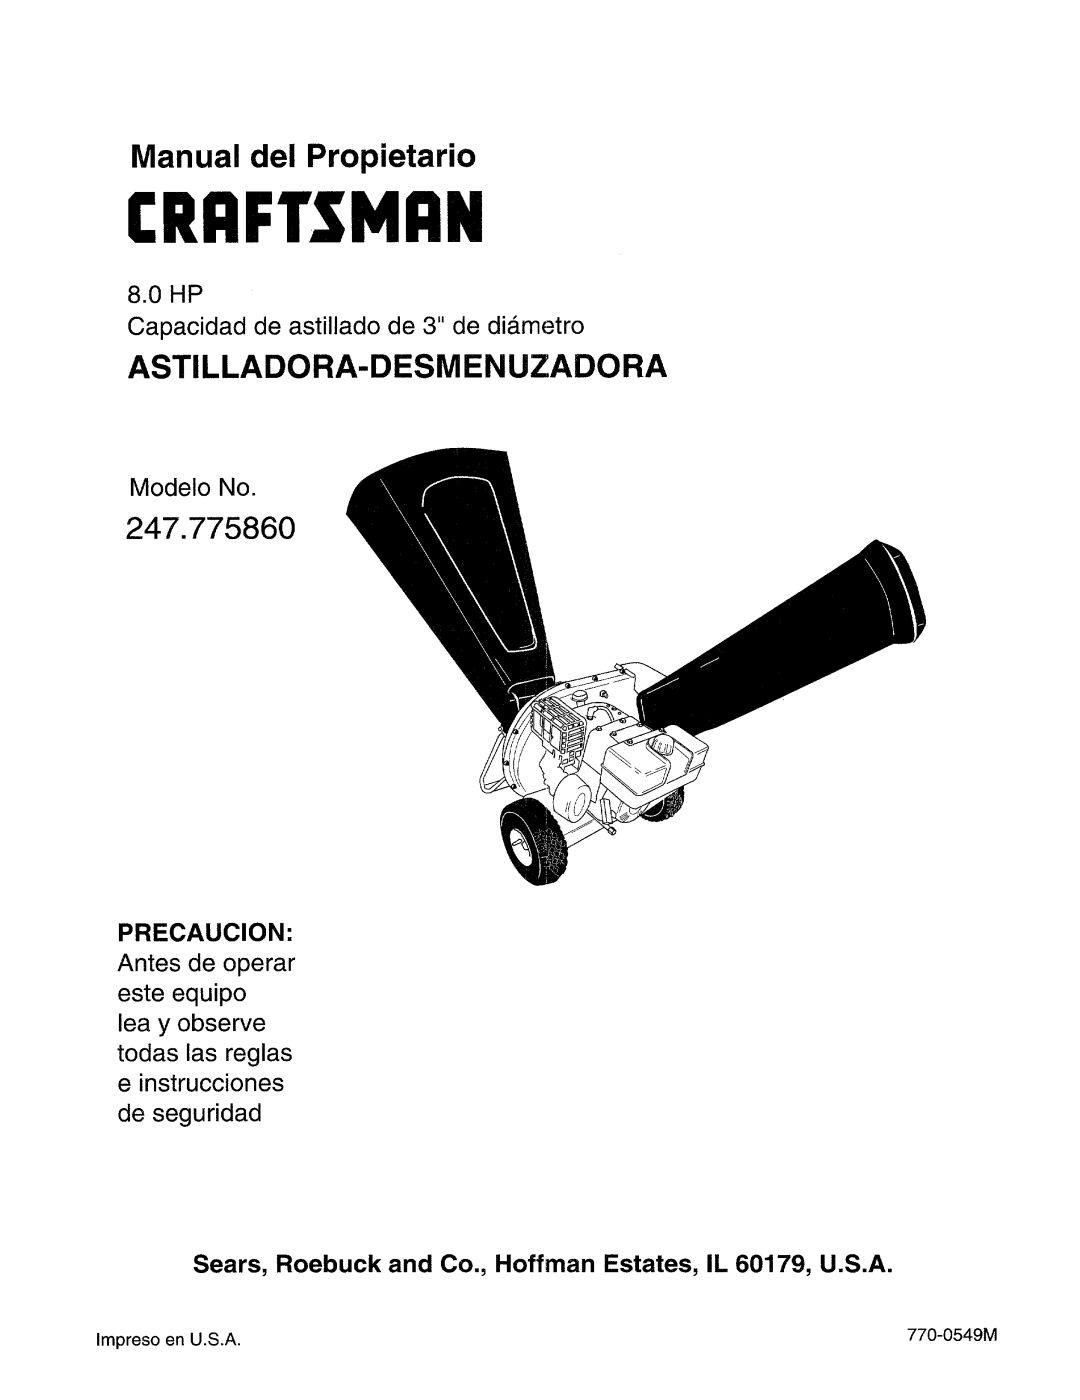
Craftsman 247.77586 Fijacion DE LA Canaleta DE LA Astilladora, Fijacion DE LA Bolsa Colectora

Page 34

Ajuste el perno. Esto asegurar_, el conjunto de la tolva a la gufa de entrada.

Para elevar la tolva, sujetela por el mango y lev_ntela hasta que calce en posici6n. Vea la figura 5.

oPara bajar la tolva, suj6tela por el mango y tire de la barra de desenganche. La tolva deberfa descender. Vea la figura 5.

Eleve la tolva

/

la barra de

desenganche

Figura 5

7.FIJACION DE LA CANALETA DE LA ASTILLADORA

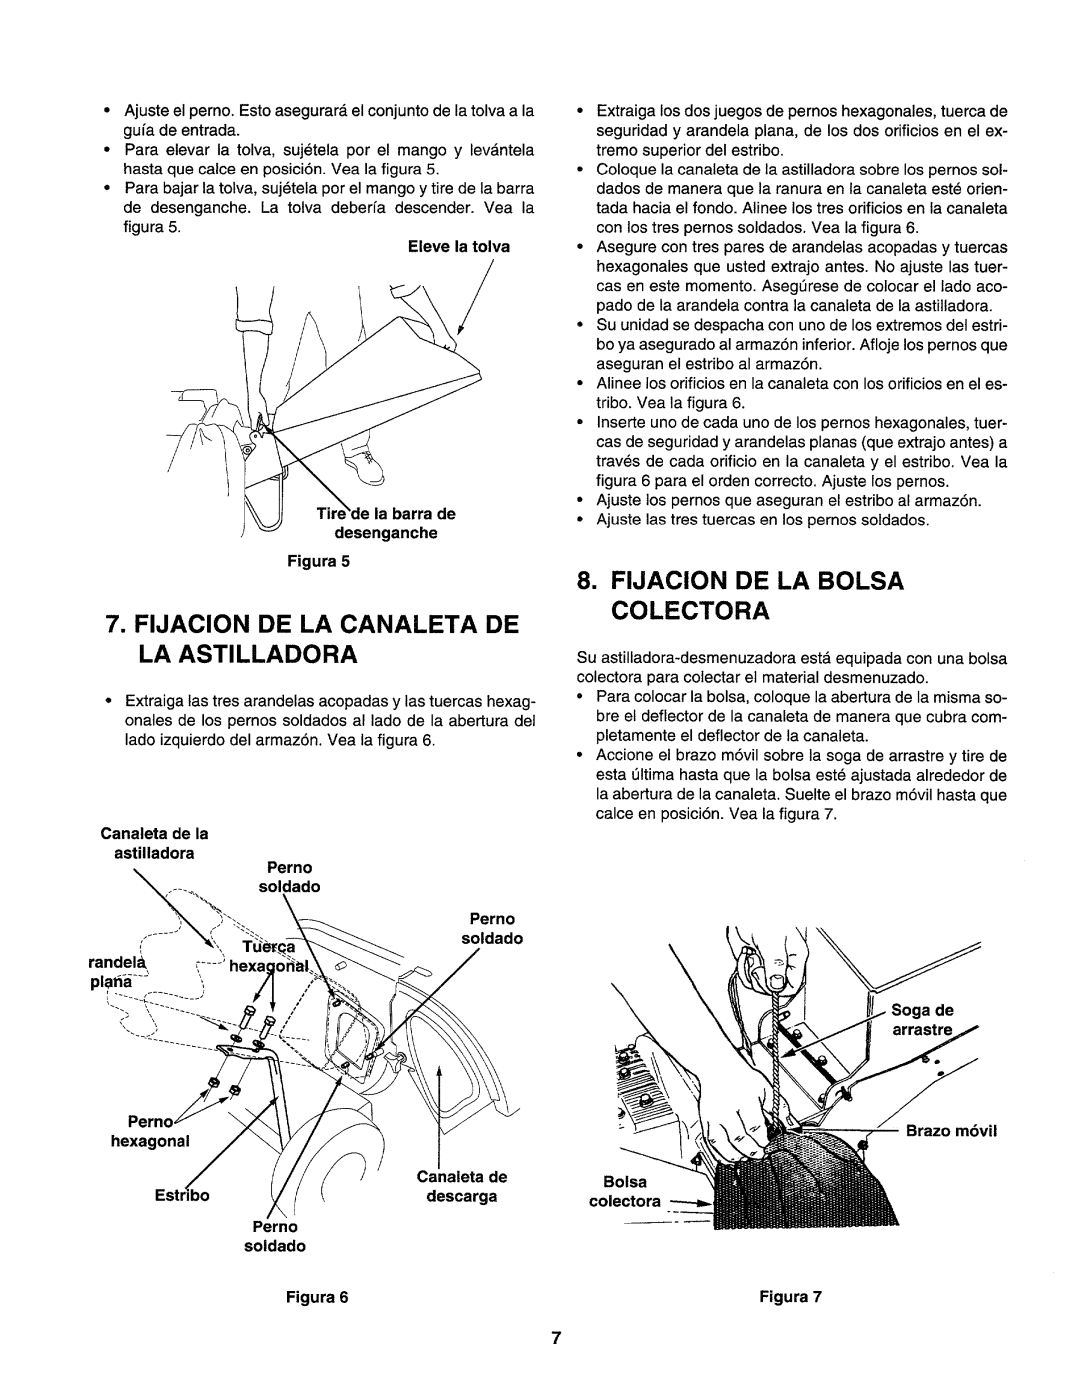
Extraiga las tres arandelas acopadas y las tuercas hexag- onales de los pernos soldados al lado de la abertura del lado izquierdo del armaz6n. Vea la figura 6.

Perno soldado

Perno soldado

Pernc hexagonal

Canaleta de descarga

Perno soldado

Figura 6

Extraiga los dos juegos de pernos hexagonales, tuerca de seguridad y arandela plana, de los dos orificios en el ex- tremo superior del estribo.

Coloque la canaleta de la astilladora sobre los pernos sol- dados de manera que la ranura en la canaleta est_ orien- tada hacia el fondo. Alinee los tres orificios en la canaleta con los tres pernos soldados. Vea la figura 6.

Asegure con tres pares de arandelas acopadas y tuercas hexagonales que usted extrajo antes. No ajuste las tuer- cas en este momento. Asegerese de colocar el lado aco- pado de la arandela contra la canaleta de la astilladora.

Su unidad se despacha con uno de los extremos del estri- bo ya asegurado al armaz6n inferior. Afloje los pernos que aseguran el estribo al armaz6n.

Alinee los orificios en la canaleta con los orificios en el es- tribo. Vea la figura 6.

Inserte uno de cada uno de los pernos hexagonales, tuer- cas de seguridad y arandelas planas (que extrajo antes) a trav_s de cada orificio en la canaleta y el estribo. Vea la

figura 6 para el orden correcto. Ajuste los pernos.

°Ajuste los pernos que aseguran el estribo al armaz6n.

• Ajuste las tres tuercas en los pernos soldados.

8.FIJACION DE LA BOLSA COLECTORA

Su astilladora-desmenuzadora est_ equipada con una bolsa colectora para colectar el material desmenuzado.

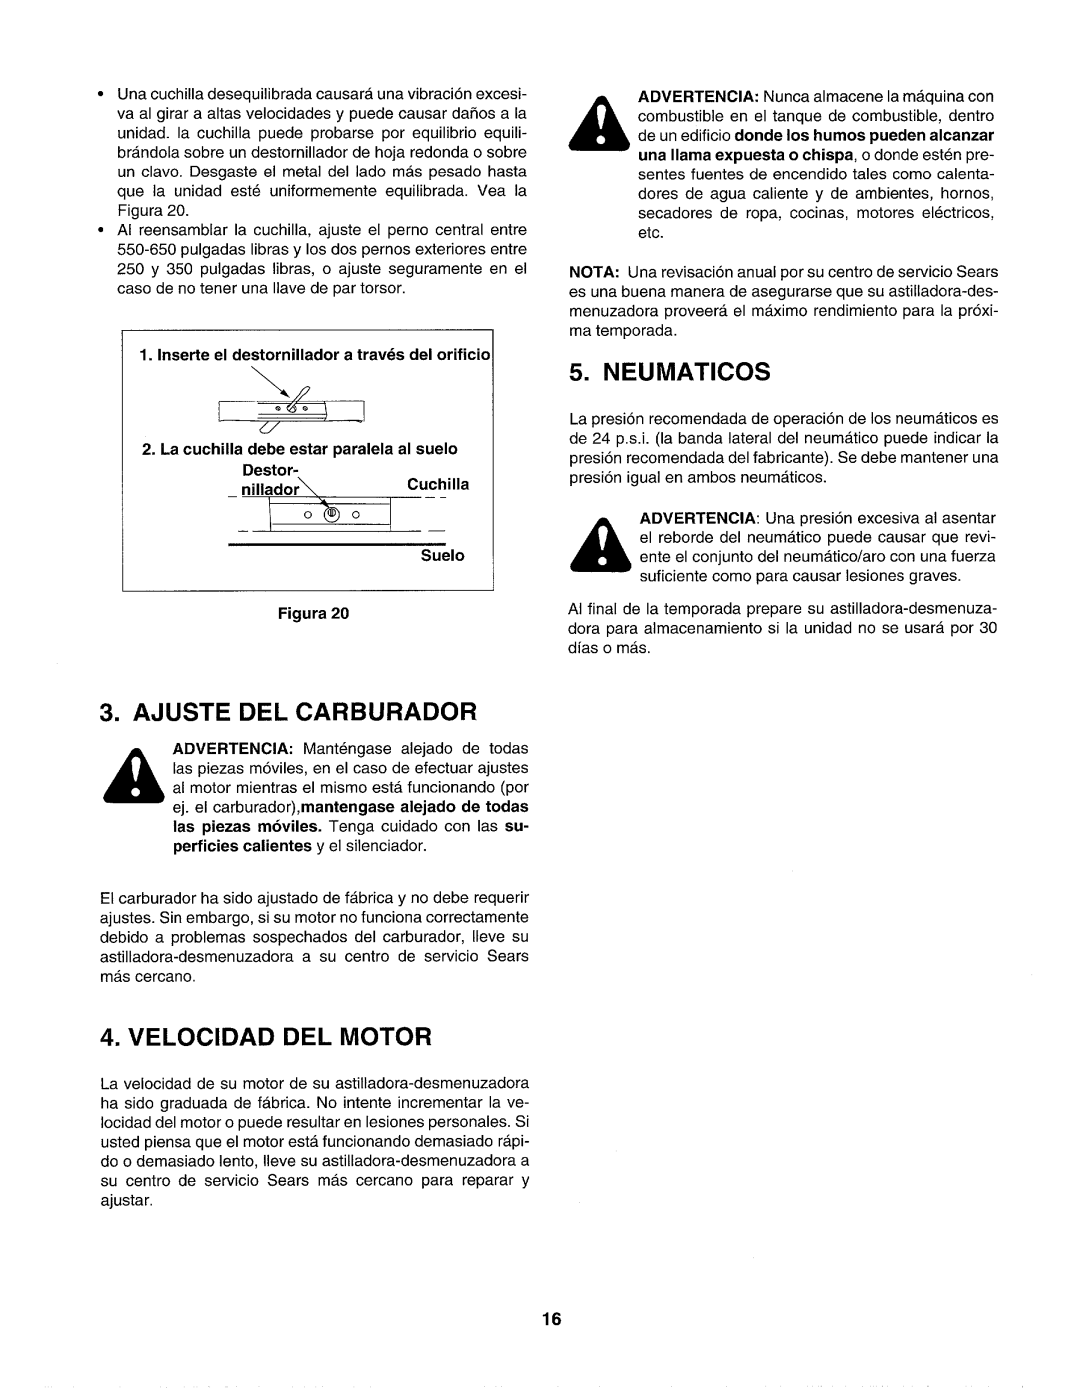
Para colocar la bolsa, coloque la abertura de la misma so- bre el deflector de la canaleta de manera que cubra com- pletamente el deflector de la canaleta.

Accione el brazo m6vil sobre la soga de arrastre y tire de esta _ltima hasta que la bolsa est_ ajustada alrededor de la abertura de la canaleta. Suelte el brazo m6vil hasta que calce en posici6n. Vea la figura 7.

a de

_vil

Bolsa colectora

Figura 7

7

Image 34
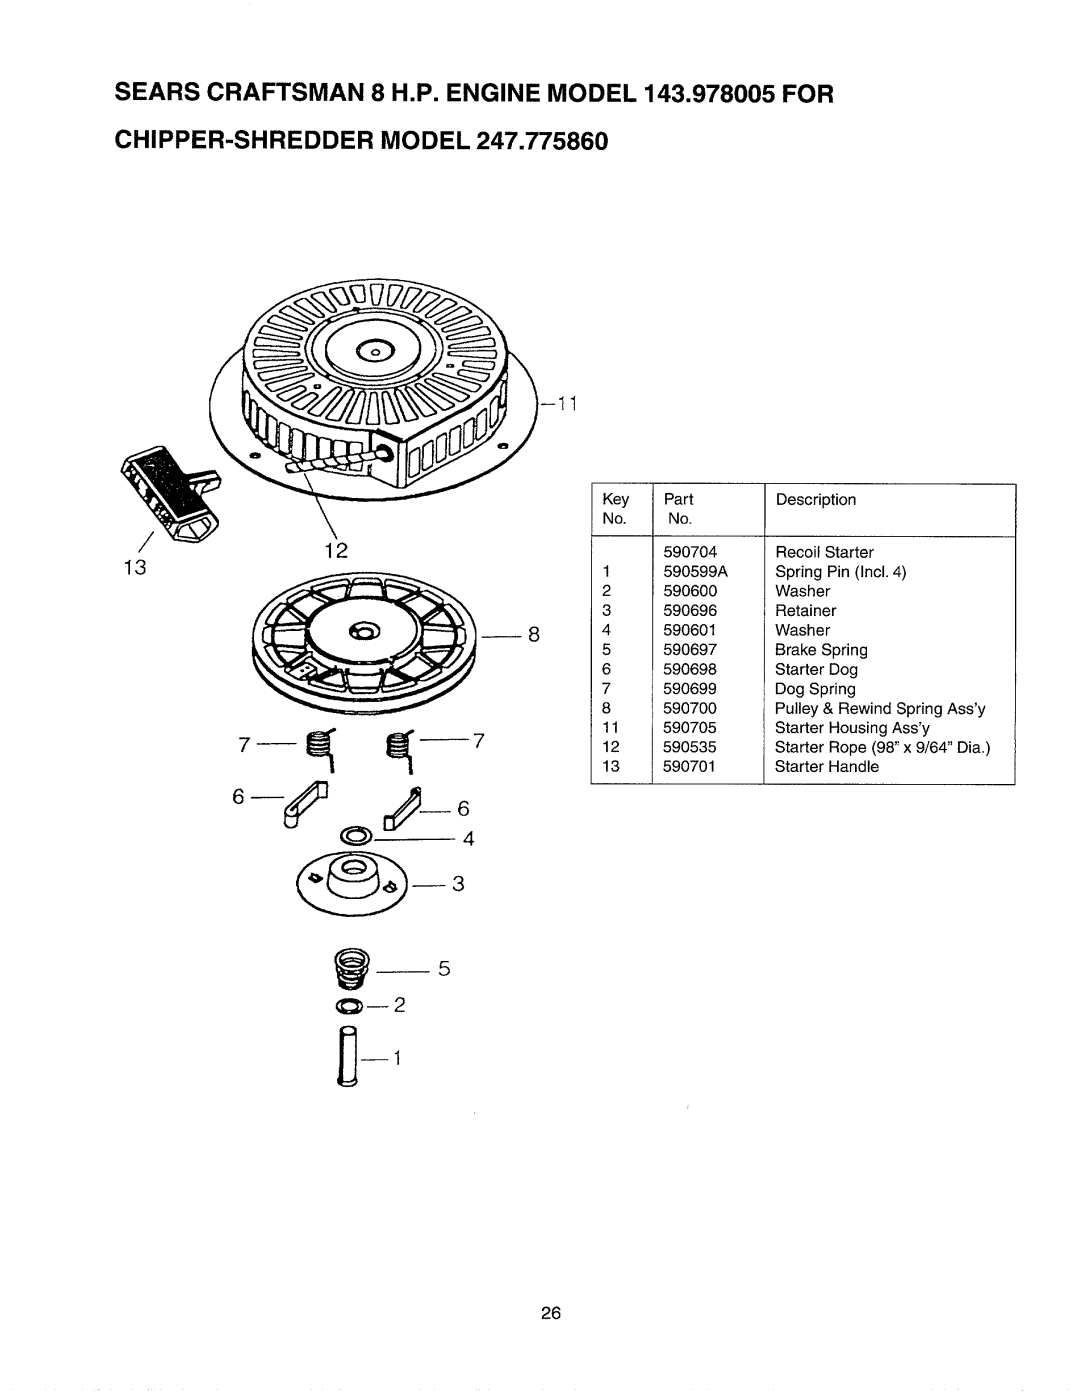
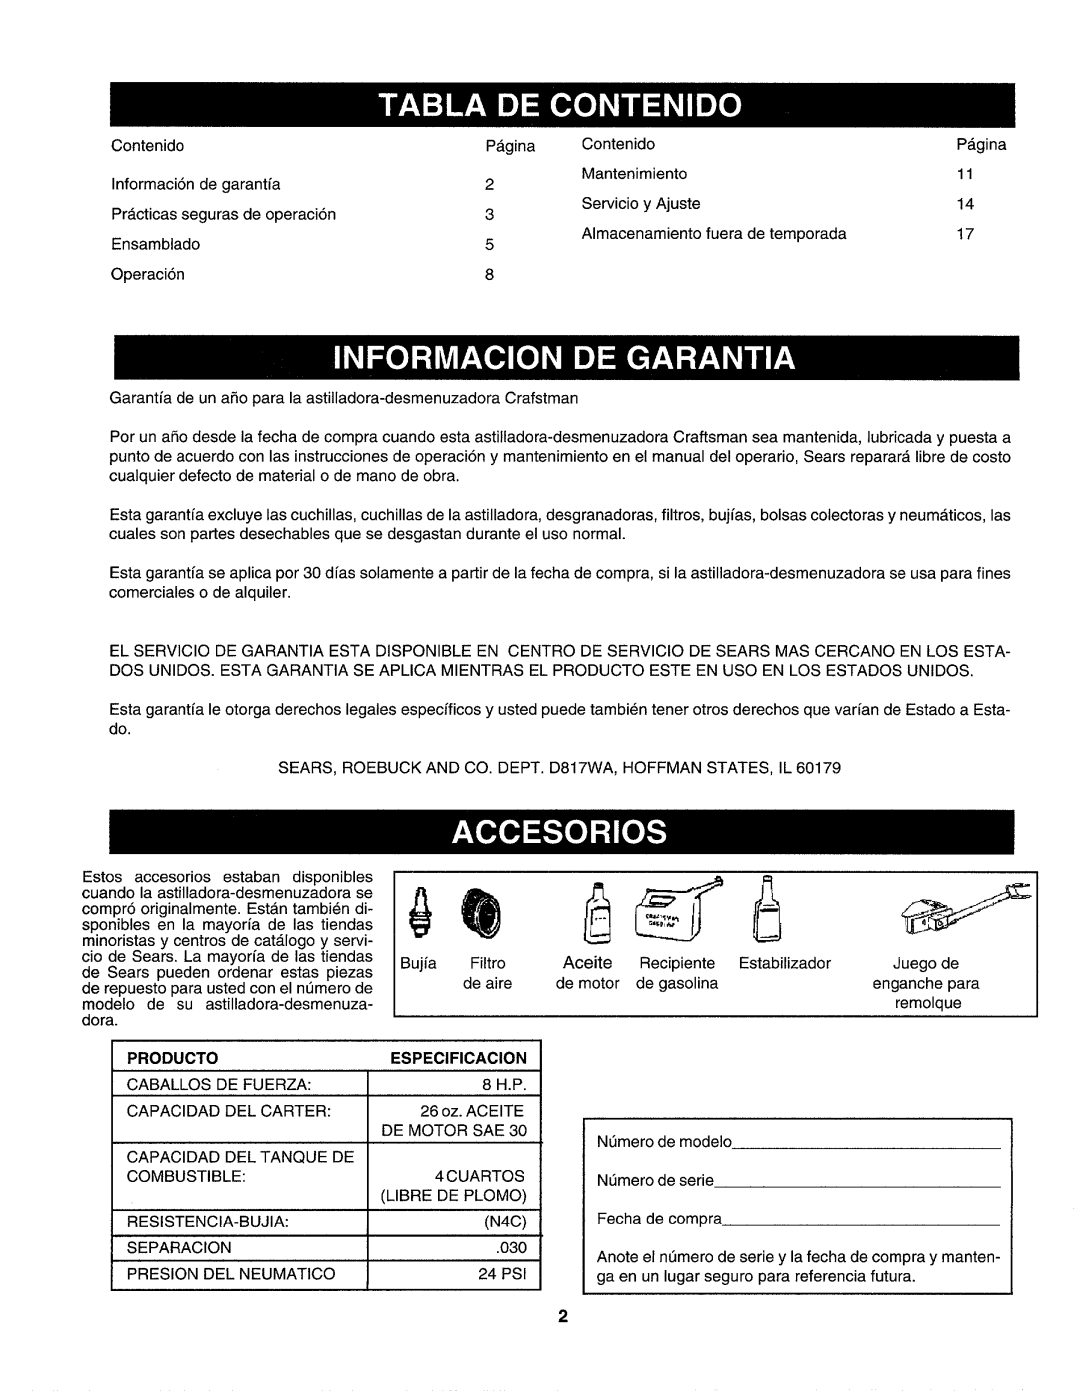
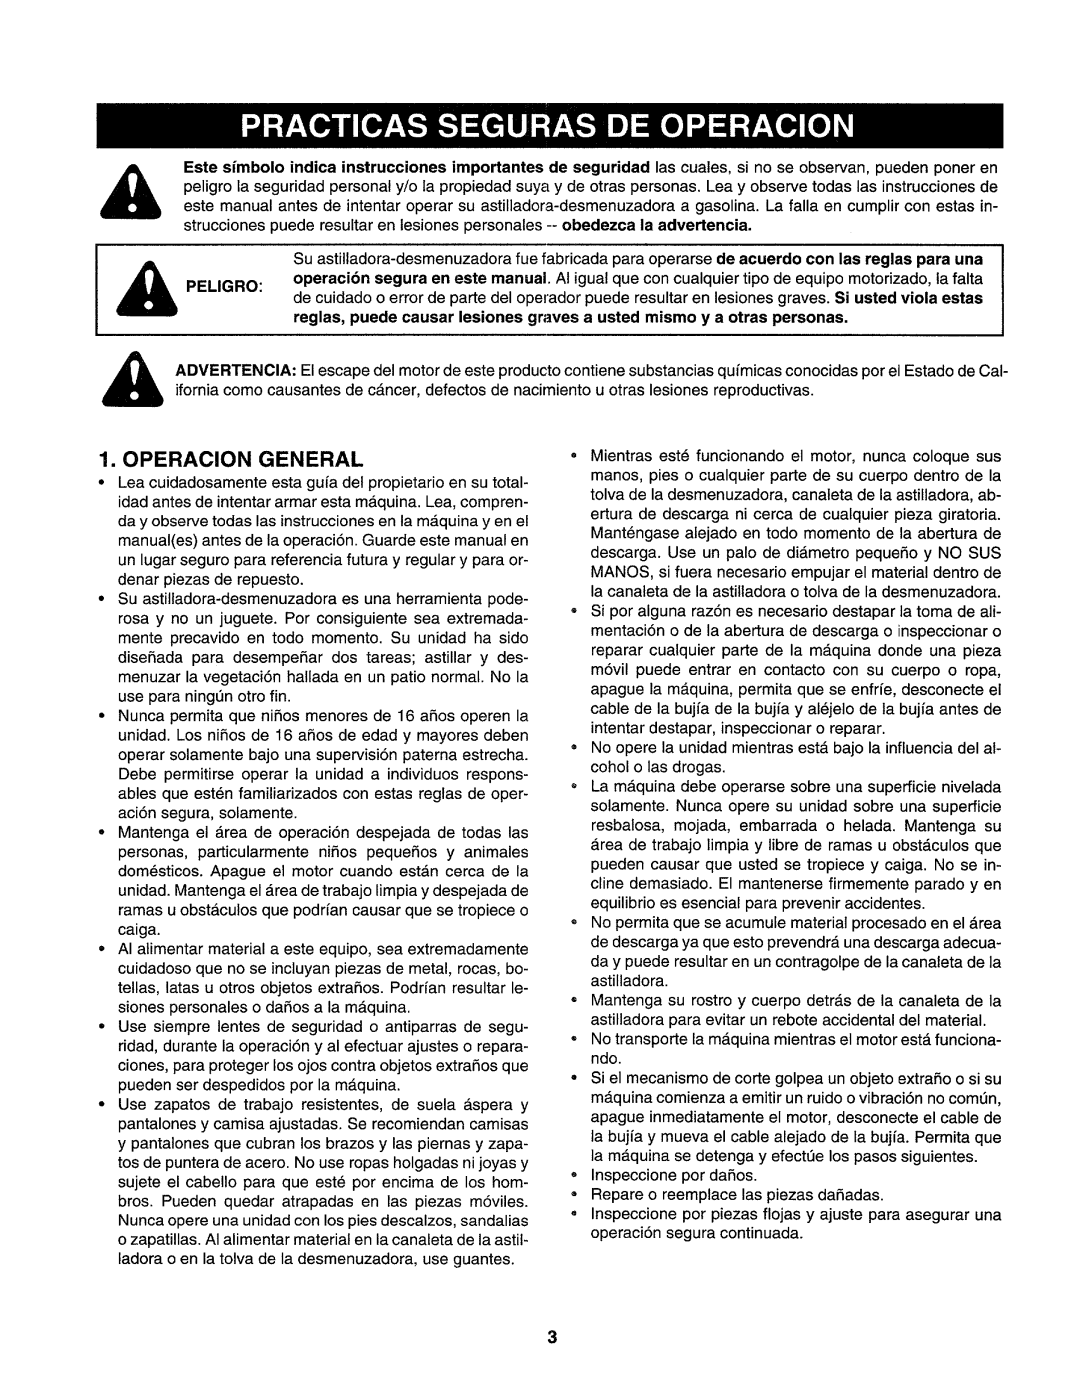
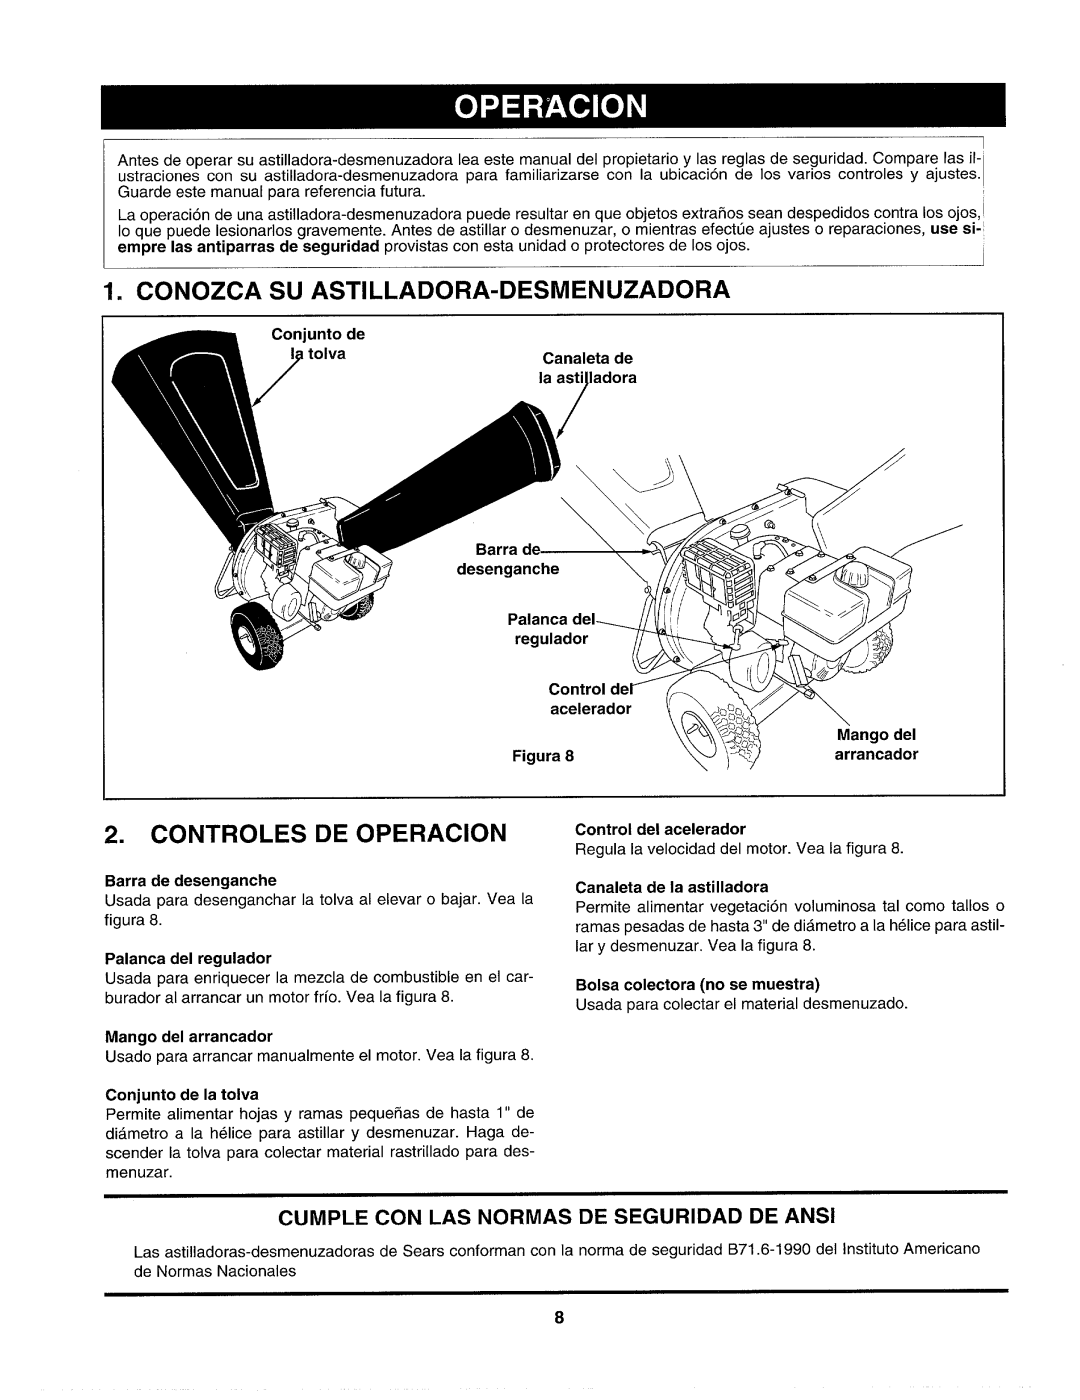
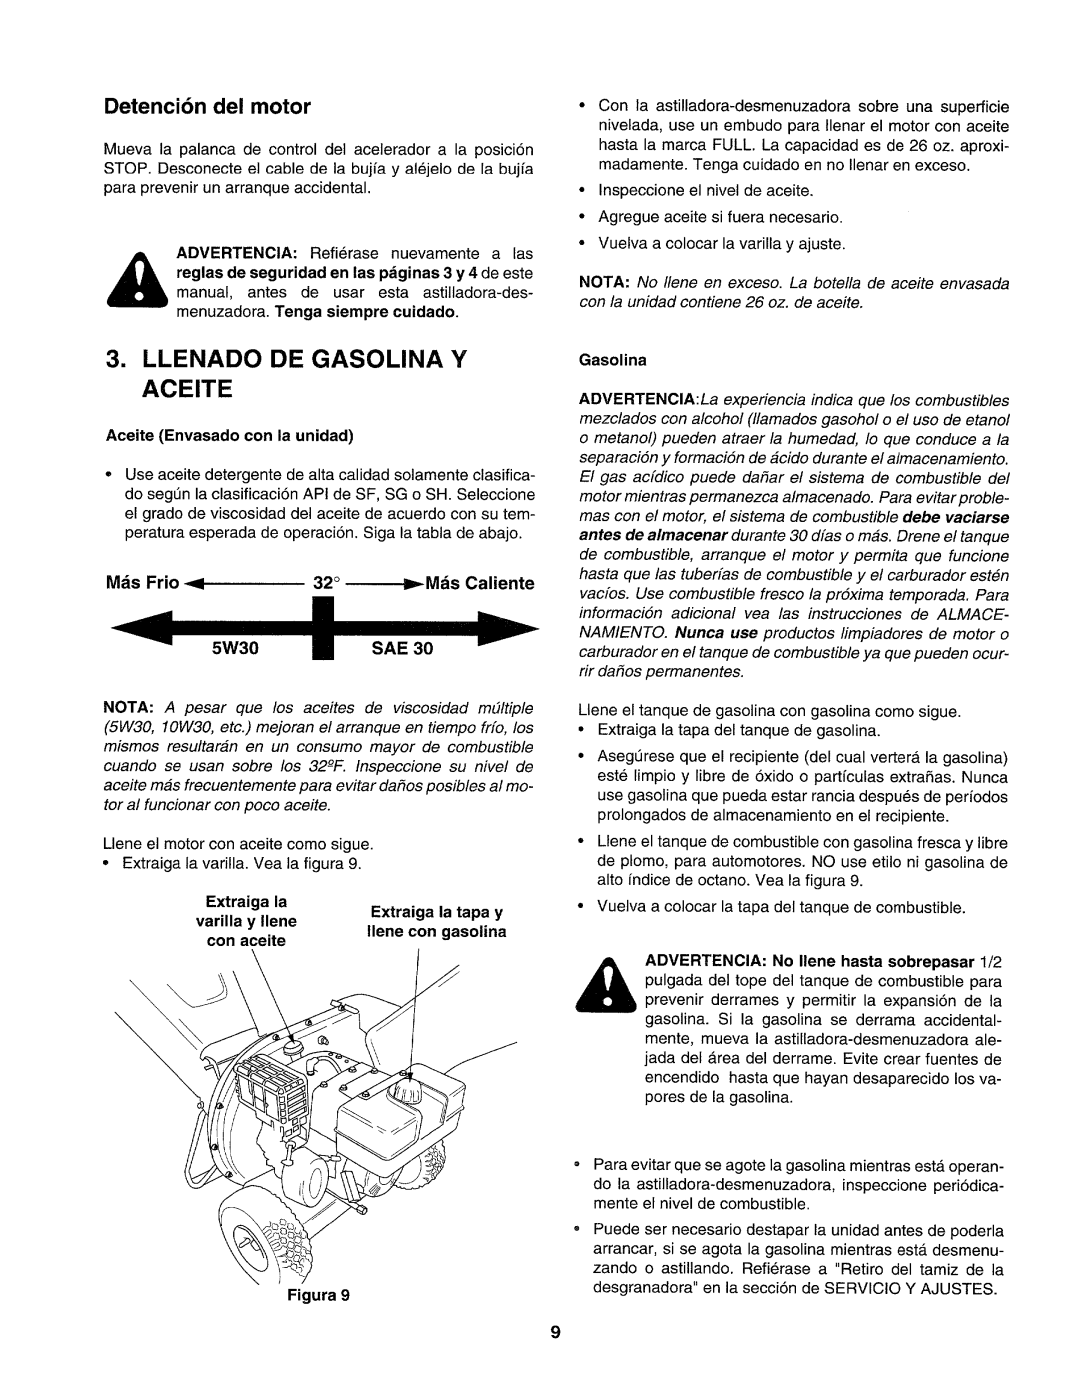
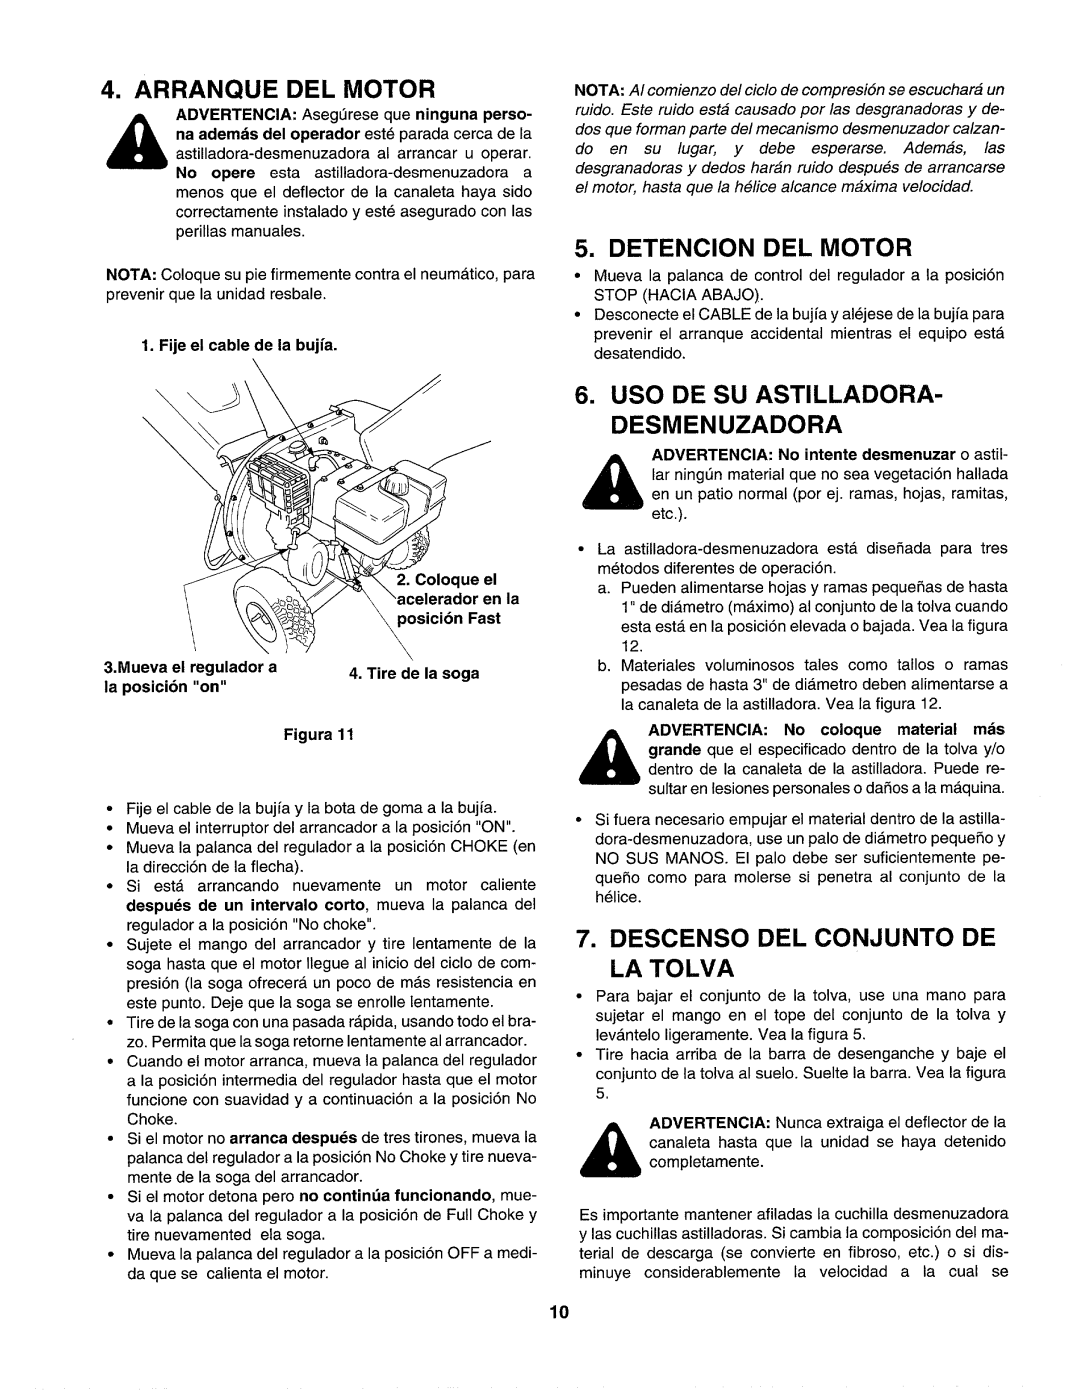
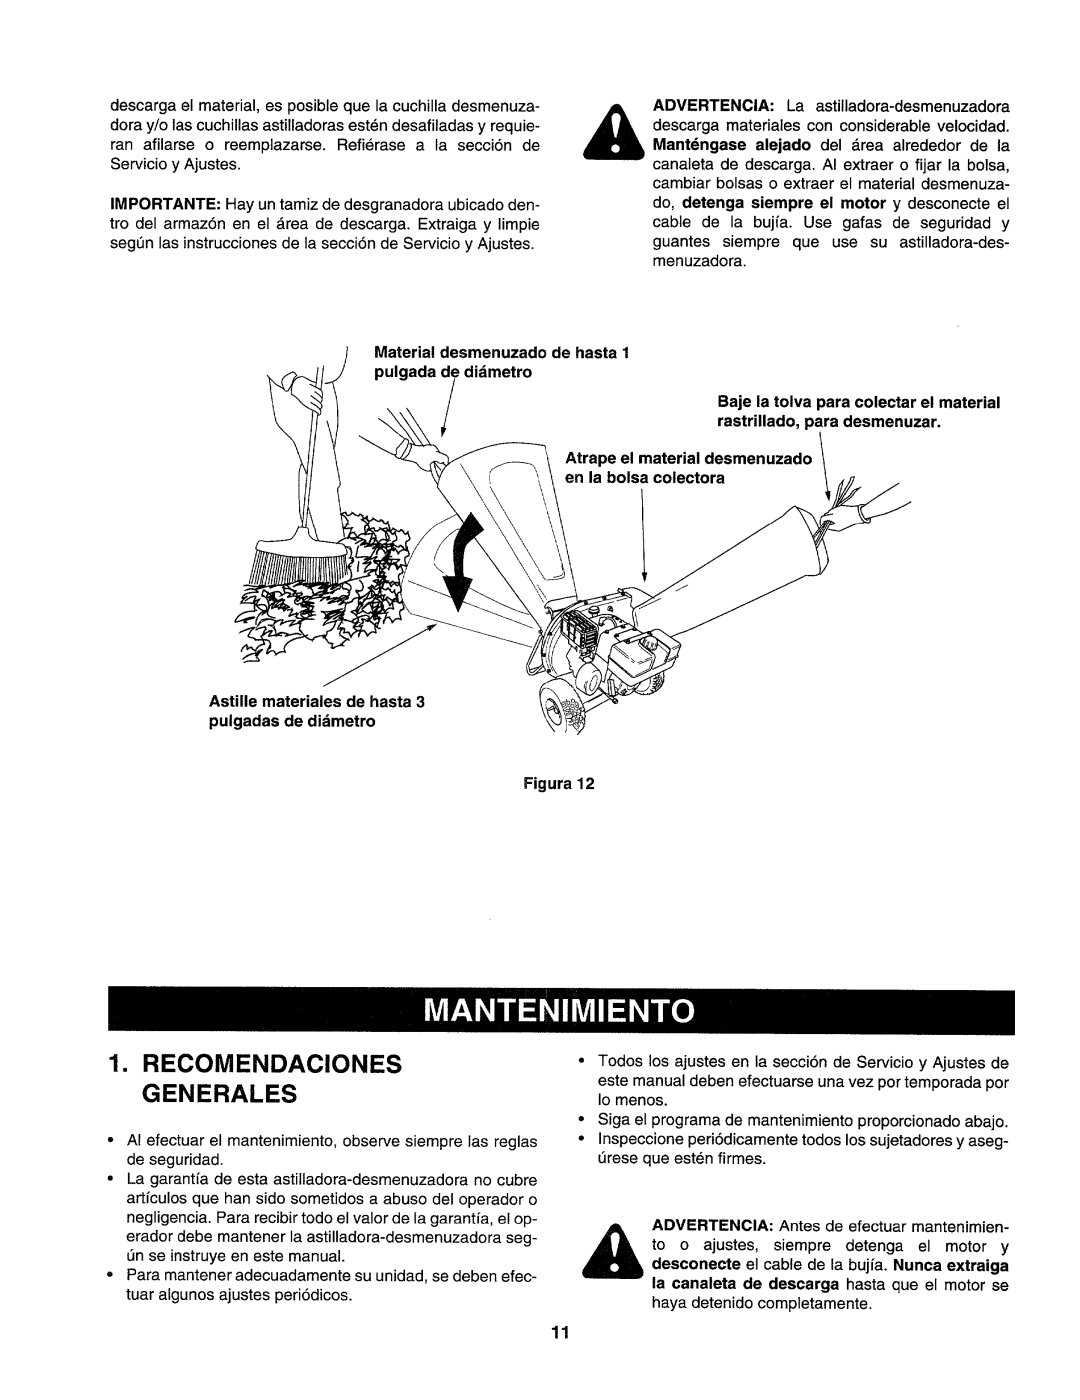
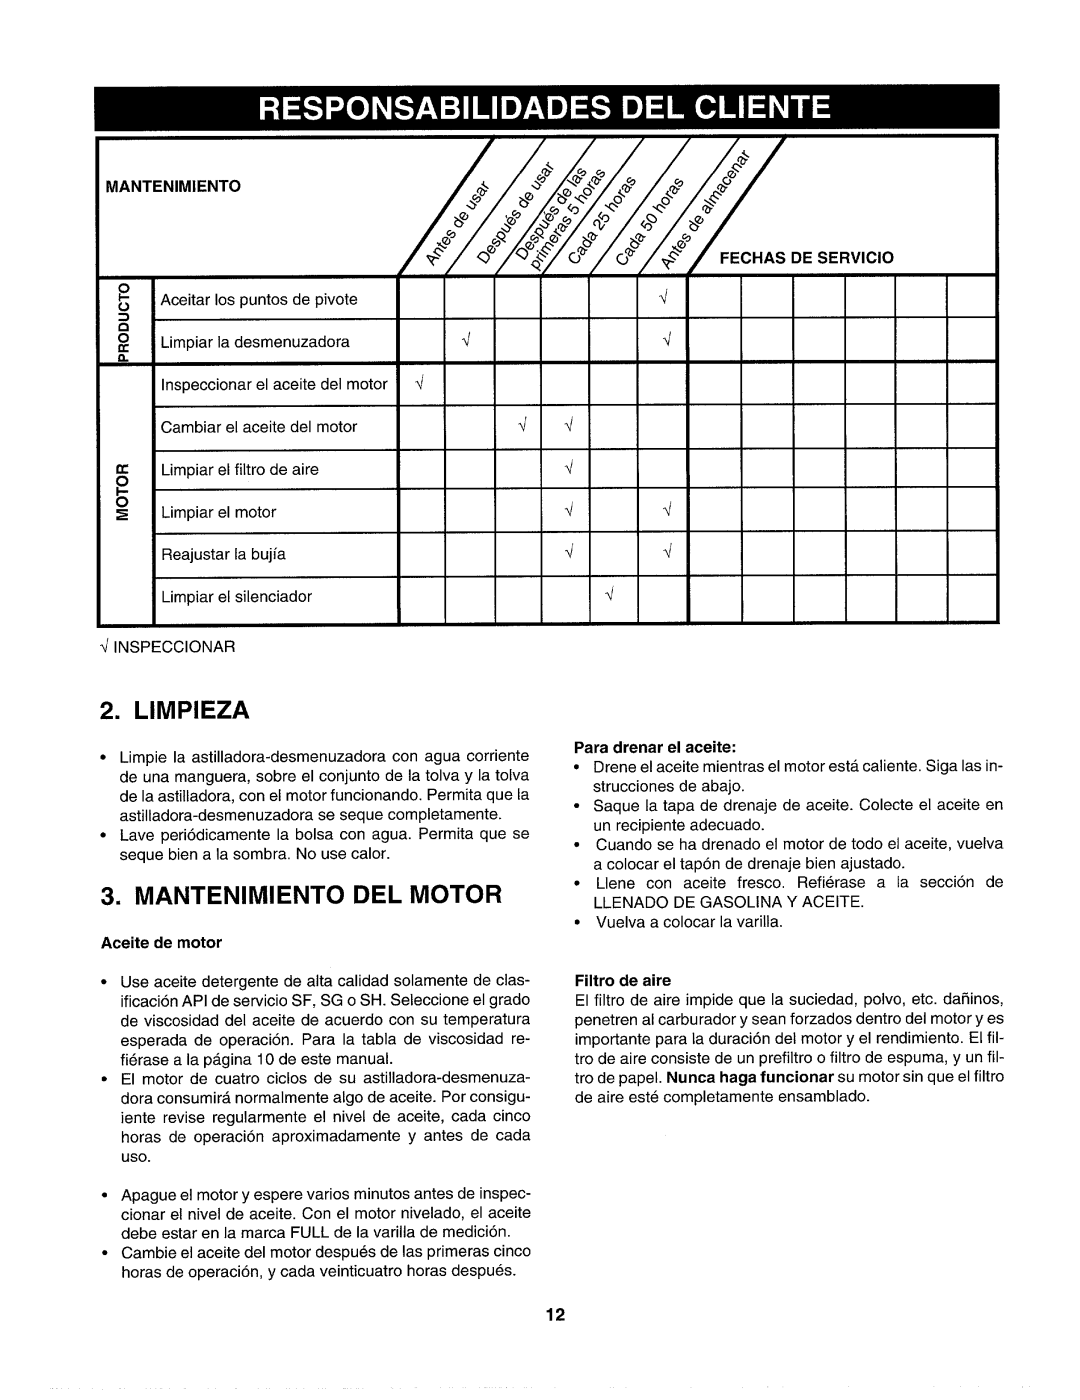
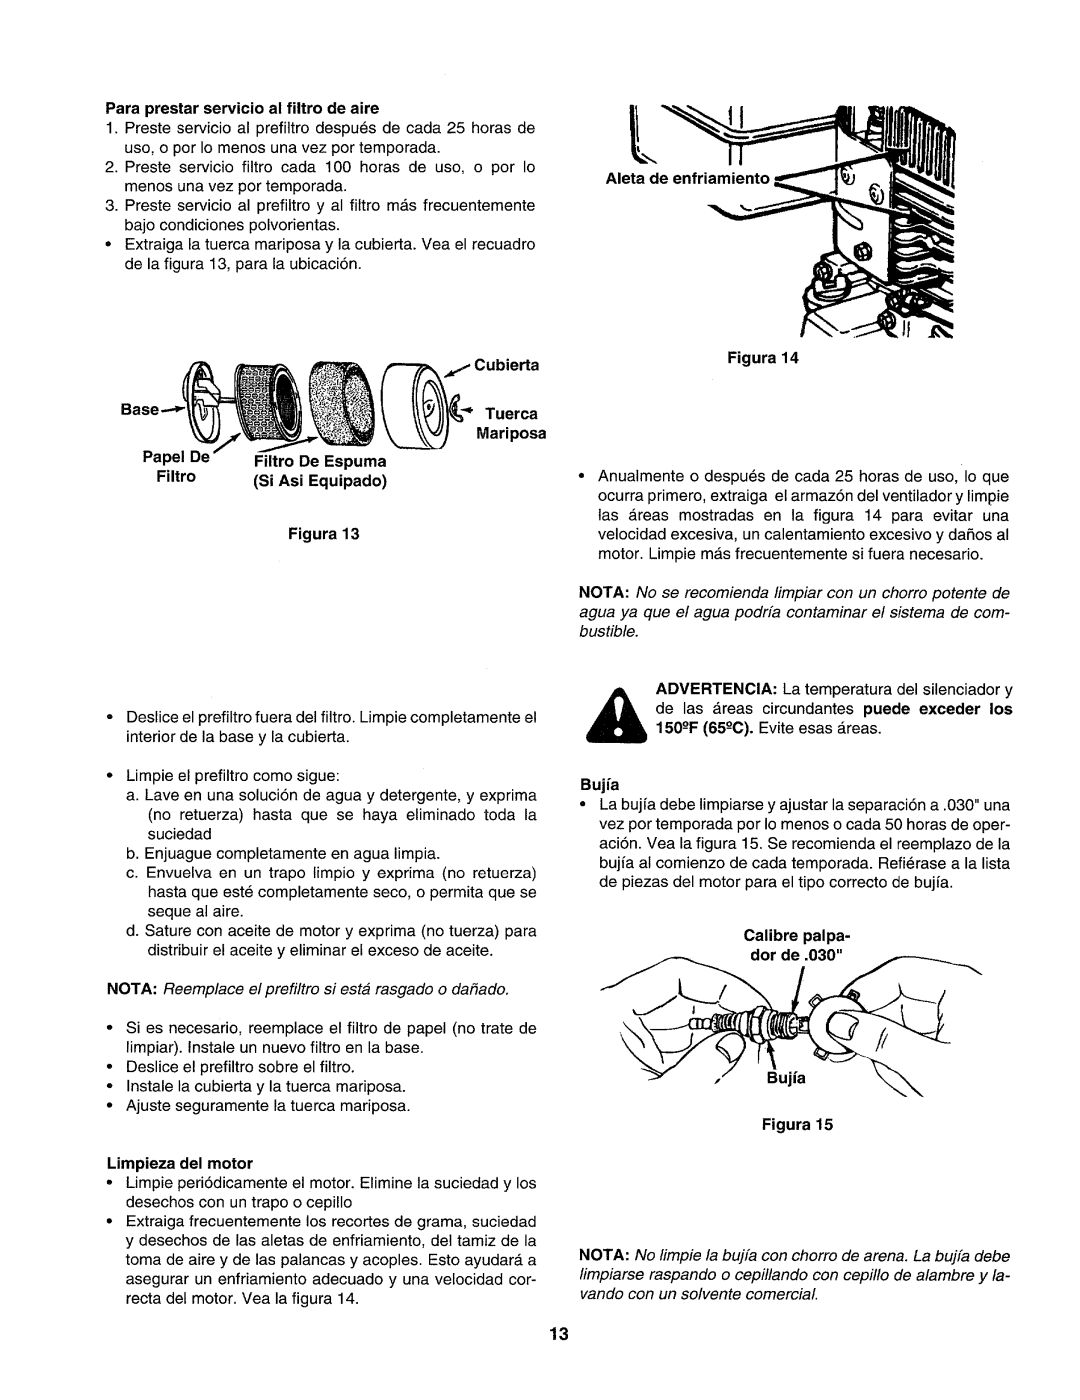
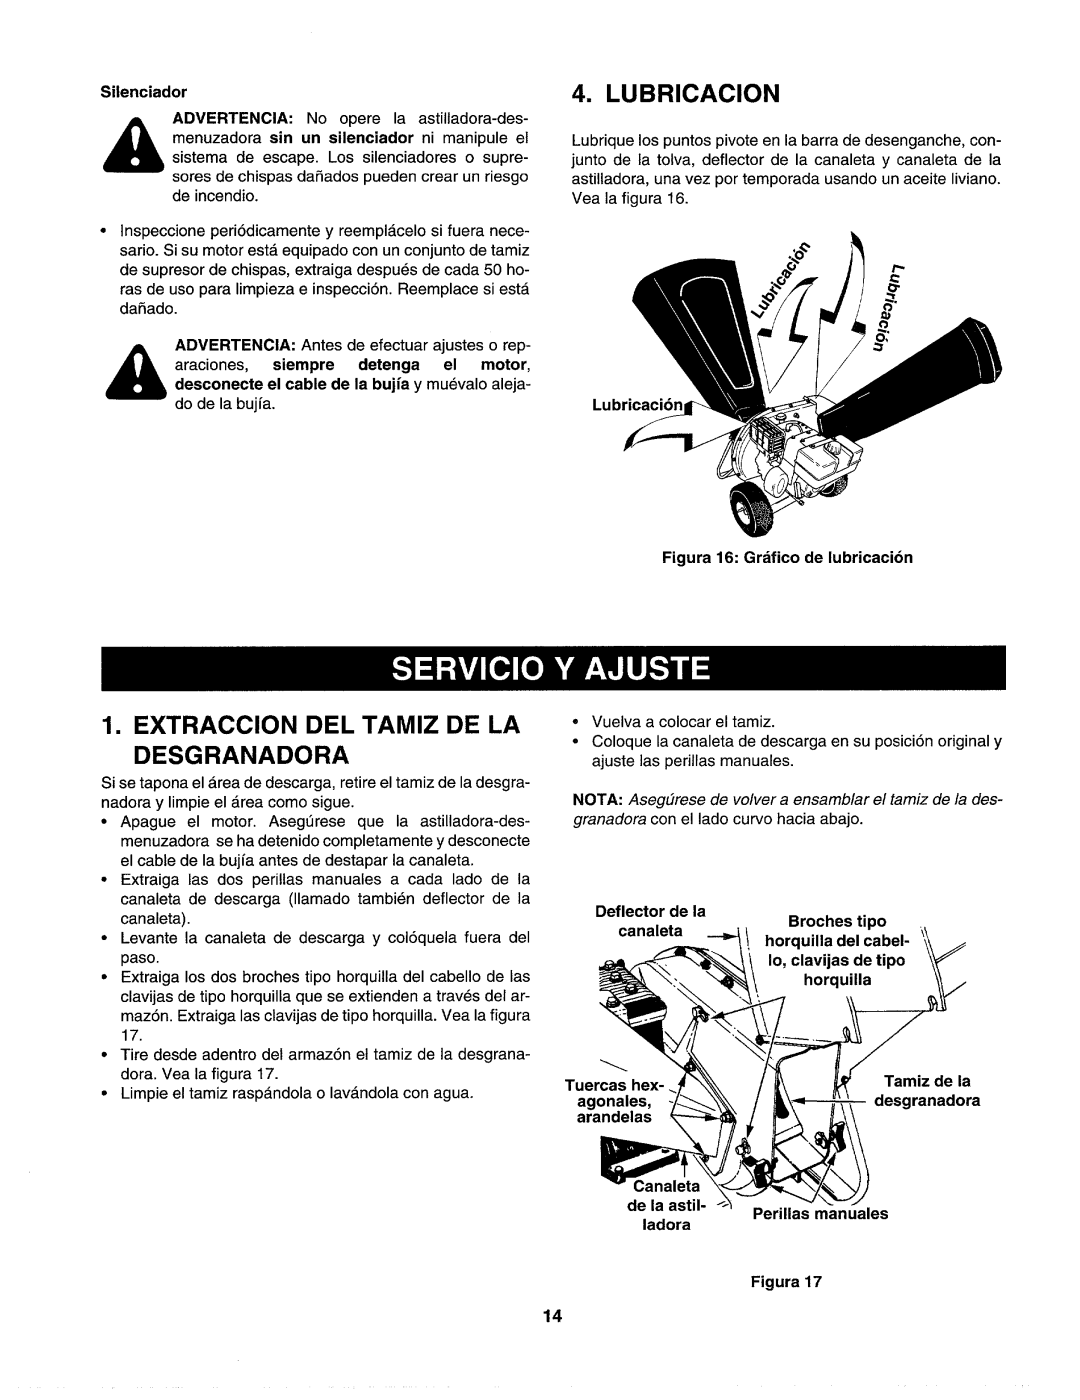
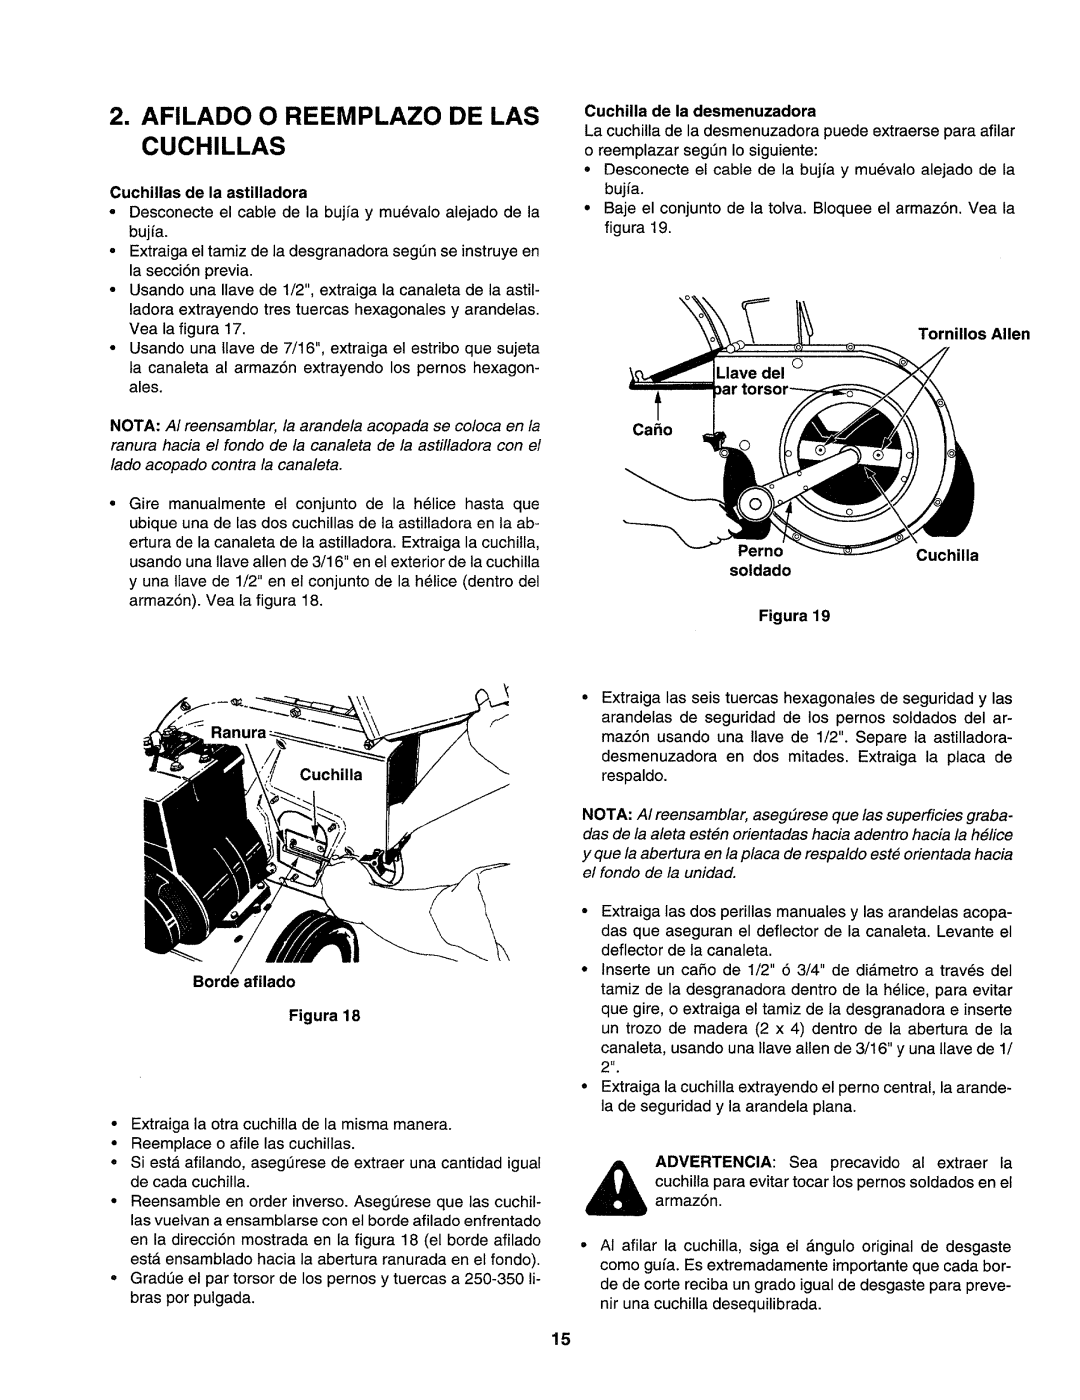
Contents Craftsman One-Year Warranty on Craftsman Chipper-Shredder General Operation Your Responsibility ServiceChildren Savetheseinstructions For FuturereferenceLoose Parts Safety Glasses Bottle OilChipper Chute Hex Bolt Hinge Disconnecting Spark PlugTools Required HopperLift hopper up Pull release bar Attaching the Chipper ChuteAttaching the Catcher BAG Weld Stud Hex Nut Discharge Chute BraceOperating Controls Meets Ansi Safety Standards?per Assembly RlreaSe Starter HandleRemove cap GAS and OIL FILL-UPOil Packed with unit Fill gasStopping Engine Using Your CHIPPER-SHREDDERStarting Engine Move choke to on positionShred material upto 1 inch in diameter General RecommendationsChute till the engine has completely stopped Maintenance CleaningEngine Maintenance Customer ResponsibilitiesSpark Plug Feeler Gauge Zrk PlugRemoving the Flail Screen LubricationMuffler Shredding Blade Sharpening or Replacing the BladesChipper Blades Sharp EdgeTires Adjusting CarburetorEngine Speed GroundEngine CHIPPER-SHREDDEROther Problem Possible Cause Corrective Action Sears Craftsman 8 H.P. CHIPPER=SHREDDER Model Sears Craftsman 8 H.P. CHIPPER-SHREDDER Model KEY Description Ooo 3OO RPM Lever Clamp8OO Sears Craftsman CHIPPER-SHREDDER CarburetorPage Sears Crrftsmrn Producto Operacion General Segura en este Manual. AI igualSU Responsabilidad Para Referencia FuturaCanaleta de la astilladora Extraiga LA Astilladora Desmenuzadora DE LA CajaPiezas Sueltas Tolva Canaleta de descargaLA Tolva Herramientas RequeridasFijacion DE LA Canaleta DE Descarga Orificio Tuerca hexagonalFijacion DE LA Bolsa Colectora Fijacion DE LA Canaleta DE LA AstilladoraPernc hexagonal Controles DE Operacion Conozca SU ASTILLADORA-DESMENUZADORACumple CON LAS Normas DE Seguridad DE Ansi Llenado DE Gasolina Y Aceite Mds Frio Mds CalienteUSO DE SU ASTILLADORA- Desmenuzadora Arranque DEL MotorDetencion DEL Motor Descenso DEL Conjunto DE LA TolvaRecomendaciones Generales FiguraFechas DE Servicio LimpiezaMantenimiento DEL Motor Aceite de motorPapel De Filtro De Espuma Para prestar servicio al filtro de aireCubierta Base Tuerca Si Asi EquipadoSilenciador LubricacionExtraccion DEL Tamiz DE LA Desgranadora Tamiz de laCuchillas de la astilladora Afilado O Reemplazo DE LAS CuchillasCaho Cuchilla de la desmenuzadoraVelocidad DEL Motor NeumaticosAjuste DEL Carburador SueloMotor ASTILLADORA-DE SmenuzadoraOtro Problema El motor no arranca800-659-7O84

247.77586 specifications

The Craftsman 247.77586 represents a blend of innovative engineering and practical design tailored for homeowners and garden enthusiasts. This versatile tool, primarily a snow blower, is optimized for efficient snow removal, making it an essential asset during winter months when heavy snowfall can pose challenges.

One of the standout features of the Craftsman 247.77586 is its powerful 24-inch clearing width, which allows users to quickly clear driveways, sidewalks, and patios. The machine is equipped with a robust 208cc engine that delivers reliable performance in various snow conditions. This engine provides ample power to move heavy, wet snow, ensuring users can tackle even the toughest of winter storms with confidence.

The Craftsman 247.77586 is designed with user comfort and convenience in mind. Its ergonomic handles are adjustable, allowing for a customizable grip that can be adjusted to suit different users' preferences. Furthermore, the snow blower features a hydraulic chute control, enabling users to easily adjust the direction of snow discharge without needing to halt their operations. This tool can throw snow up to 30 feet away, helping prevent the accumulation of snow in areas that have already been cleared.

The unit is equipped with a 6-speed transmission, comprising 5 forward speeds and 1 reverse, allowing for efficient maneuvering to suit different snow depths and types. This feature is particularly advantageous when navigating tricky terrain or when following previously cleared paths.

Another notable characteristic of the Craftsman 247.77586 is its durable construction. Built with high-quality materials, this snow blower is designed to withstand the rigors of frequent use during harsh winter months. The heavy-duty impeller and auger work together effectively to break down large snow piles, while the sturdy chassis ensures stability and resilience.

Additionally, the Craftsman 247.77586 boasts easy maintenance features. Access points for oil changes and spark plug replacements are conveniently located, allowing users to keep the equipment in top shape with minimal hassle. This attention to maintenance eases the ownership experience, ensuring that performance remains at an optimal level throughout the snow season.

In summary, the Craftsman 247.77586 is not just a snow blower; it is a reliable winter partner. With its powerful engine, substantial clearing capabilities, user-friendly adjustments, and durable construction, it is designed to tackle the demands of winter efficiently. For anyone seeking to maintain a clear outdoor space during snowfalls, the Craftsman 247.77586 stands out as a dependable choice.