Gravely 927060-1028, 927064-1440, 927062-1232 manual Front Wheel Alignment

Page 20

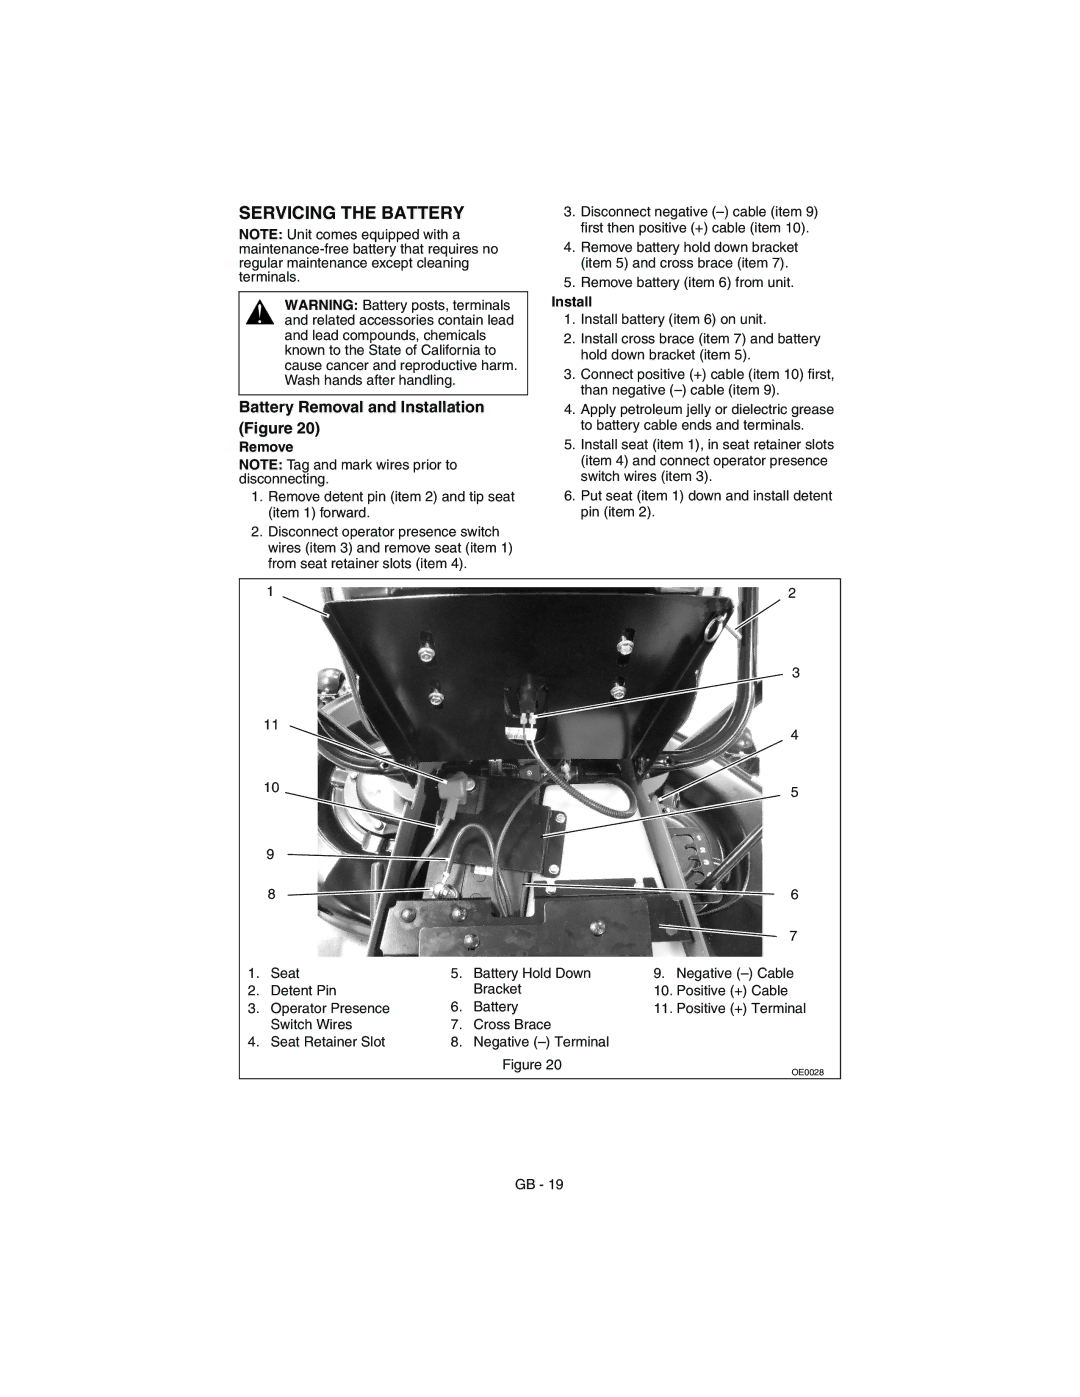
Cleaning Battery and Battery Cables (Figure 20)

1.Remove battery from unit (see Battery Removal and Installation on page 19).

2.Clean or service battery away from unit. Remove corrosion from battery terminals and cable connections with wire brush, then wash with a weak baking soda solution.

3.Install battery on unit (see Battery Removal and Installation on page 19).

Charging the Battery (Figure 20)

WARNING: FROZEN BATTERIES CAN EXPLODE and result in death or serious injury. DO NOT charge a frozen battery. Let the battery thaw before charging.

Follow First Aid directions for contact with battery fluid.

External Contact: Flush with water.

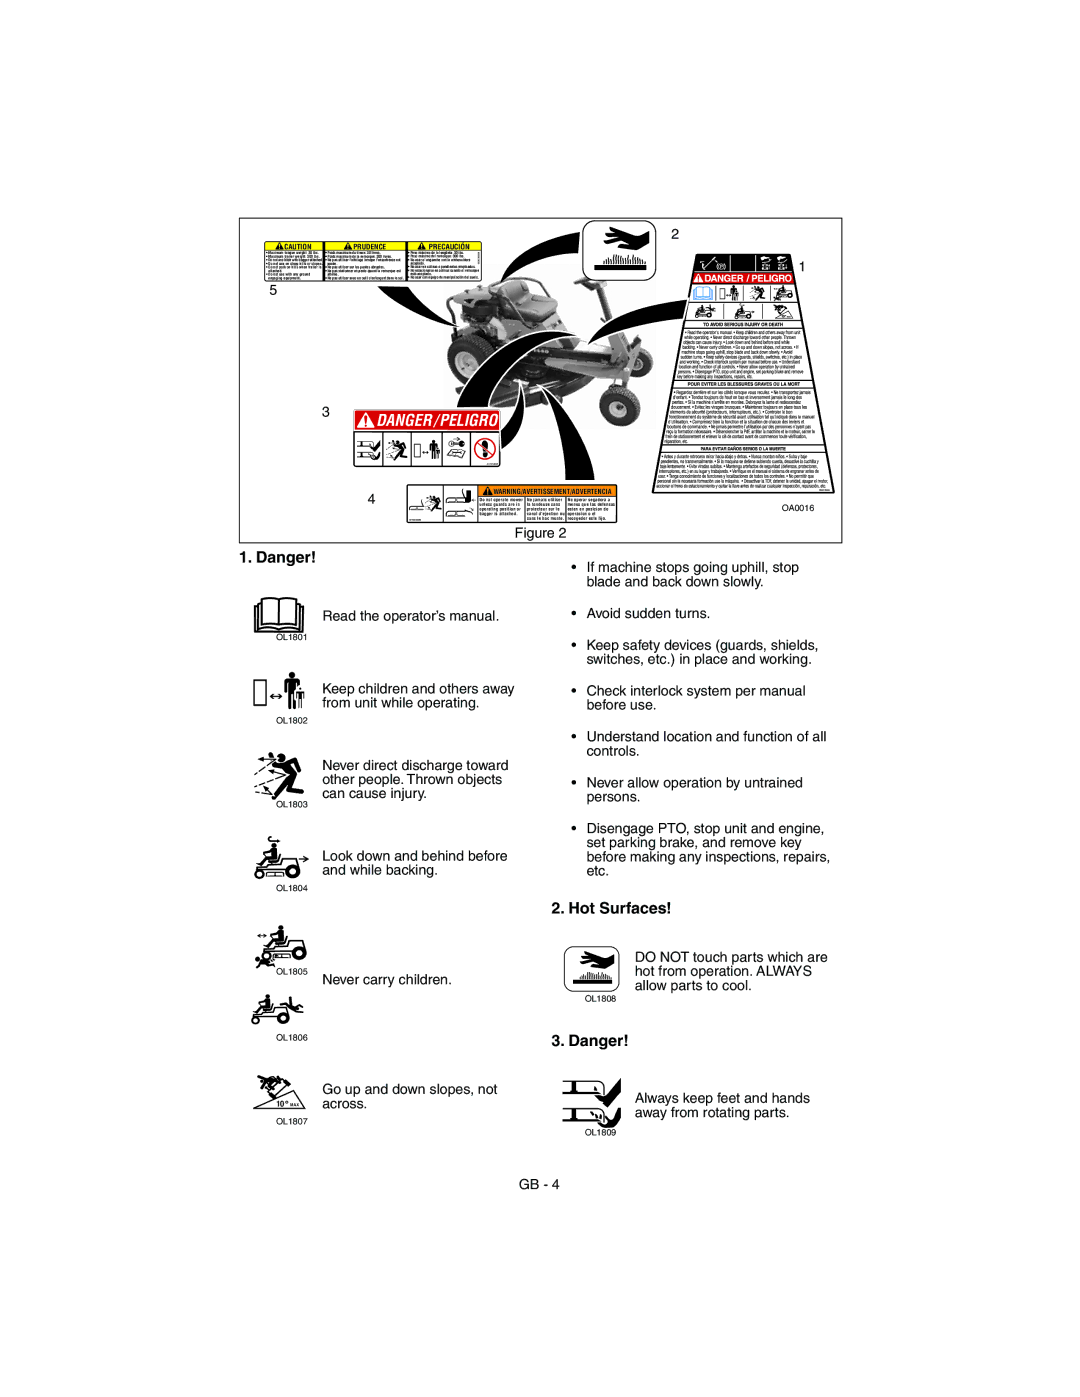
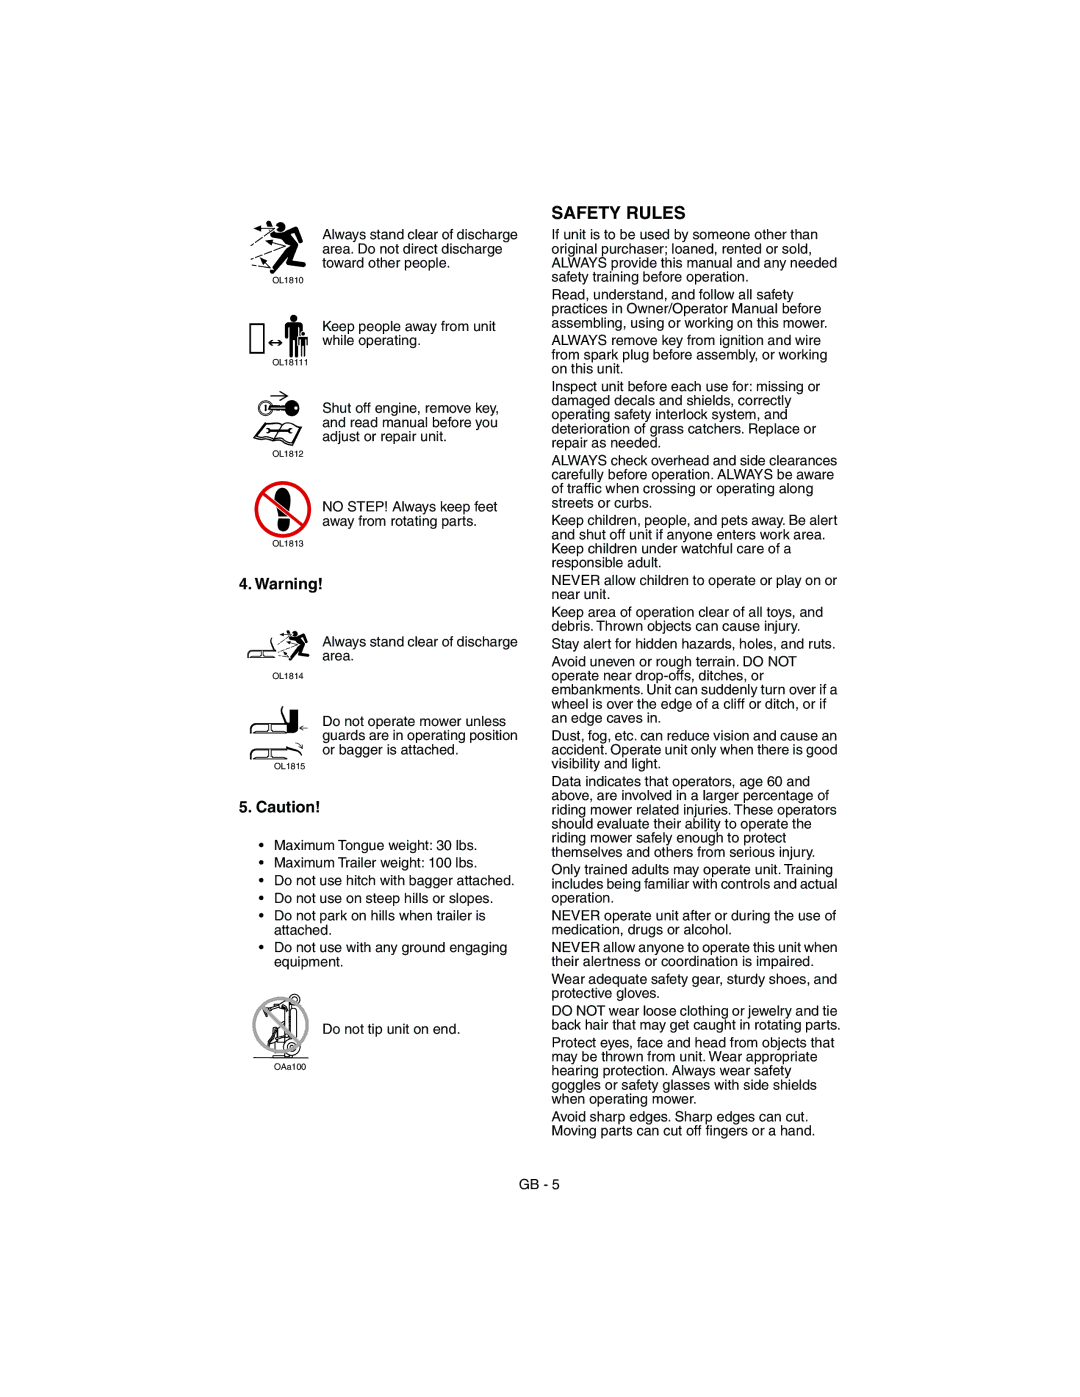
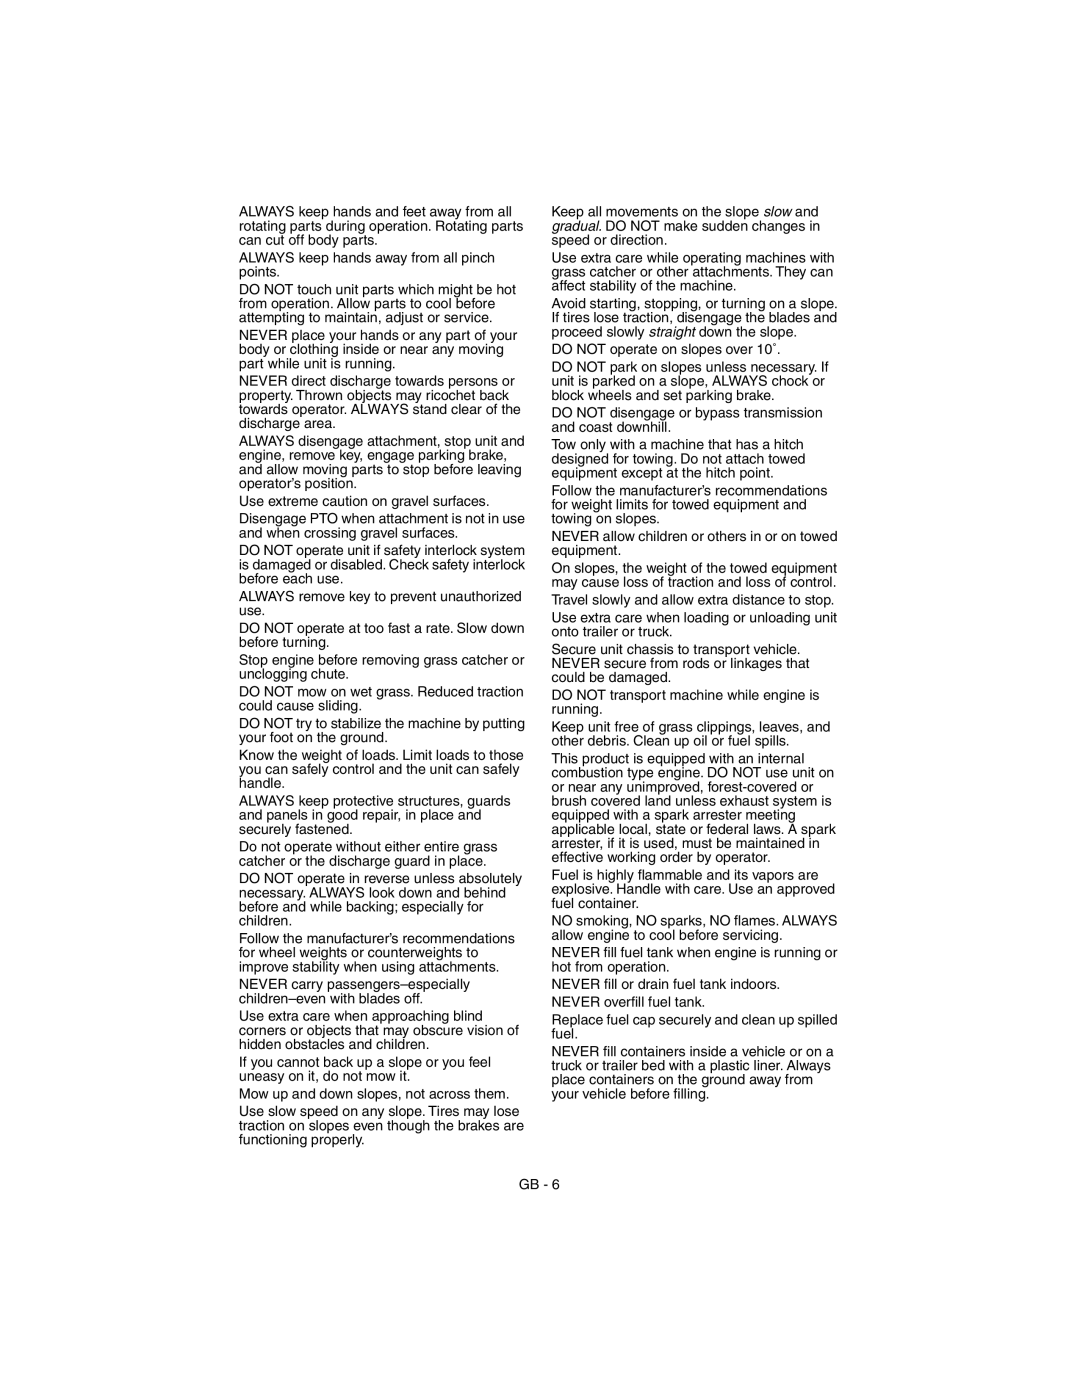
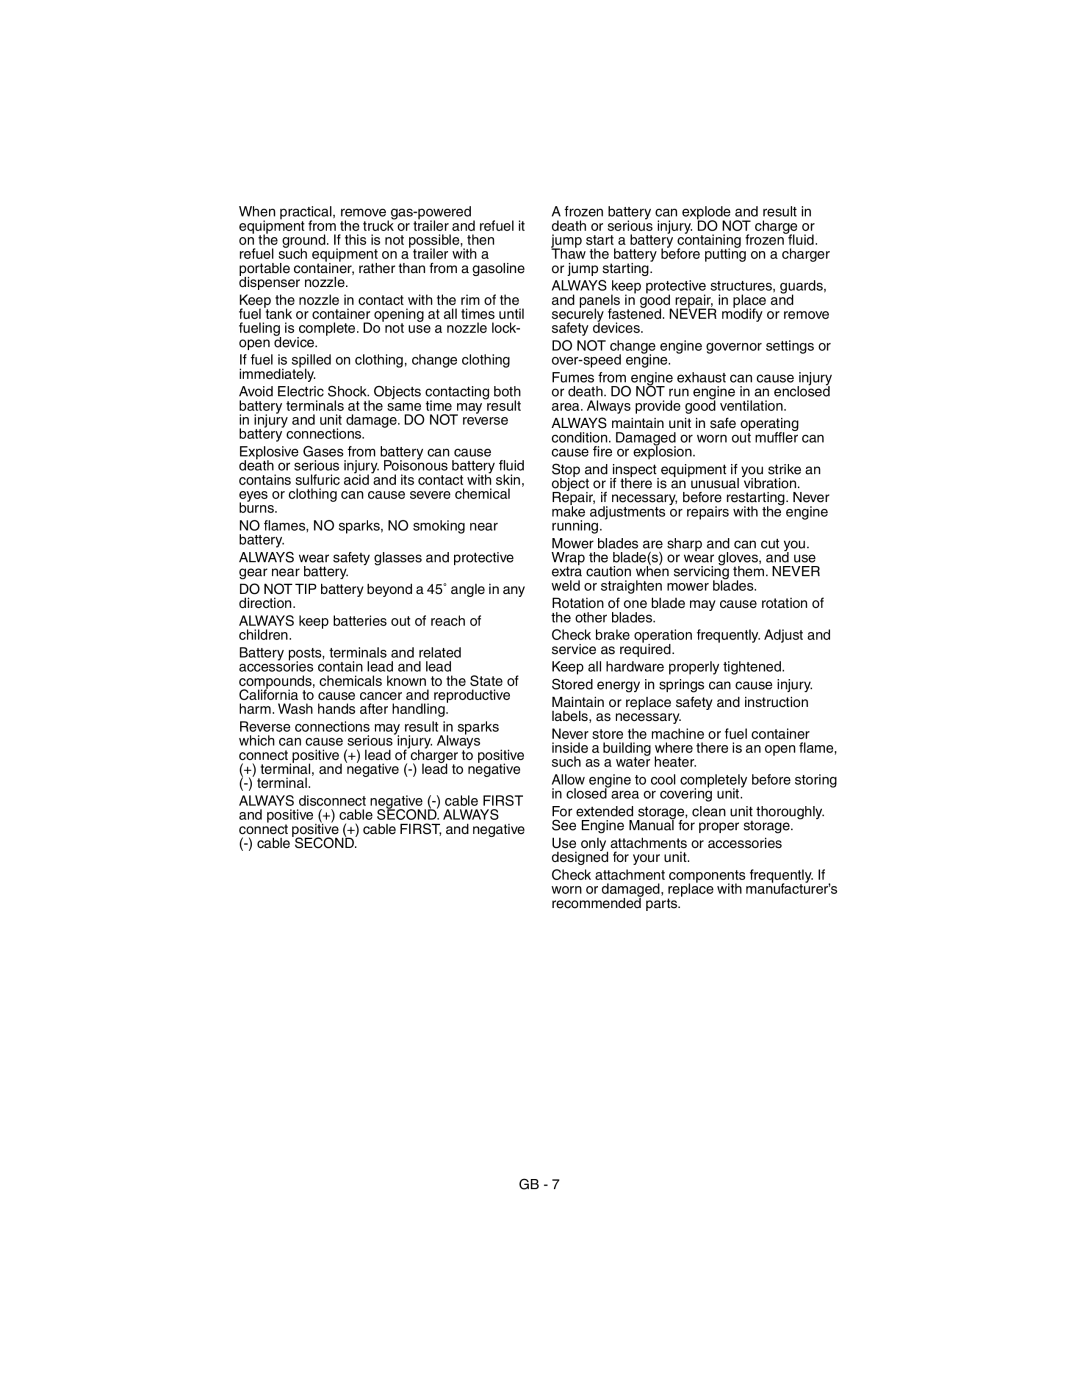
Eyes: Flush with water for at least 15 minutes and get medical attention immediately!

Internal Contact: Drink large quantities of water. Follow with Milk of Magnesia, beaten egg or vegetable oil. Get medical attention immediately!

In case of internal contact, DO NOT induce vomiting!

IMPORTANT: DO NOT fast charge. Charging at a higher rate will damage or destroy battery.

IMPORTANT: ALWAYS follow information provided on battery and battery charger. Contact battery and battery charger manufacturers’ for detailed instructions.

1.Remove battery from unit (see Battery Removal and Installation on page 19).

2.Place battery on bench or other well- ventilated area.

3.Connect positive (+) lead of charger to positive (+) terminal (item 11), and negative (–) lead of charger to negative (–) terminal (item 8).

4.Charge battery according to battery charger and battery manufacturers’ instructions.

5.Install battery on unit (see Battery Removal and Installation on page 19).

Jump Starting the Battery (Figure 20)

IMPORTANT: The unit used for jump starting should have a 12 volt battery with at least 500 cold cranking amperes, and a negatively grounded system.

IMPORTANT: Ensure battery is not frozen. If battery is frozen, remove battery from unit and allow it to thaw before charging.

1.Connect positive (+) jumper cable to positive (+) terminal (item 11) of discharged battery.

2.Connect the other end of positive (+) jumper cable to positive (+) terminal of booster battery.

3.Connect negative (–) jumper cable to negative (–) terminal of the booster battery.

4.Connect the other end of negative (–) jumper cable to engine of unit with discharged battery.

WARNING: Make sure cables are clear of any moving engine parts before starting engine.

NOTE: If engine will not start, unit or battery may need service.

5.Start engine.

6.After engine starts, leave jumper cables connected for one to two minutes.

7.Disconnect jumper cables in reverse order of installation.

8.Operate unit as normal to charge battery.

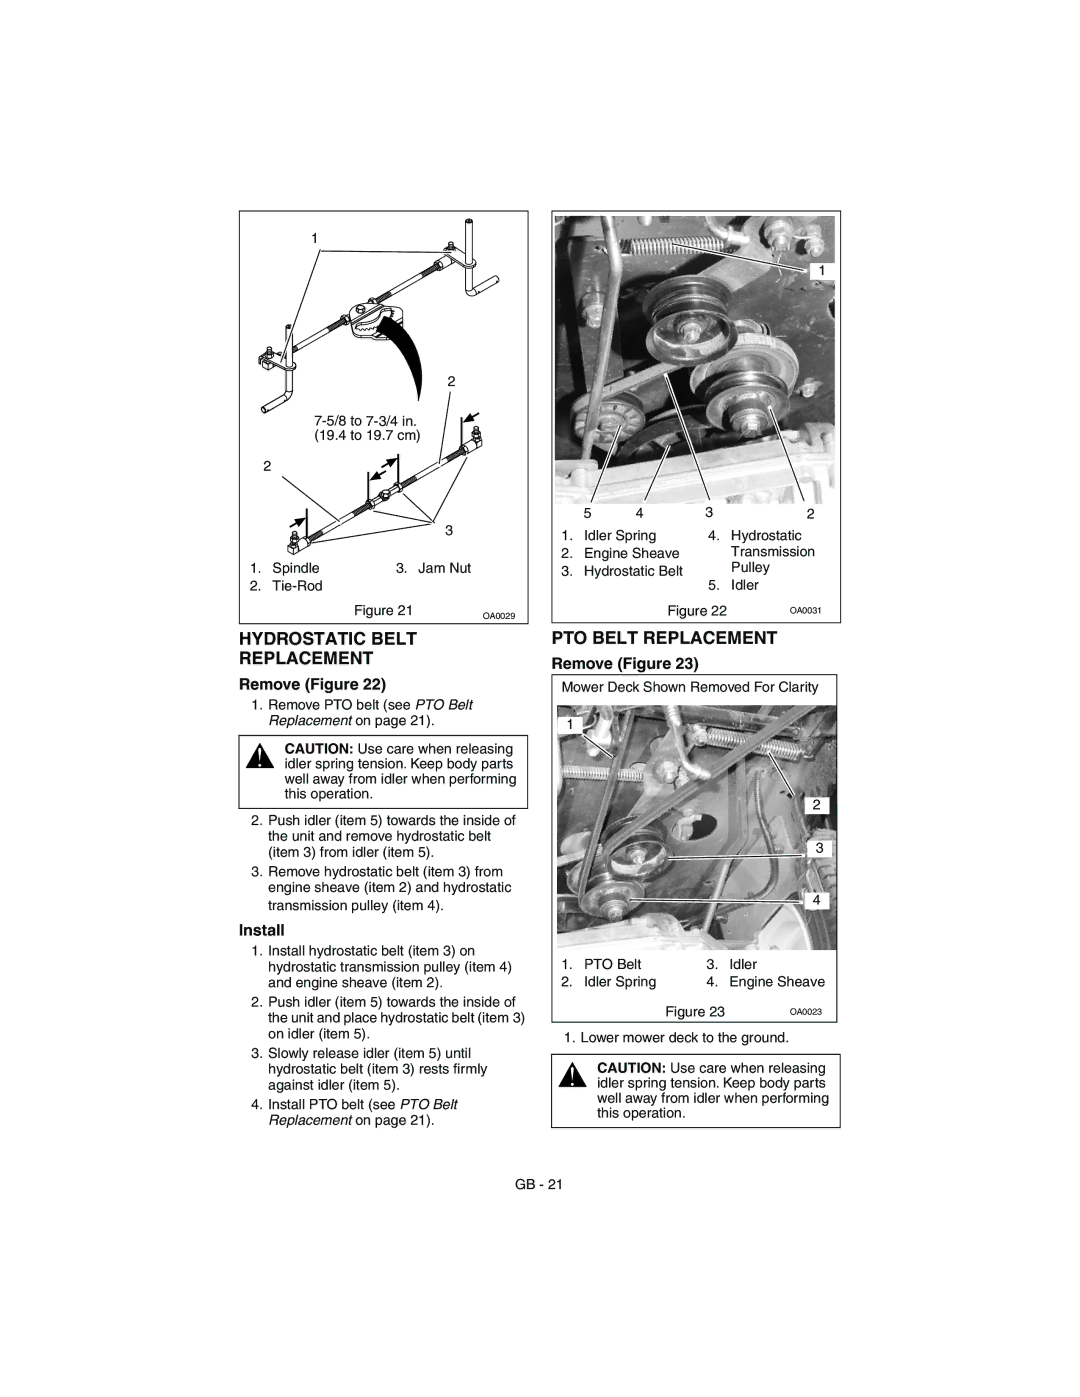
FRONT WHEEL ALIGNMENT

Check (Figure 21)

NOTE: The distance between jam nuts (item 3) should be 7-5/8 to 7-3/4 in. (19.4 to 19.7 cm).

1.Measure the distance between jam nuts (item 3).

2.Adjust if needed.

Adjust (Figure 21)

1.Remove tie-rod(s) (item 2) from spindle(s) (item 1).

2.Loosen jam nut(s) (item 3) and turn tie-rod(s) (item 2) clockwise or counterclockwise until the distance between the jam nuts (item 3) is within specifications.

3.Tighten jam nuts (item 3).

4.Install tie-rod(s) (item 2) on spindle(s) (item 1).

GB - 20

Image 20
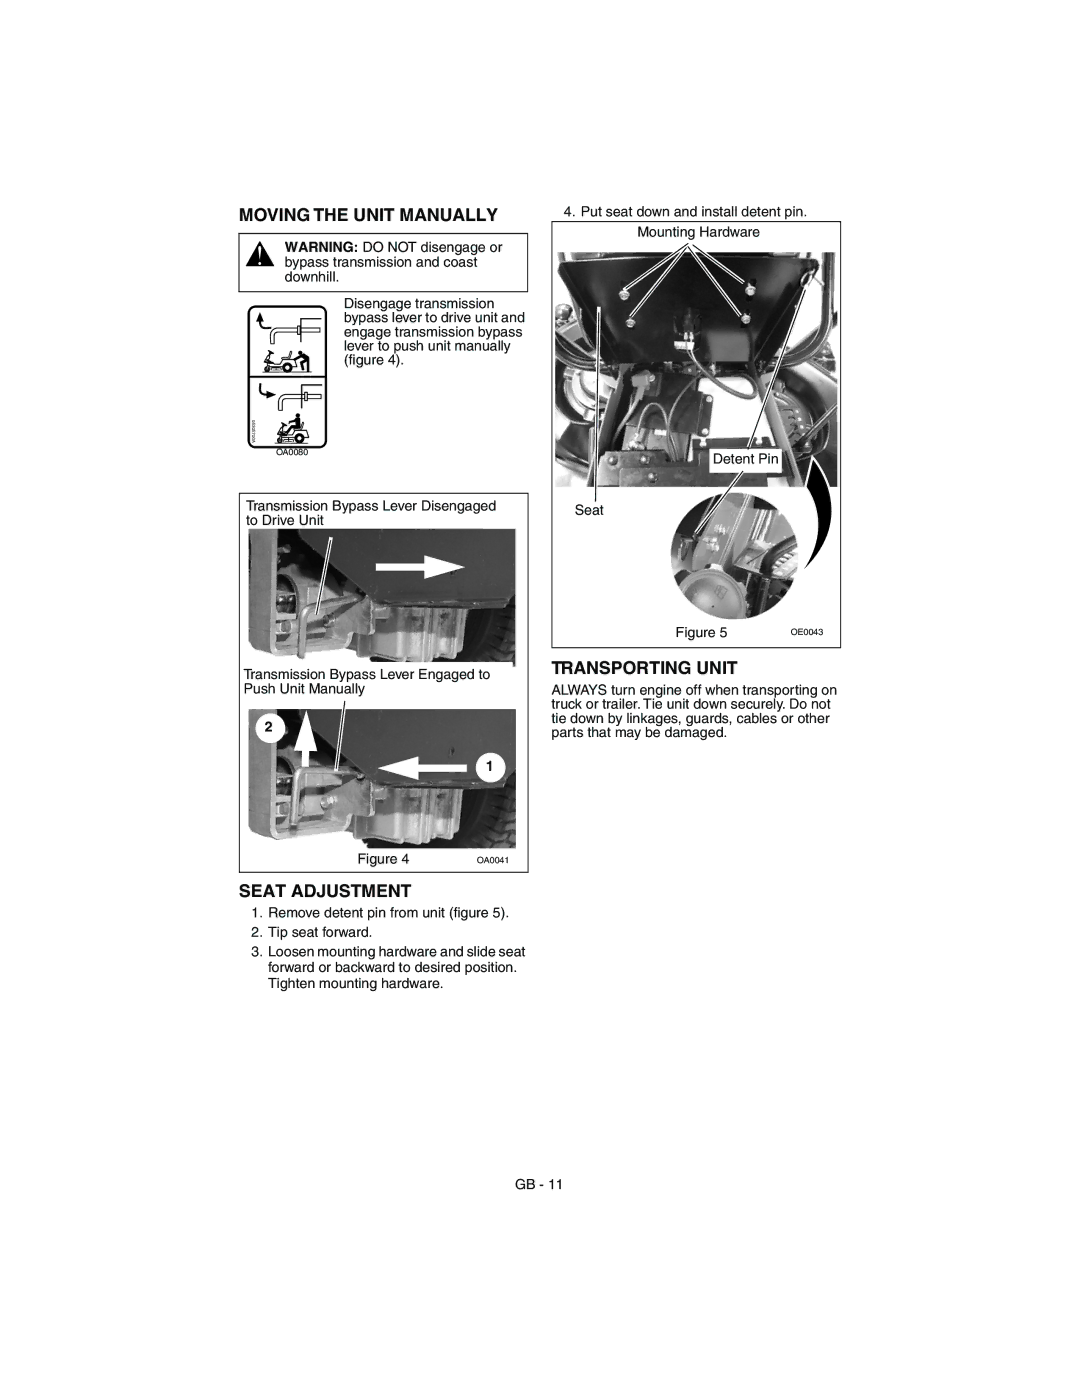
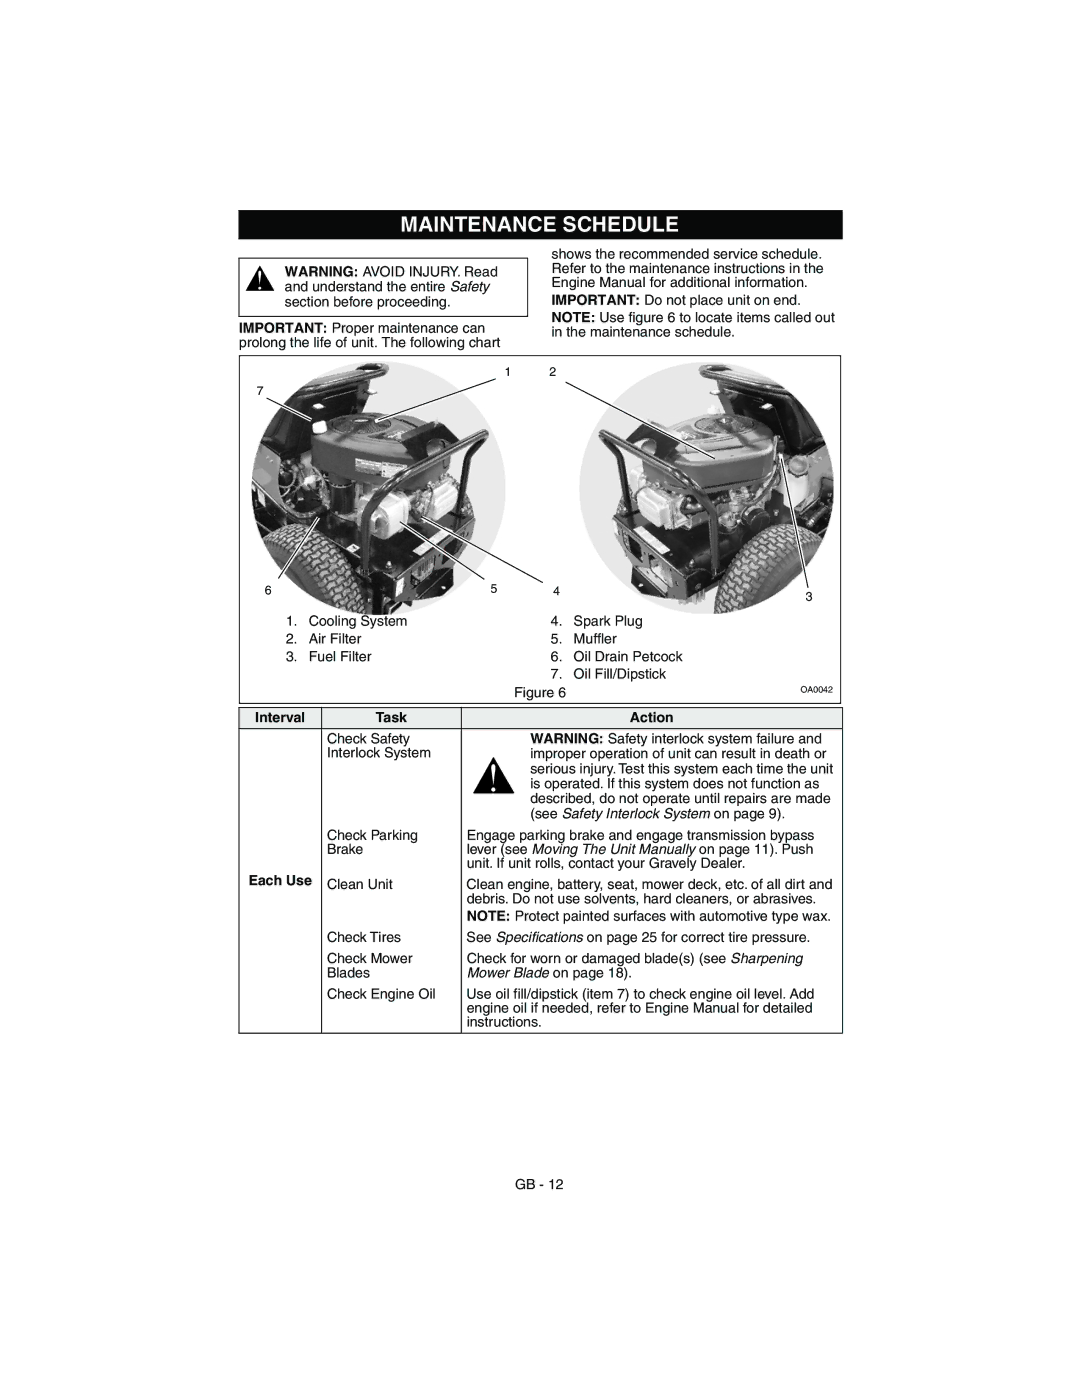
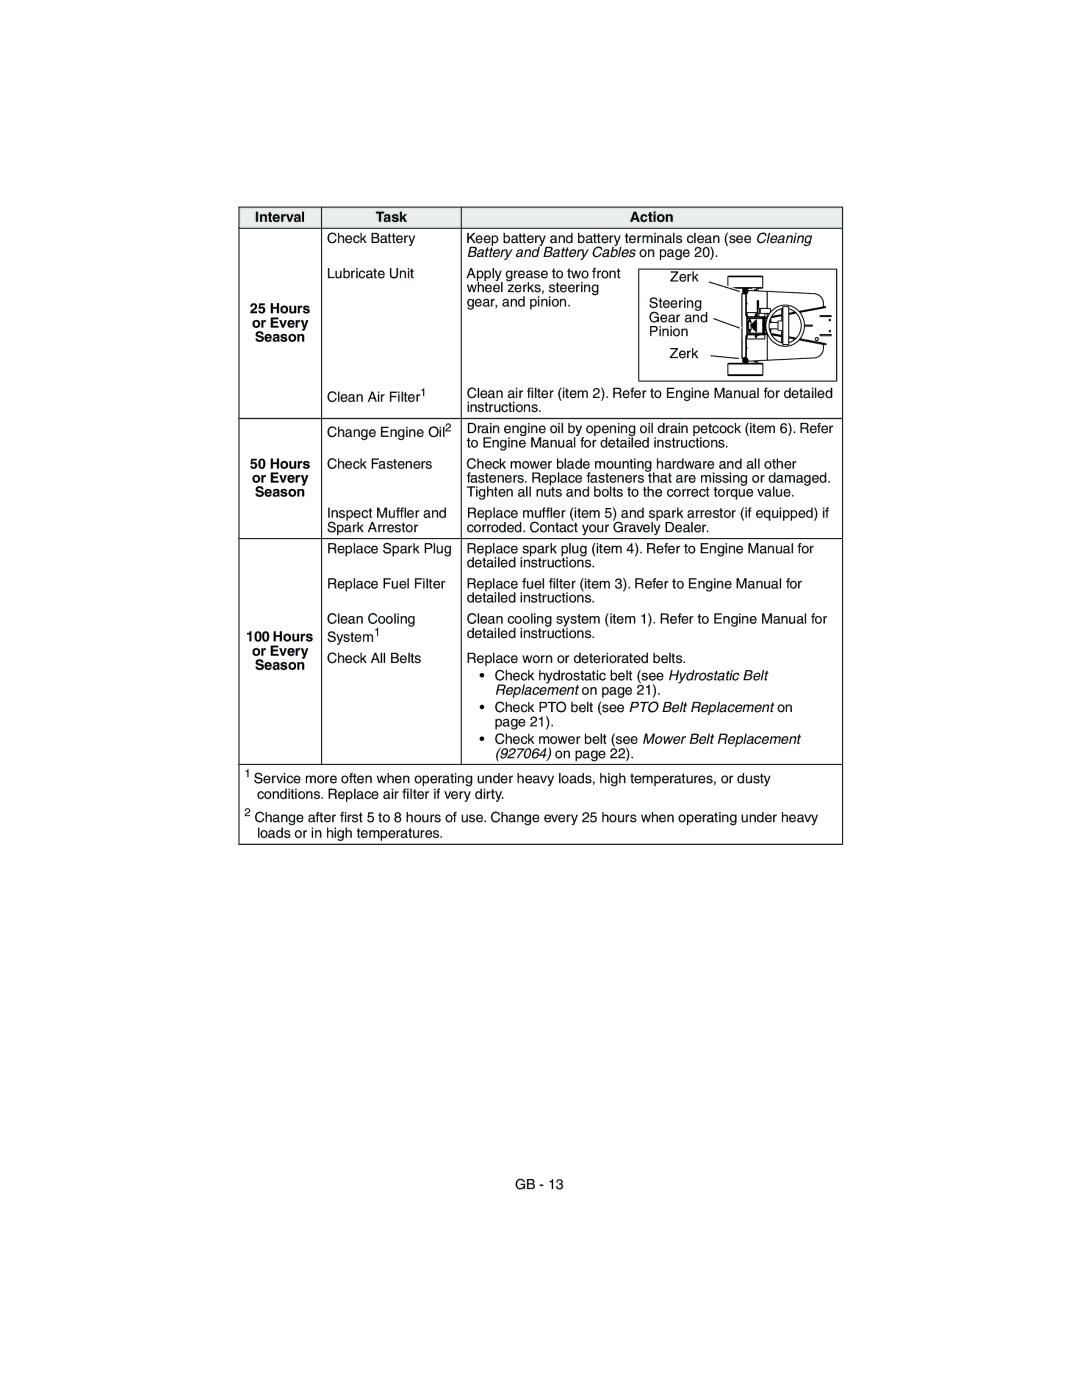
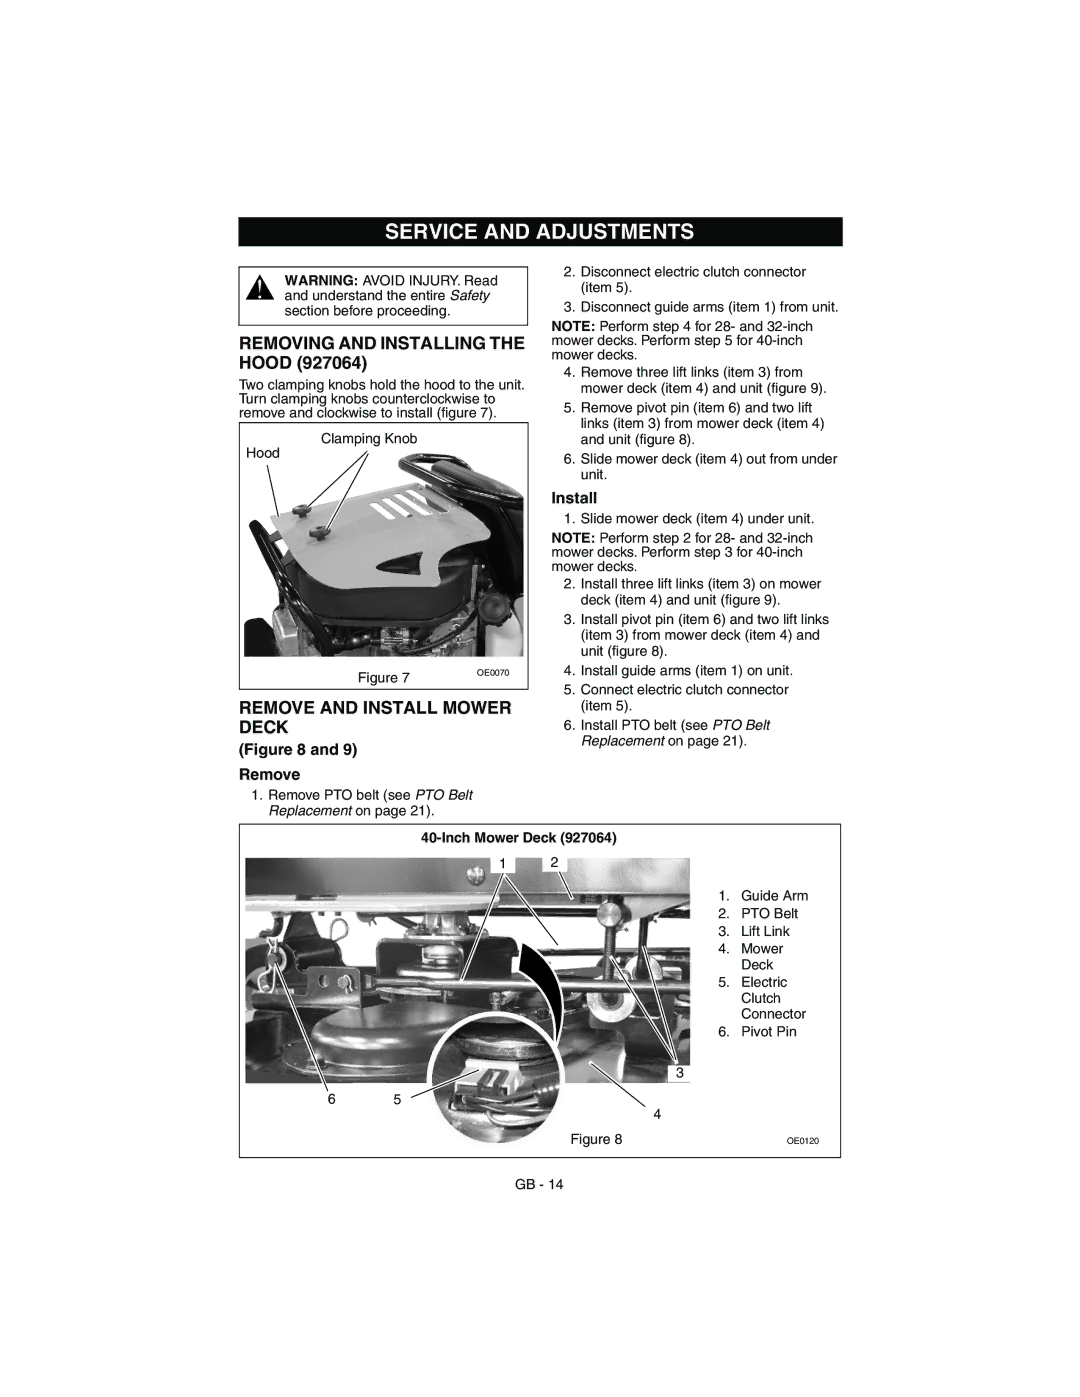
Contents Rear-Engine Rider Product reg Istration hereTable of Contents IntroductionSafety Hot Surfaces Read the operator’s manualLook down and behind before and while backing Never carry childrenSafety Rules Keep people away from unit while operatingNo STEP! Always keep feet away from rotating parts Always stand clear of discharge areaPage Page Assembly Tools RequiredUnpack Unit First Time USEControls and Features Figure Safety Interlock SystemIgnition Switch Item OperationStopping in AN Emergency Starting and Shutting OFF EngineFilling Fuel Tank Operating MowerSeat Adjustment Moving the Unit ManuallyTransporting Unit Remove detent pin from unit figure Tip seat forwardMaintenance Schedule Task ActionClean Air Filter Check hydrostatic belt see Hydrostatic Belt Replacement onLubricate Unit ZerkService and Adjustments Removing and Installing the HoodRemove and Install Mower Deck InstallLeveling Mower Deck and Adjusting Mower Deck Pitch Leveling Mower DeckGuide Arm Electric ClutchAdjusting Mower Deck Pitch Rear Lift LinkRear Trunnion Figure Front of Mower Ground Deck Rear Blade Cutting HeightInch Mower Deck Figure Remove Mower Blade ReplacementInch and 32-Inch Mower Decks Figure Antiscalp Roller Adjustment Sharpening Mower BladeNever weld or straighten mower blades Do not Sharpen to this PatternServicing the Battery Battery Removal and Installation FigureInstall RemoveFront Wheel Alignment Hydrostatic Belt Replacement PTO Belt ReplacementRemove Figure 8 to 7-3/4 19.4 to 19.7 cm Spindle Jam Nut Tie-RodMower Belt Replacement Install FigureStorage Short Term StorageTroubleshooting RunsService Parts Specifications Year Limited Warranty GRAVELY’

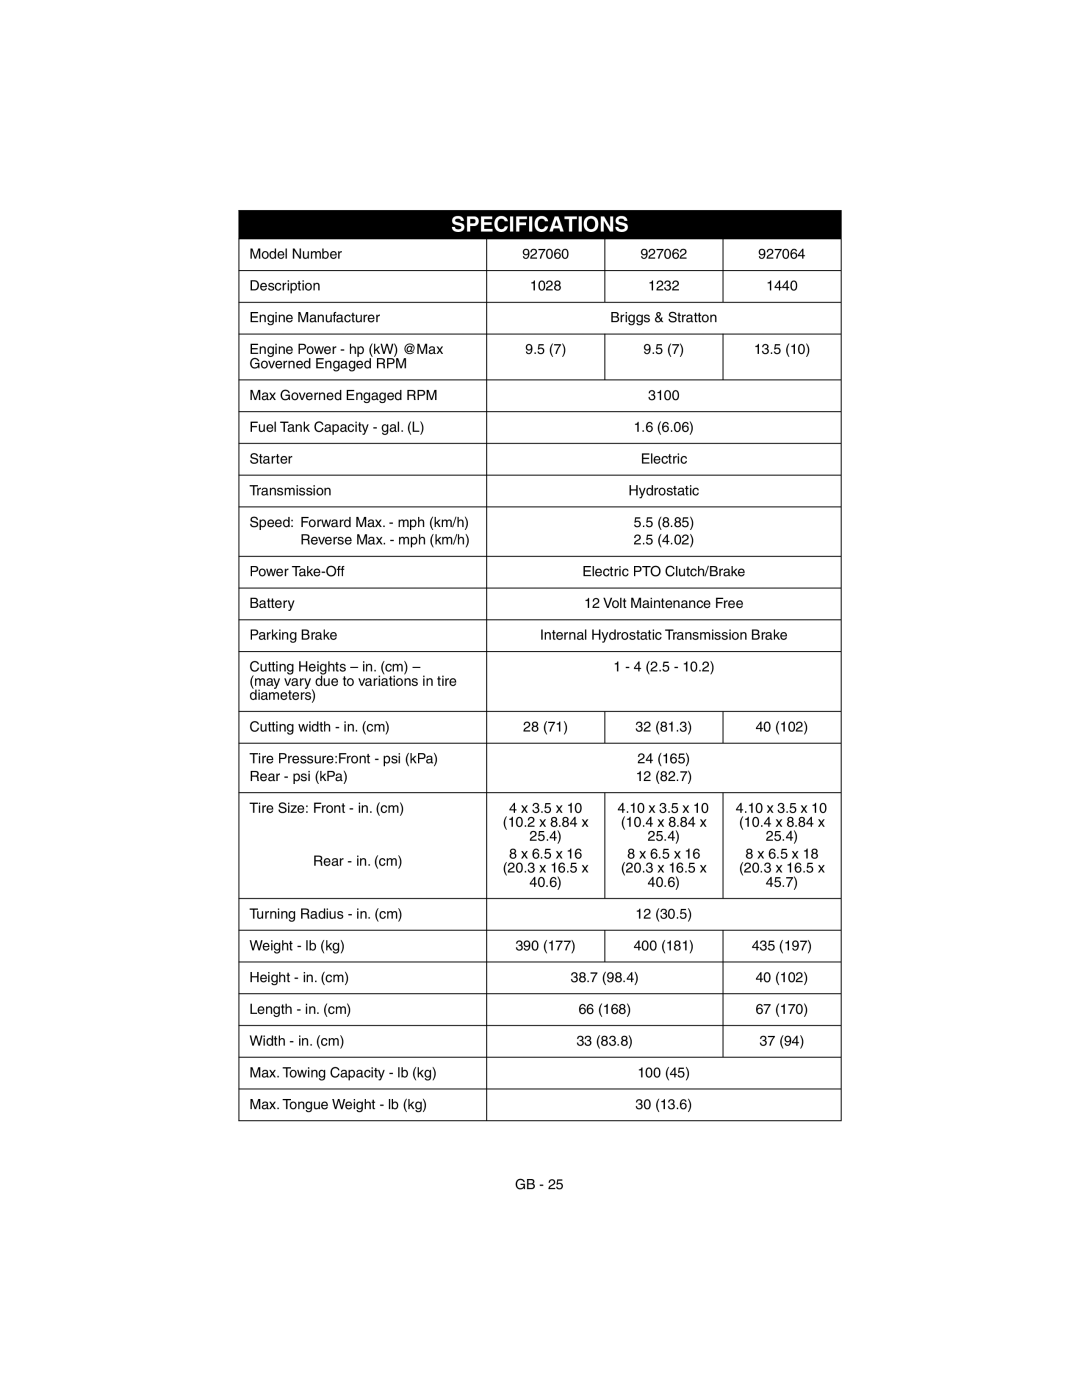
927060-1028, 927062-1232, 927064-1440 specifications

The Gravely models 927064-1440, 927062-1232, and 927060-1028 are part of Gravely's esteemed lineup of zero-turn mowers, designed to deliver exceptional performance and durability for both residential and commercial users. Each of these models stands out due to their unique features, advanced technologies, and robust characteristics.

The Gravely 927064-1440 is equipped with a powerful engine, ensuring efficient cuts even in challenging mowing conditions. With a 1440cc engine, this model provides ample horsepower, allowing for faster mowing speeds and improved productivity. Its 60-inch cutting deck is designed for precision, enabling users to tackle larger lawns with fewer passes. The adjustable cutting height feature allows for tailored mowing to suit varying grass types, ensuring a clean and professional finish.

Moving on to the 927062-1232, this model is notable for its compact size without compromising on performance. With a 32-inch cutting deck and a reliable engine, the 927062-1232 is perfect for residential yards and small commercial properties. It boasts a tight turning radius, making it maneuverable in tight spaces, such as flower beds and around trees. This versatility is complemented by a comfortable operator seat and easy-to-use controls, enhancing the mowing experience.

Lastly, the Gravely 927060-1028 offers a balance between power and efficiency with its 1028cc engine and 60-inch cutting deck. This model is engineered for durability, featuring a heavy-duty steel frame that withstands the rigors of regular use. The innovative suspension system enhances ride comfort, allowing operators to navigate uneven terrains with ease. Additionally, the 927060-1028 includes advanced twin-blade technology, ensuring a consistent cut and superior grass discharge.

All these models feature user-friendly interfaces, including intuitive control systems and ergonomic seating, making them accessible for users of all skill levels. The integration of modern technologies such as advanced air filtration and fuel efficiency measures helps prolong engine life and reduce environmental impact.

Overall, Gravely's 927064-1440, 927062-1232, and 927060-1028 zero-turn mowers are engineered for exceptional performance, reliability, and comfort. They represent Gravely's commitment to quality and innovation, making them ideal choices for anyone seeking a dependable mowing solution. Whether for residential lawns or commercial landscaping, these models provide the efficiency and effectiveness that today's users demand.