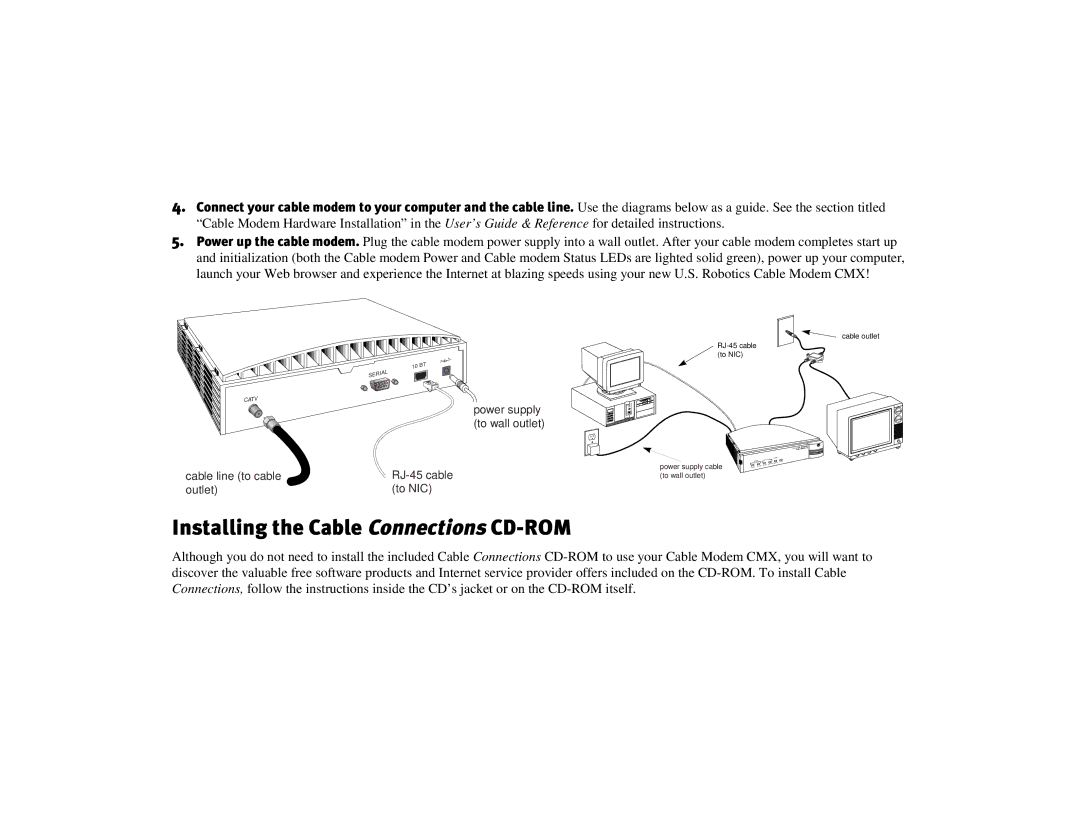
4.Connect your cable modem to your computer and the cable line. Use the diagrams below as a guide. See the section titled “Cable Modem Hardware Installation” in the User’s Guide & Reference for detailed instructions.
5.Power up the cable modem. Plug the cable modem power supply into a wall outlet. After your cable modem completes start up and initialization (both the Cable modem Power and Cable modem Status LEDs are lighted solid green), power up your computer, launch your Web browser and experience the Internet at blazing speeds using your new U.S. Robotics Cable Modem CMX!
CATV
cable line (to cable outlet)
10 | BT |
SERIAL
power supply (to wall outlet)
RJ-45 cable RJ-45 Cable (to NIC)
cable outlet
3ComU.S.Robotics CableModem
|
| PC | Link | Cable |
| Cable |
| Activity FCN | |
power supply cable | Modem | Status Activity | ||
Power Status |
| |||
|
|
| ||
(to wall outlet)
Installing the Cable Connections CD-ROM
Although you do not need to install the included Cable Connections