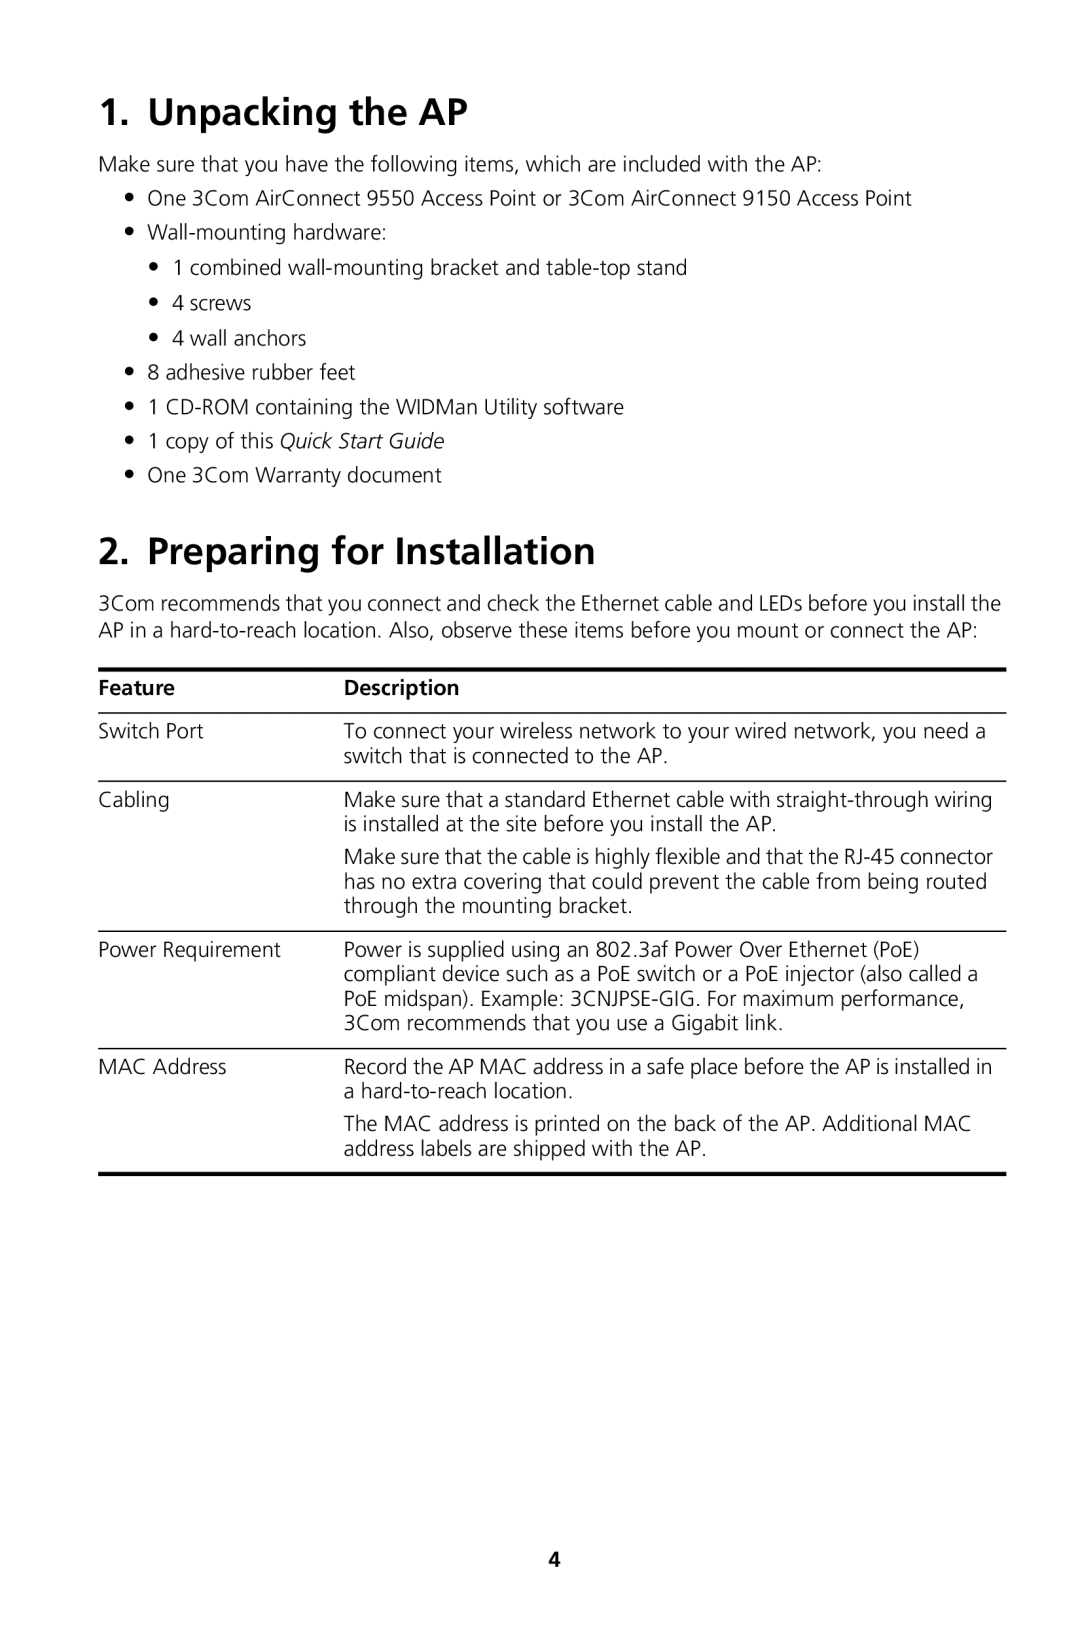
1. Unpacking the AP
Make sure that you have the following items, which are included with the AP:
•One 3Com AirConnect 9550 Access Point or 3Com AirConnect 9150 Access Point
•
•1 combined
•4 screws
•4 wall anchors
•8 adhesive rubber feet
•1
•1 copy of this Quick Start Guide
•One 3Com Warranty document
2.Preparing for Installation
3Com recommends that you connect and check the Ethernet cable and LEDs before you install the AP in a
Feature | Description |
|
|
Switch Port | To connect your wireless network to your wired network, you need a |
| switch that is connected to the AP. |
|
|
Cabling | Make sure that a standard Ethernet cable with |
| is installed at the site before you install the AP. |
| Make sure that the cable is highly flexible and that the |
| has no extra covering that could prevent the cable from being routed |
| through the mounting bracket. |
|
|
Power Requirement | Power is supplied using an 802.3af Power Over Ethernet (PoE) |
| compliant device such as a PoE switch or a PoE injector (also called a |
| PoE midspan). Example: |
| 3Com recommends that you use a Gigabit link. |
|
|
MAC Address | Record the AP MAC address in a safe place before the AP is installed in |
| a |
| The MAC address is printed on the back of the AP. Additional MAC |
| address labels are shipped with the AP. |
|
|
4
