Changing the Ionization Balance and Decay Parameters
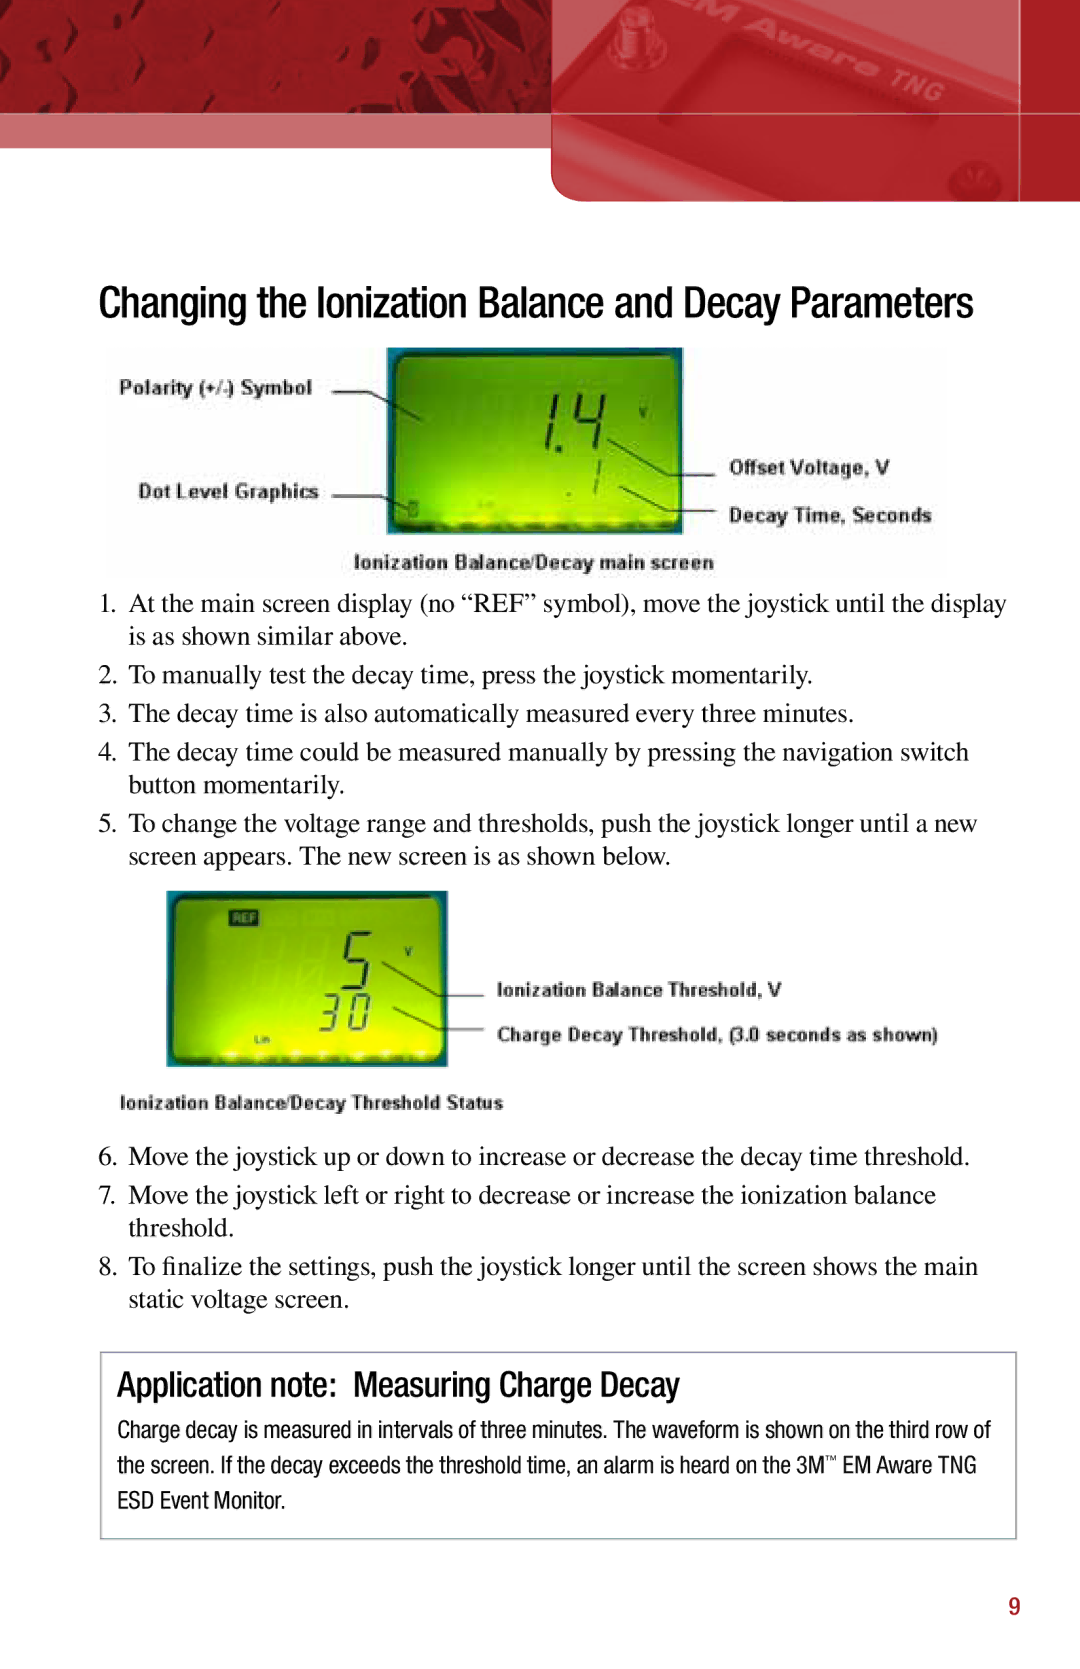
1.At the main screen display (no “REF” symbol), move the joystick until the display is as shown similar above.
2.To manually test the decay time, press the joystick momentarily.
3.The decay time is also automatically measured every three minutes.
4.The decay time could be measured manually by pressing the navigation switch button momentarily.
5.To change the voltage range and thresholds, push the joystick longer until a new screen appears. The new screen is as shown below.
6.Move the joystick up or down to increase or decrease the decay time threshold.
7.Move the joystick left or right to decrease or increase the ionization balance threshold.
8.To finalize the settings, push the joystick longer until the screen shows the main static voltage screen.
Application note: Measuring Charge Decay
Charge decay is measured in intervals of three minutes. The waveform is shown on the third row of the screen. If the decay exceeds the threshold time, an alarm is heard on the 3M™ EM Aware TNG ESD Event Monitor.
9