Section 3: Set Up/Connections
3-1. Terminal Connection Panel
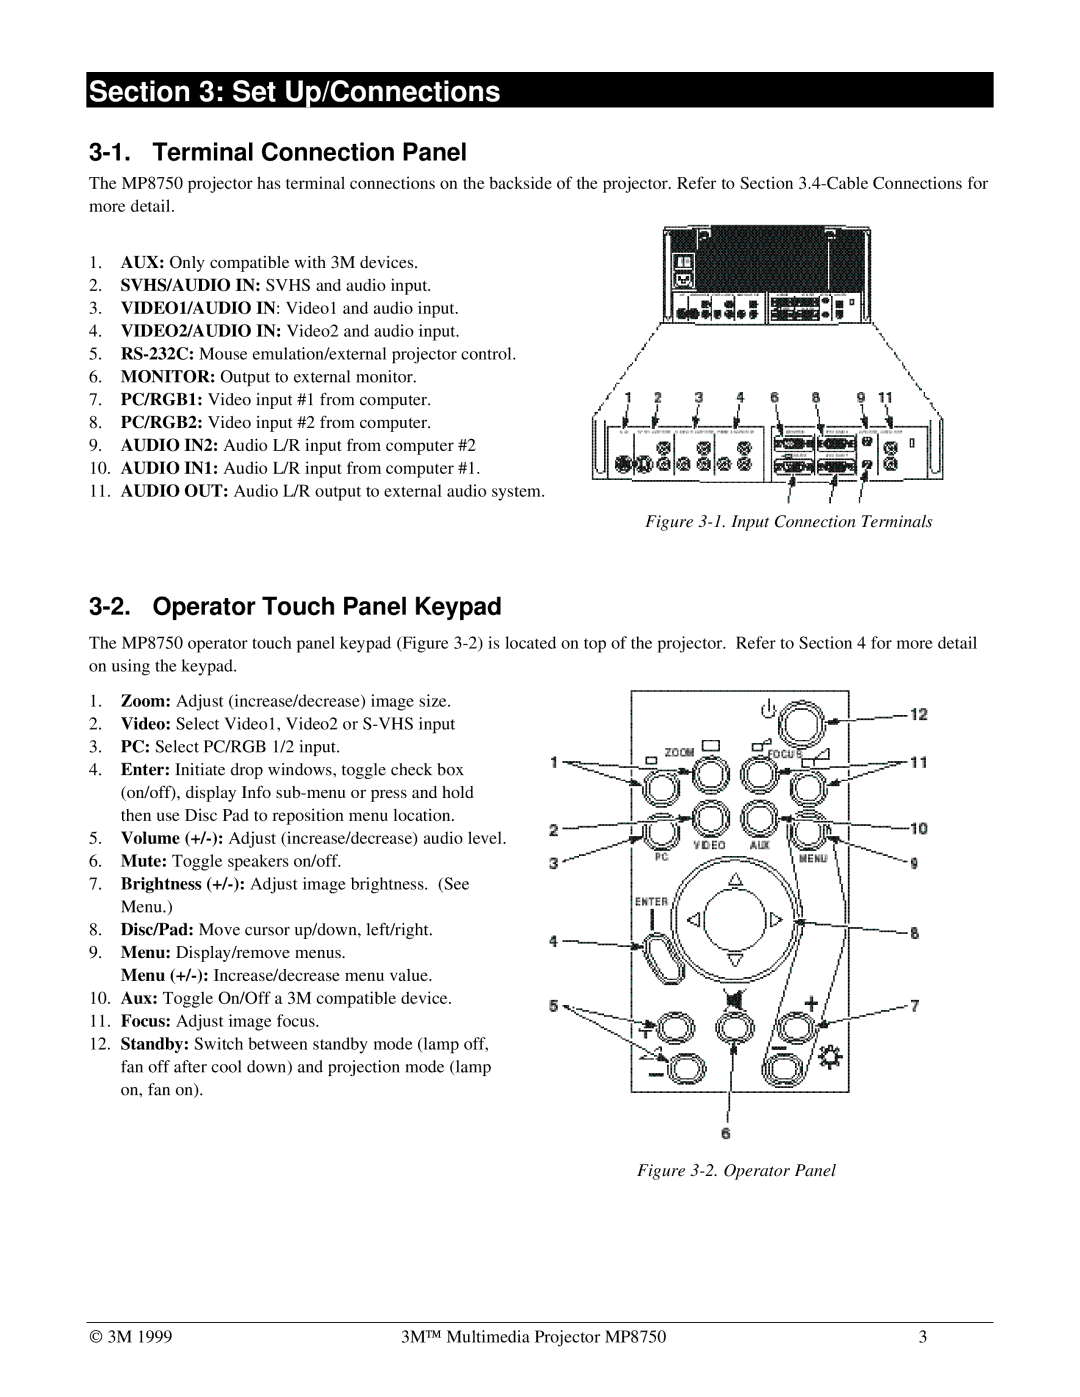
The MP8750 projector has terminal connections on the backside of the projector. Refer to Section
1.AUX: Only compatible with 3M devices.
2.SVHS/AUDIO IN: SVHS and audio input.
3.VIDEO1/AUDIO IN: Video1 and audio input.
4.VIDEO2/AUDIO IN: Video2 and audio input.
5.
6.MONITOR: Output to external monitor.
7.PC/RGB1: Video input #1 from computer.
8.PC/RGB2: Video input #2 from computer.
9.AUDIO IN2: Audio L/R input from computer #2
10.AUDIO IN1: Audio L/R input from computer #1.
11.AUDIO OUT: Audio L/R output to external audio system.
Figure 3-1. Input Connection Terminals
3-2. Operator Touch Panel Keypad
The MP8750 operator touch panel keypad (Figure
1.Zoom: Adjust (increase/decrease) image size.
2.Video: Select Video1, Video2 or
3.PC: Select PC/RGB 1/2 input.
4.Enter: Initiate drop windows, toggle check box (on/off), display Info
5.Volume
6.Mute: Toggle speakers on/off.
7.Brightness
8.Disc/Pad: Move cursor up/down, left/right.
9.Menu: Display/remove menus.
Menu
10.Aux: Toggle On/Off a 3M compatible device.
11.Focus: Adjust image focus.
12.Standby: Switch between standby mode (lamp off, fan off after cool down) and projection mode (lamp on, fan on).
Figure 3-2. Operator Panel
© 3M 1999 | 3M™ Multimedia Projector MP8750 | 3 |