Setting Up Your System
Setting Up Your System
The AastraLink RP 500 can be
Wall-Mounted Unit
The template, screws, and anchors from the
1.Use the provided template to mark locations for mounting screws.
2.Drill holes at marked locations and install anchors.
3.Apply screws to anchors.
4.Align the AastraLink RP 500 on the screws.
Desktop Unit
Place the AastraLink RP 500 on a flat surface.
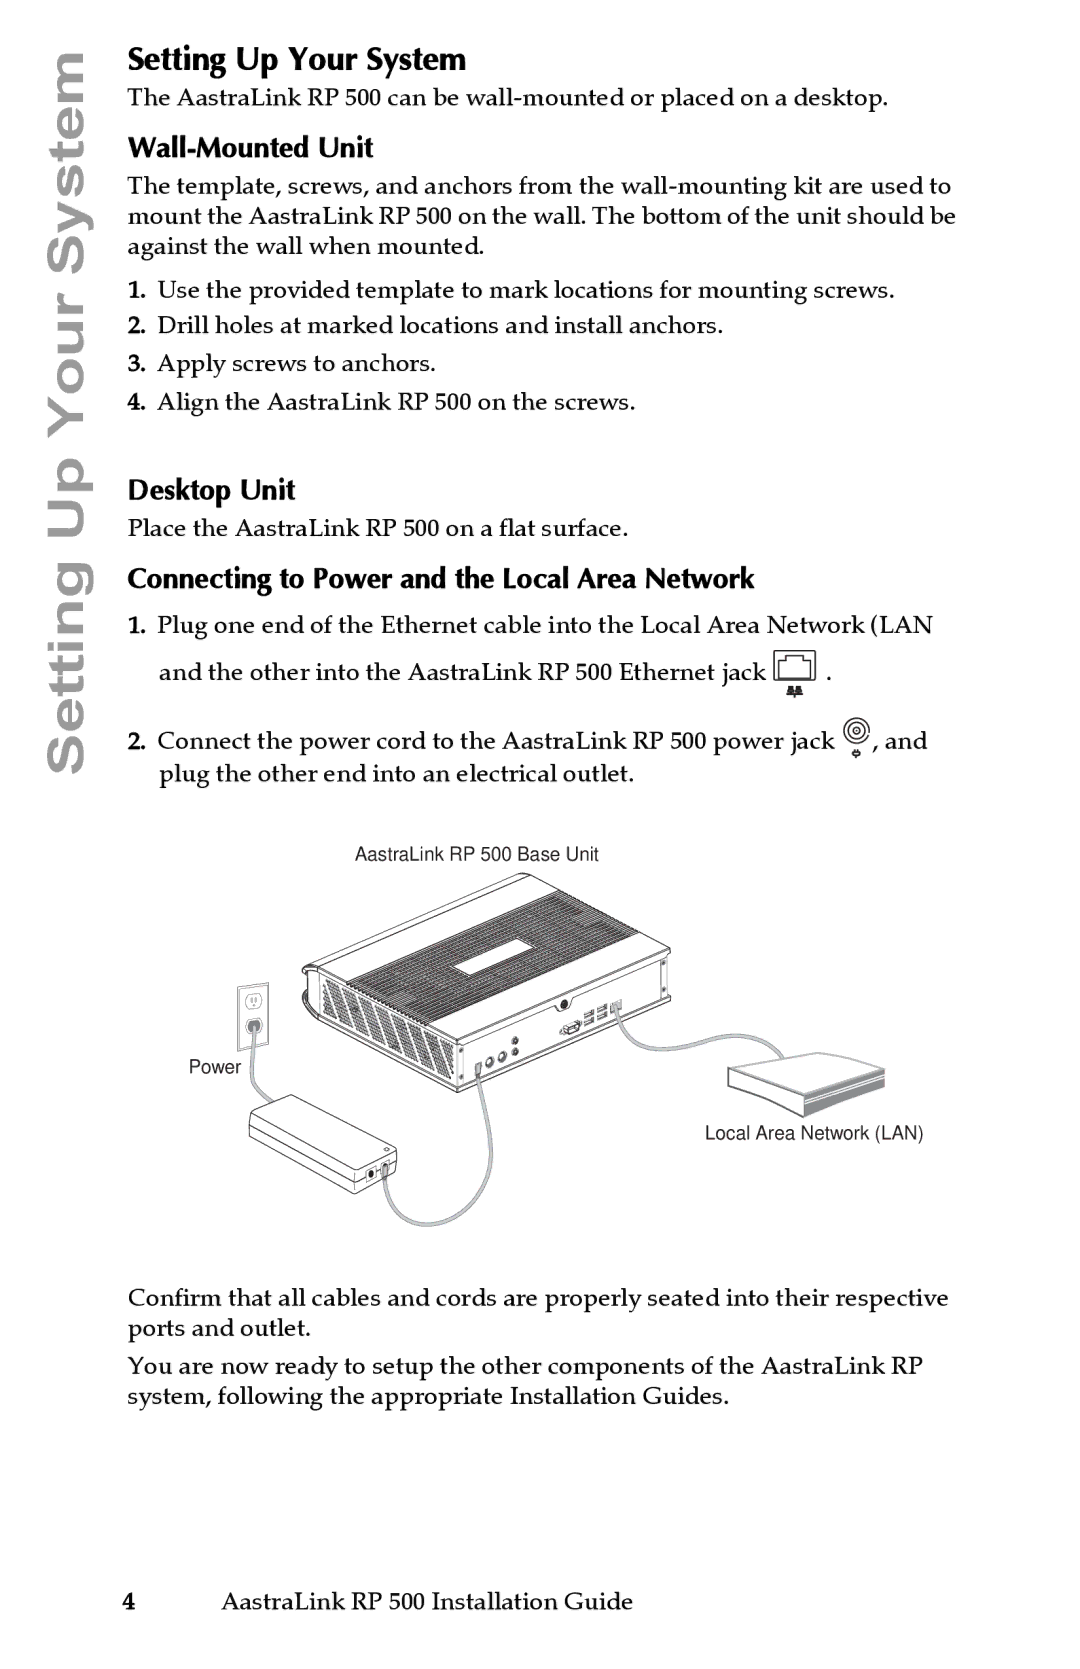
Connecting to Power and the Local Area Network
1.Plug one end of the Ethernet cable into the Local Area Network (LAN
and the other into the AastraLink RP 500 Ethernet jack ![]() .
.
2.Connect the power cord to the AastraLink RP 500 power jack ![]() , and plug the other end into an electrical outlet.
, and plug the other end into an electrical outlet.
AastraLink RP 500 Base Unit
Power
Local Area Network (LAN)
Confirm that all cables and cords are properly seated into their respective ports and outlet.
You are now ready to setup the other components of the AastraLink RP system, following the appropriate Installation Guides.
4AastraLink RP 500 Installation Guide