Installation
Free standing
The RPS14 can be operated as a freestanding unit for shelf or floor operation. Ensure adequate air flow around the unit. It must not be covered in any way. Always stand the unit on a firm flat surface well away from any soft furnishings or carpet.
Rack mounting
The RPS14 is designed as a 19 inch rack mount unit and will occupy 2U (3.5 inches) of rack space. The fast feet may need to be removed before rack mounting. Retain feet for future use.
An important consideration when
Rack equipment known to produce a significant amount of heat should not be mounted directly below the power supply unit. Equipment which also relies on good airflow within the rack (i.e. most power amplifiers and other power supply units) should be given due consideration and some space should be provided between such units and between the RPS14 unit. Forced convection, by means of a
Location
As with any power supply unit that contains a mains voltage transformer, it is preferable to provide a degree of physical isolation of the unit from other equipment, particularly that which carries low level audio signals, to avoid any possible interference
Earthing
Finally, some consideration should be given to the earthing arrangement of the system, at the centre of which is the console and the RPS14. The console chassis is earthed to the mains earth via the power supply unit. When
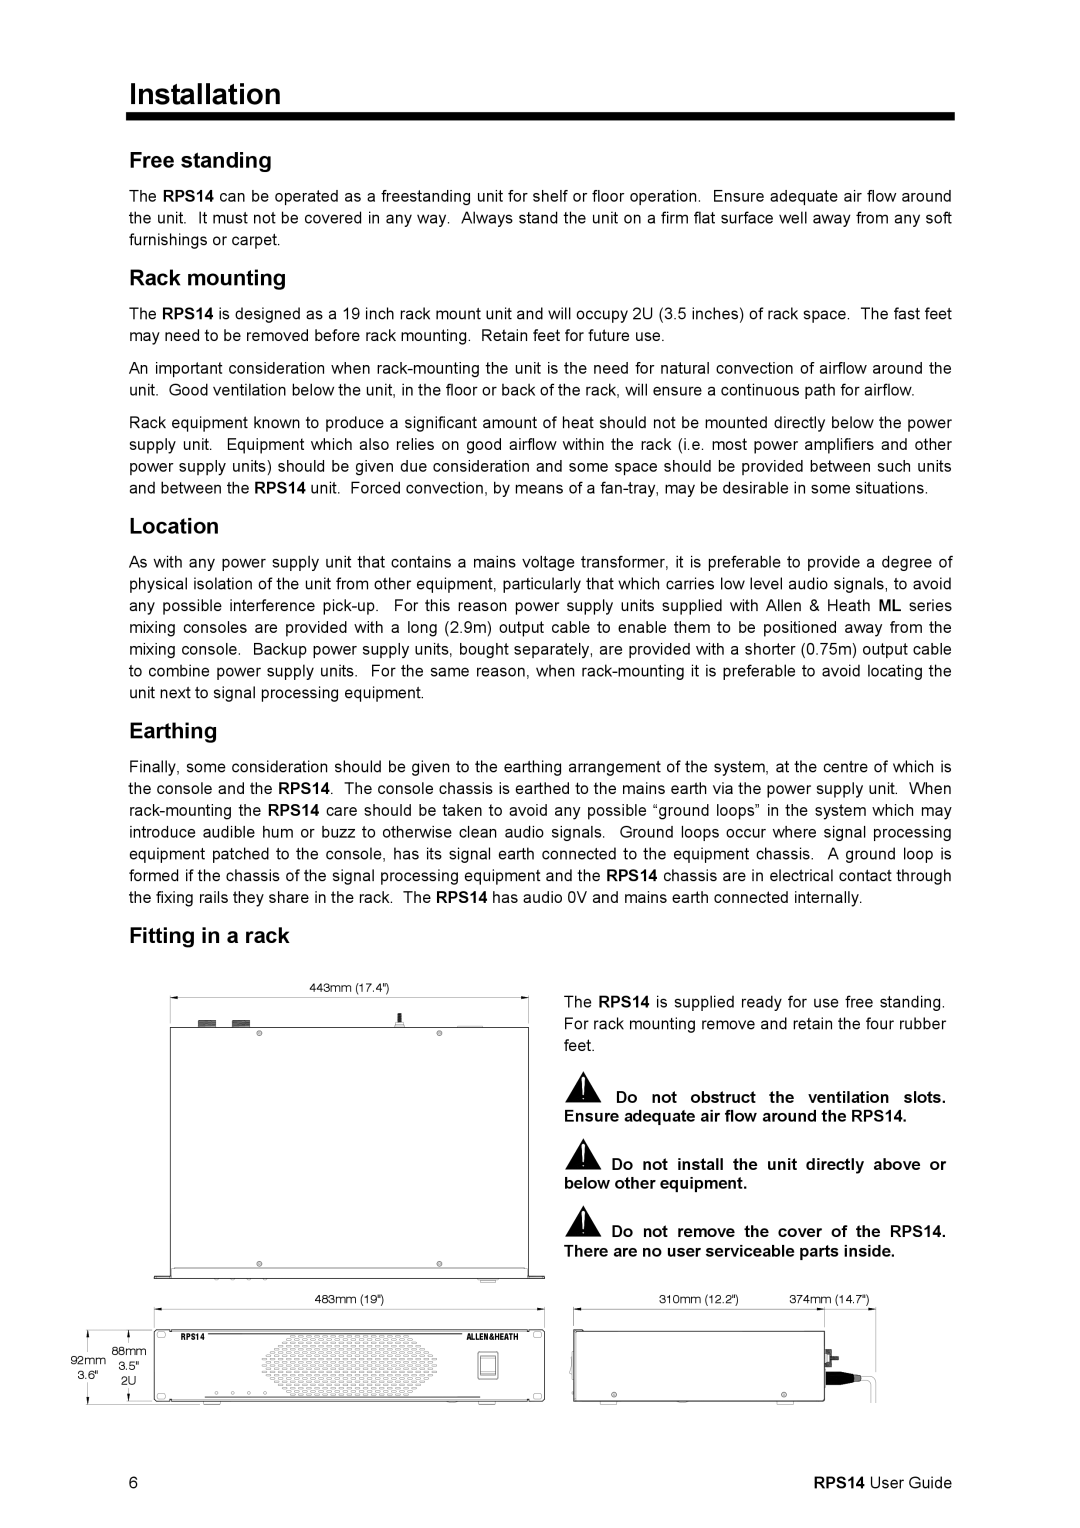
Fitting in a rack
443mm (17.4")
The RPS14 is supplied ready for use free standing. For rack mounting remove and retain the four rubber feet.
Do not obstruct the ventilation slots.
Ensure adequate air flow around the RPS14.
![]() Do not install the unit directly above or below other equipment.
Do not install the unit directly above or below other equipment.
Do not remove the cover of the RPS14.
There are no user serviceable parts inside.
483mm (19") | 310mm (12.2") | 374mm (14.7") |
| RPS14 | ALLEN&HEATH |
92mm | 88mm |
|
3.5" |
| |
3.6" | 2U |
|
|
|
6 | RPS14 User Guide |