Mercury 8/16 User’s Manual
1.6 Rear Panel
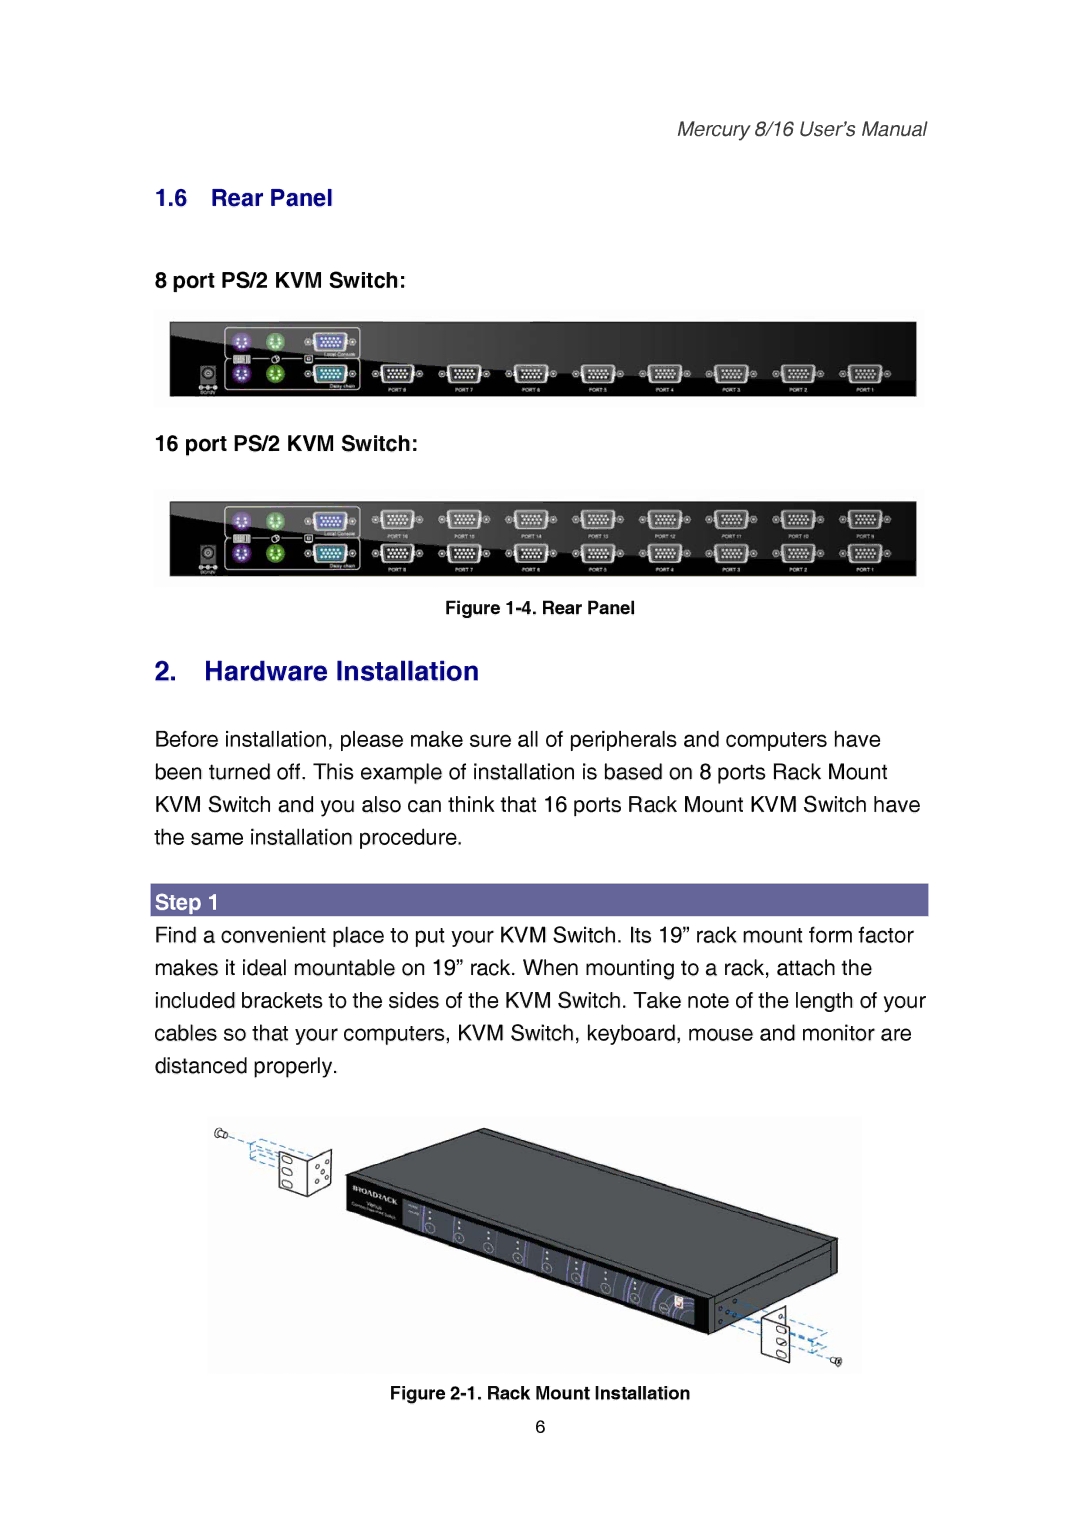
8 port PS/2 KVM Switch:
16 port PS/2 KVM Switch:
Figure 1-4. Rear Panel
2.Hardware Installation
Before installation, please make sure all of peripherals and computers have been turned off. This example of installation is based on 8 ports Rack Mount KVM Switch and you also can think that 16 ports Rack Mount KVM Switch have the same installation procedure.
Step 1
Find a convenient place to put your KVM Switch. Its 19” rack mount form factor makes it ideal mountable on 19” rack. When mounting to a rack, attach the included brackets to the sides of the KVM Switch. Take note of the length of your cables so that your computers, KVM Switch, keyboard, mouse and monitor are distanced properly.
Figure 2-1. Rack Mount Installation
6