ADDONICS TECHNOLOGIES
Model: DGC3
Quick Guide
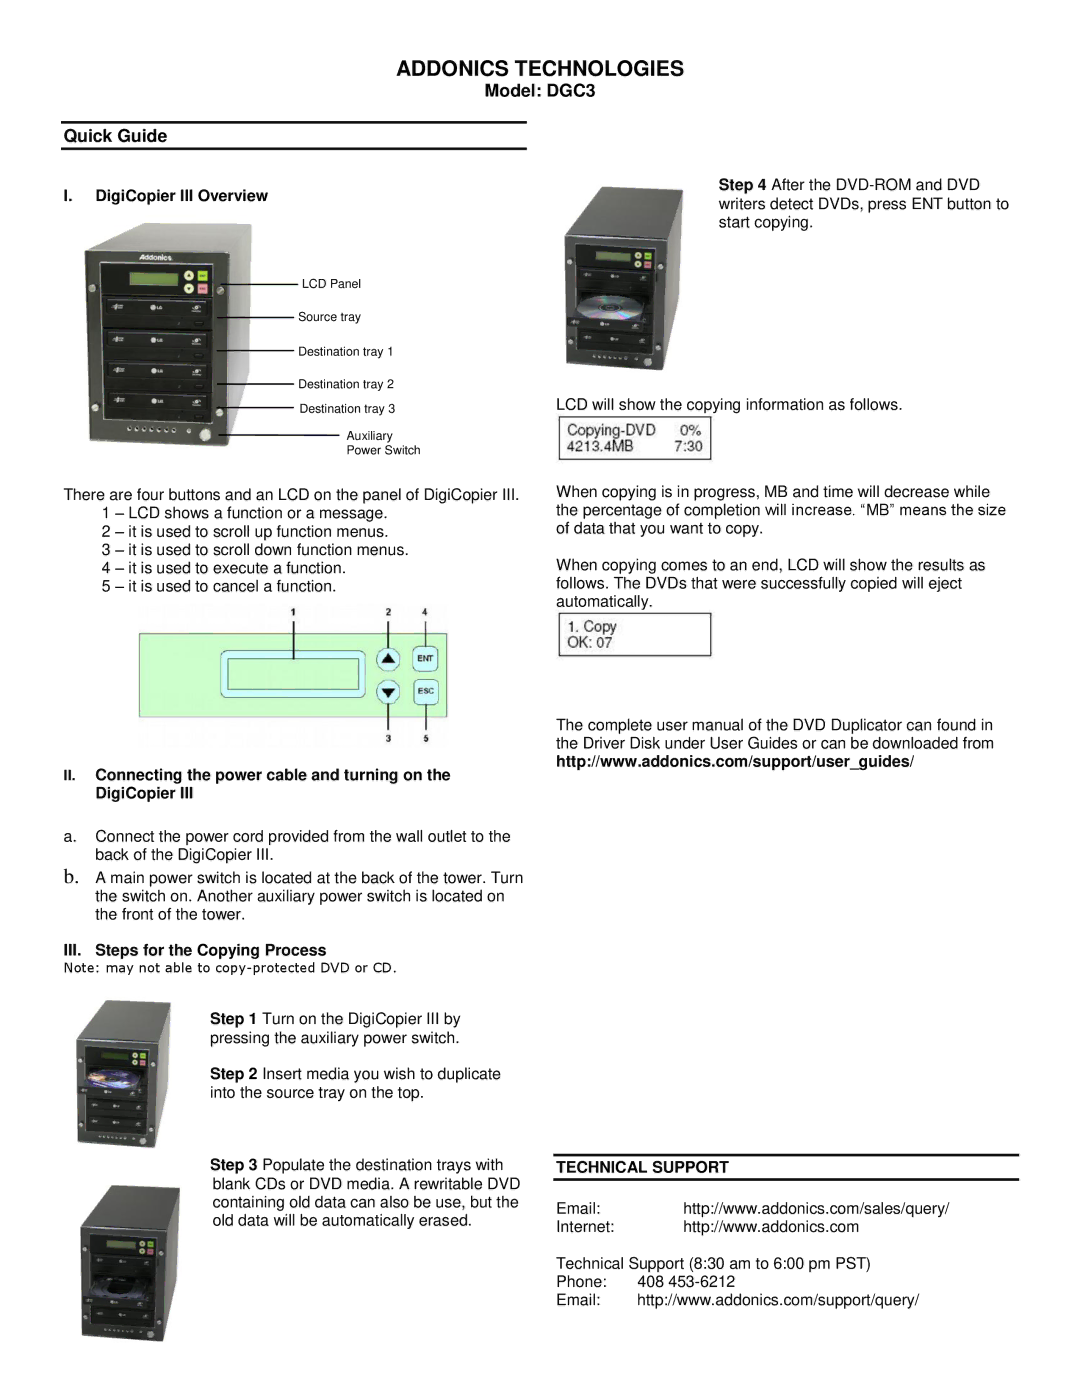
I.DigiCopier III Overview
LCD Panel
Source tray
Destination tray 1
Destination tray 2
Destination tray 3
Auxiliary
Power Switch
Step 4 After the
LCD will show the copying information as follows.
There are four buttons and an LCD on the panel of DigiCopier III. 1 – LCD shows a function or a message.
2 – it is used to scroll up function menus.
3 – it is used to scroll down function menus.
4 – it is used to execute a function.
5 – it is used to cancel a function.
II.Connecting the power cable and turning on the DigiCopier III
a.Connect the power cord provided from the wall outlet to the back of the DigiCopier III.
b.A main power switch is located at the back of the tower. Turn the switch on. Another auxiliary power switch is located on the front of the tower.
III. Steps for the Copying Process
Note: may not able to
Step 1 Turn on the DigiCopier III by pressing the auxiliary power switch.
Step 2 Insert media you wish to duplicate into the source tray on the top.
Step 3 Populate the destination trays with blank CDs or DVD media. A rewritable DVD containing old data can also be use, but the old data will be automatically erased.
When copying is in progress, MB and time will decrease while the percentage of completion will increase. “MB” means the size of data that you want to copy.
When copying comes to an end, LCD will show the results as follows. The DVDs that were successfully copied will eject automatically.
The complete user manual of the DVD Duplicator can found in the Driver Disk under User Guides or can be downloaded from http://www.addonics.com/support/user_guides/
TECHNICAL SUPPORT
Email:http://www.addonics.com/sales/query/
Internet: http://www.addonics.com
Technical Support (8:30 am to 6:00 pm PST)
Phone: 408
Email: http://www.addonics.com/support/query/