Manuals
/
AEG
/
Kitchen Appliance
/
Freezer
AEG
A92860GNX0
user manual
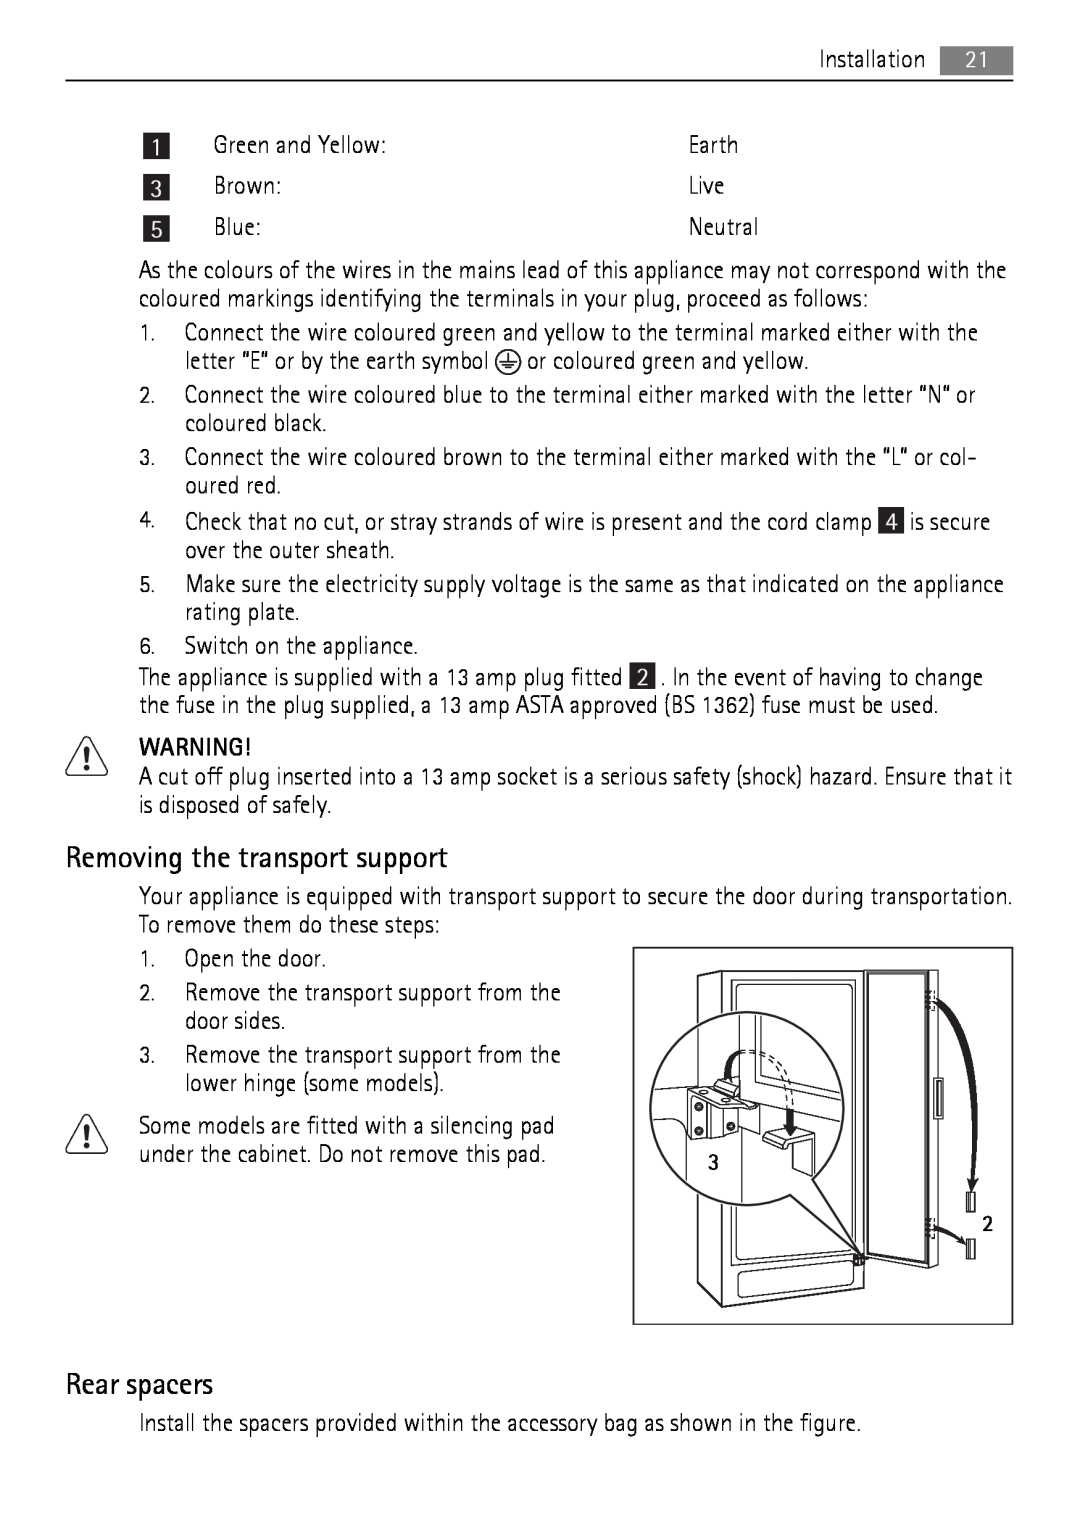
Removing the transport support, Rear spacers
Models:
A92860GNX0
1
21
28
28
Download
28 pages
5.51 Kb
18
19
20
21
22
23
24
25
Install
High temperature alarm
Display/Indicator
Connecting the water hose
Problem
Accessories And Consumables
Care and cleaning
Safety
Technical Data
Page 21
Image 21
Page 20
Page 22
Page 21
Image 21
Page 20
Page 22
Contents
EN FREEZER
A92860GNX0
FOR PERFECT RESULTS
ACCESSORIES AND CONSUMABLES
CONTENTS
SAFETY INFORMATION
Children and vulnerable people safety
General safety
Daily Use
Care and cleaning
Installation
CONTROL PANEL
Service
Environment Protection
Switching on
Display/Indicator
Switching off
Temperature regulation
Ice maker function
FROSTMATIC function
Minute Minder function
Child Lock function
High temperature alarm
Door open alarm
ICE DISPENSER
Child lock function
Temporary unlocking
Permanent unlocking
DAILY USE
FIRST USE
Cleaning the interior
Freezing fresh food
Thawing
Shelf above ice maker
Removing the ice container
Hints for freezing
HELPFUL HINTS AND TIPS
Hints for storage of frozen food
Removal of freezing baskets from the freezer
CARE AND CLEANING
Periodic cleaning
Cleaning the ice maker
Cleaning the ventilation grille
WHAT TO DO IF…
Defrosting of the freezer
Periods of non-operation
Solution
Problem
What to do if…
Possible cause
Closing the door
Replacing the lamp
TECHNICAL DATA
INSTALLATION
Positioning
Electrical Connection
Location
Rear spacers
Removing the transport support
Fitting the door handles
Connecting the water hose
SSSRRR
NOISES
CRACK
HISSS
HISSS
BRRR
CLICK BRRR
CLICK
CRACK
ENVIRONMENTAL CONCERNS
SSSRRR CRACK
SSSRRR
Page
Page
855813201-A-132011
Top
Page
Image
Contents