Electrical connection
Before initial
e.g.: | AC | 220 ... | 240 V | 50 Hz or |
| 220 ... | 240 V~ | 50 Hz |
|
(i.e. 220 to 240 volts alternating current, 50 Hertz) The rating plate is inside the appliance on the left.
A correctly installed, earthed socket is required for the electrical supply. The supply must have a fuse rating of at least 10 Amps.
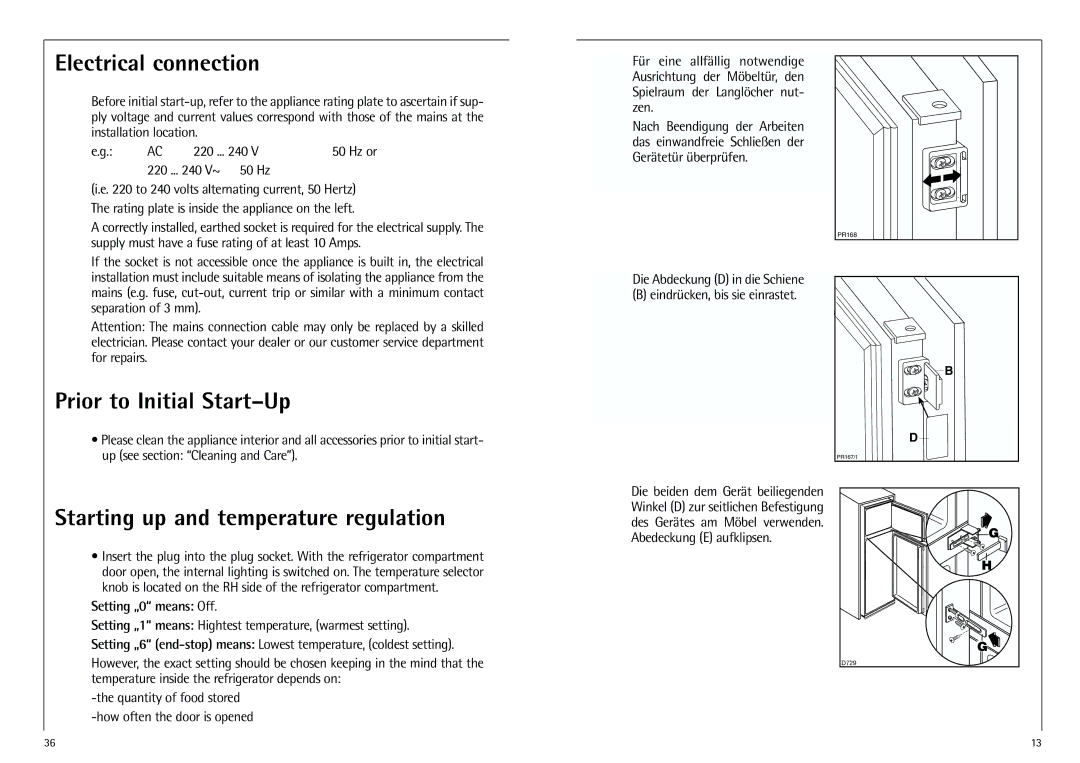
Für eine allfällig notwendige Ausrichtung der Möbeltür, den Spielraum der Langlöcher nut- zen.
Nach Beendigung der Arbeiten das einwandfreie Schließen der Gerätetür überprüfen.
PR168 |
If the socket is not accessible once the appliance is built in, the electrical installation must include suitable means of isolating the appliance from the mains (e.g. fuse,
Attention: The mains connection cable may only be replaced by a skilled electrician. Please contact your dealer or our customer service department for repairs.
Prior to Initial Start–Up
•Please clean the appliance interior and all accessories prior to initial start- up (see section: “Cleaning and Care”).
Starting up and temperature regulation
•Insert the plug into the plug socket. With the refrigerator compartment door open, the internal lighting is switched on. The temperature selector knob is located on the RH side of the refrigerator compartment.
Setting „0“ means: Off.
Setting „1“ means: Hightest temperature, (warmest setting).
Setting „6“
However, the exact setting should be chosen keeping in the mind that the temperature inside the refrigerator depends on:
Die Abdeckung (D) in die Schiene
(B) eindrücken, bis sie einrastet.
Die beiden dem Gerät beiliegenden Winkel (D) zur seitlichen Befestigung des Gerätes am Möbel verwenden. Abedeckung (E) aufklipsen.
B |
D |
PR167/1 |
G |
H |
G |
D729 |
36 | 13 |