8. Using the PS Utility
PS Utility is a
Note: If you haven’t installed PS Utility yet, please follow the installation instructions as described in Section 3, Installing PS Utility.
You can start PS Utility by going to Start, (All) Programs,
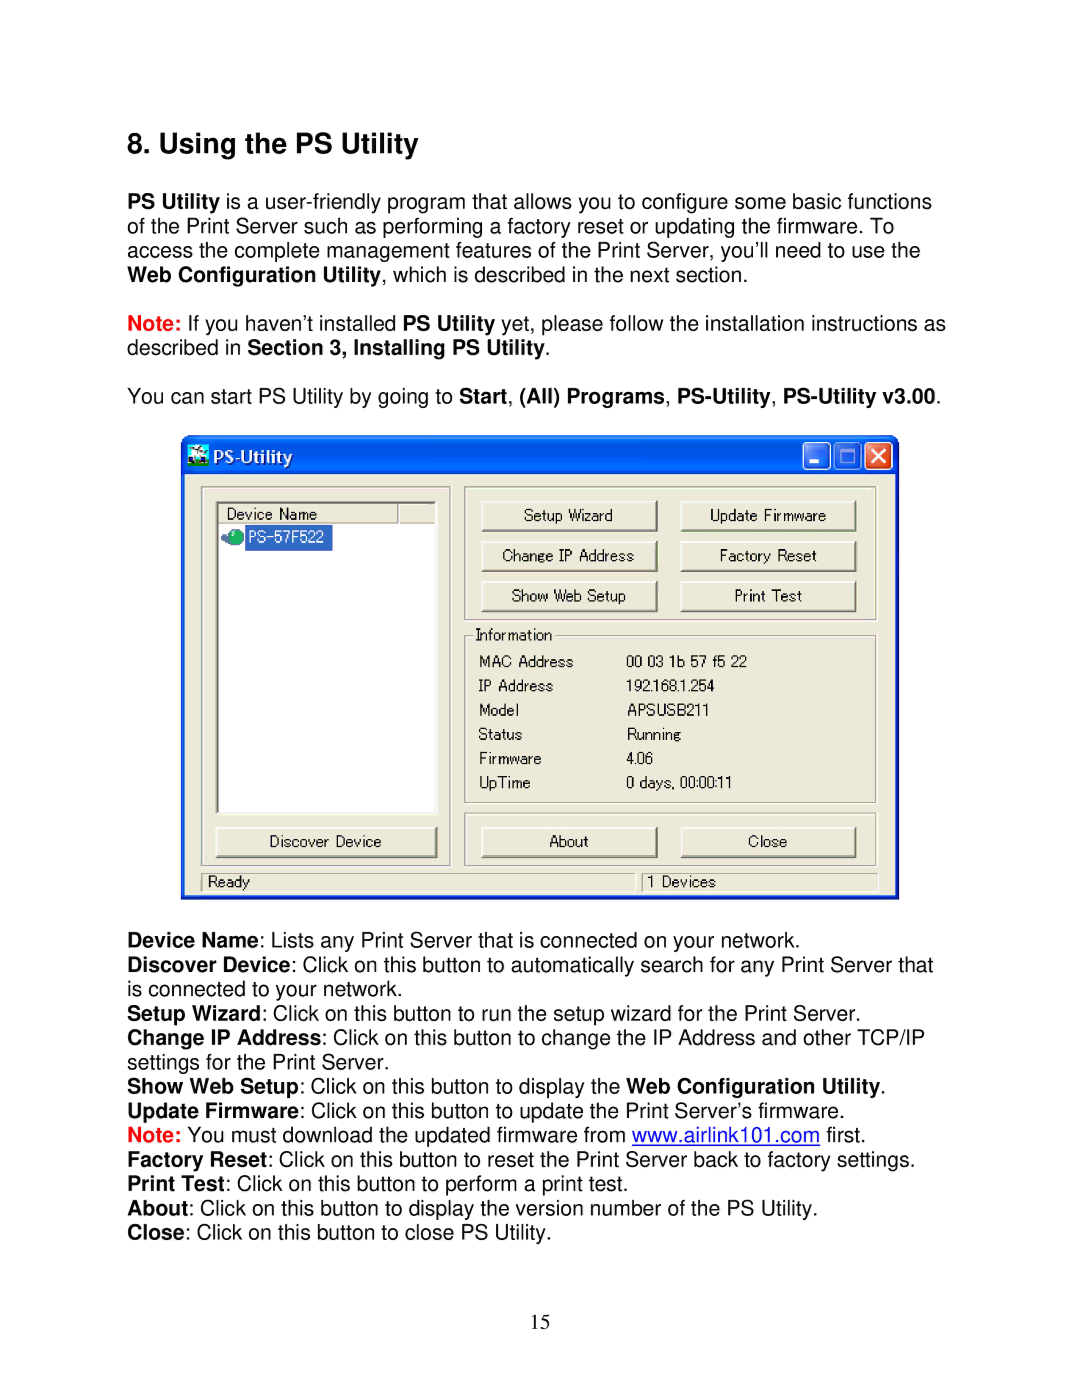
Device Name: Lists any Print Server that is connected on your network.
Discover Device: Click on this button to automatically search for any Print Server that is connected to your network.
Setup Wizard: Click on this button to run the setup wizard for the Print Server.
Change IP Address: Click on this button to change the IP Address and other TCP/IP settings for the Print Server.
Show Web Setup: Click on this button to display the Web Configuration Utility.
Update Firmware: Click on this button to update the Print Server’s firmware.
Note: You must download the updated firmware from www.airlink101.com first.
Factory Reset: Click on this button to reset the Print Server back to factory settings.
Print Test: Click on this button to perform a print test.
About: Click on this button to display the version number of the PS Utility.
Close: Click on this button to close PS Utility.
15
