
NSX-A10 specifications
The Aiwa NSX-A10 is a remarkable piece of audio technology that encapsulates the spirit of the late 1990s and early 2000s home entertainment systems. This compact stereo system is designed to deliver a balanced and powerful audio experience, making it a popular choice for music enthusiasts who appreciate both quality and functionality.One of the standout features of the Aiwa NSX-A10 is its dual cassette deck, which allows for convenient tape playback and recording. This feature appeals to collectors of cassette tapes as well as those who enjoy mixing their own recordings, a testament to the nostalgia attached to analog formats. Additionally, the NSX-A10 supports Auto-reverse functionality, allowing for continuous playback without the need to manually flip the tape.
The system also includes a CD player that provides high-quality sound reproduction. Its ability to play CD-R and CD-RW formats further caters to users who enjoy custom mixed CDs. The digital audio processing technology embedded in the unit ensures that sound is clear, crisp, and well-balanced. The Aiwa NSX-A10 features a powerful built-in amplifier that drives its speakers, delivering impressive output and a rich listening experience.
Another key feature is the five-band equalizer, which allows users to tailor the audio output to their personal preferences. This level of customization means you can enhance the bass for a more robust sound or adjust the treble for clarity, depending on the genre of music being played.
The NSX-A10 also boasts a range of connectivity options, including an auxiliary input for connecting external devices like MP3 players or smartphones, making it versatile for modern use despite its vintage roots. The system’s compact design means it can easily fit into any room, providing an elegant aesthetic with its sleek lines and minimalist interface.
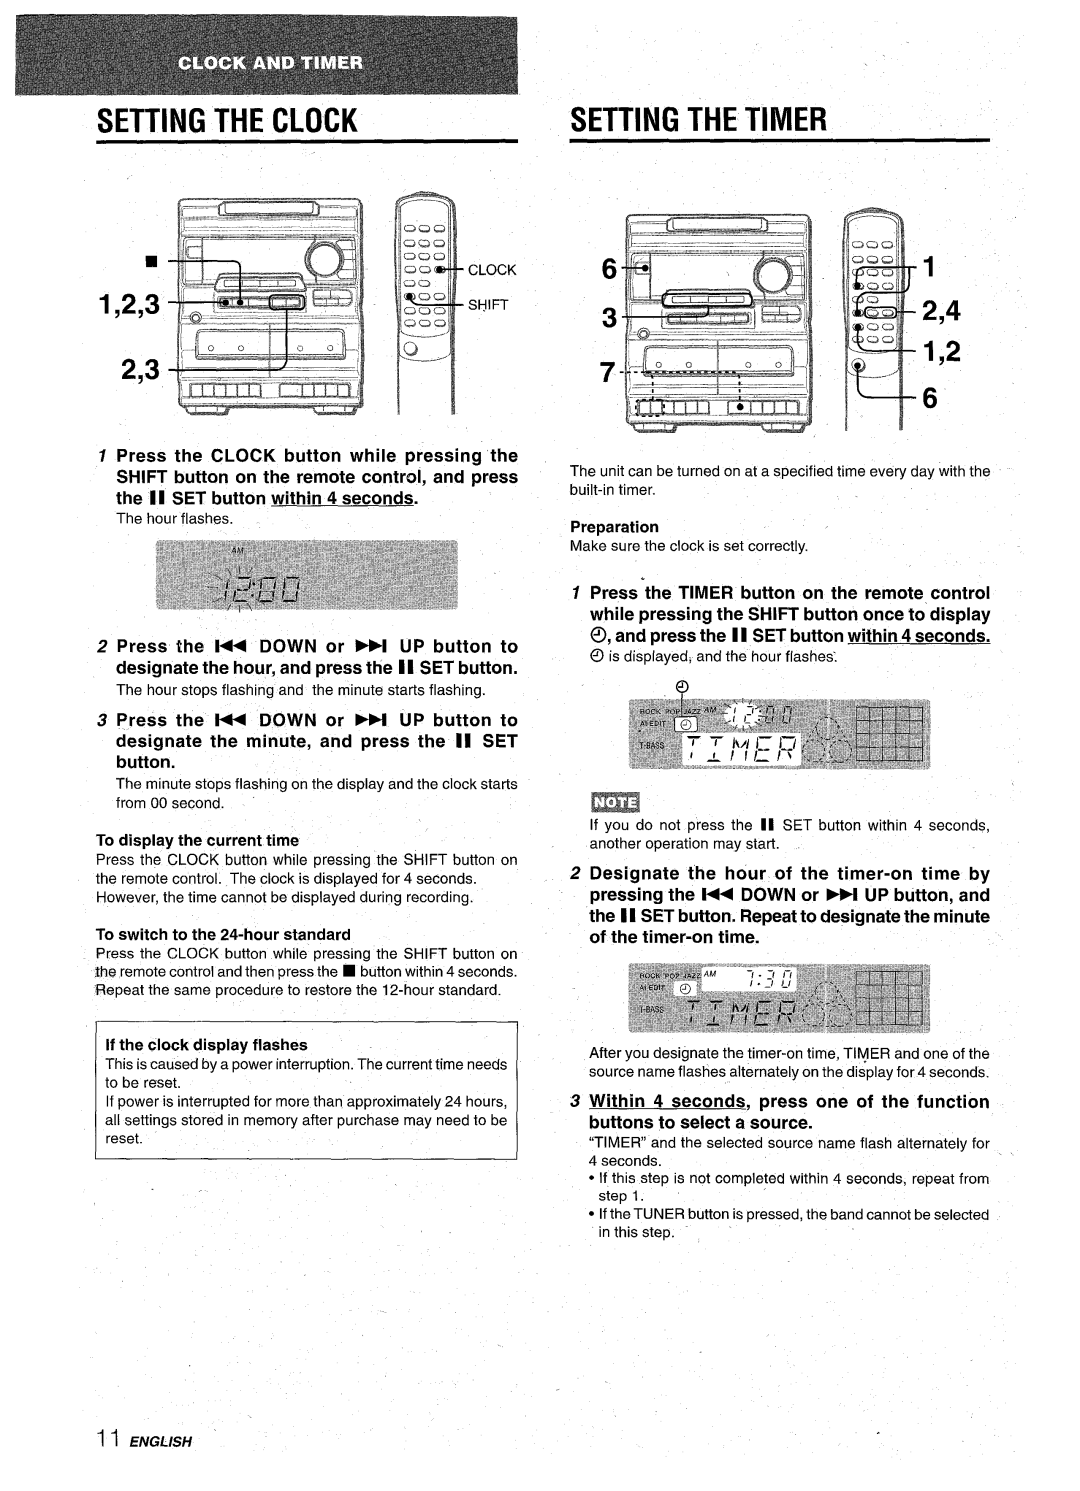
Its remote control feature enhances usability, allowing for easy track changes and volume adjustments from a distance. Additionally, the system incorporates a built-in radio tuner, giving users access to AM and FM frequencies to enjoy their favorite radio stations.
Overall, the Aiwa NSX-A10 stands out as a multifaceted audio system, merging classic technologies with user-centric features. Its blend of cassette, CD, and radio playback makes it a well-rounded choice for those who appreciate both nostalgia and sound quality in their home audio experiences.