27.Loop: Press and hold this button to activate the Loop or Repeat feature in your software. This button is considered a transport control, so it can be set to send the same messages as the other transport control buttons: MMC (MIDI Machine Control), MMC/MIDI SysEx, MIDI Start/Stop, or
Important: Your software must be able to loop or repeat in order to use this feature. Also, make sure that you are using the MPK261 Preset named after your particular software. If your software does not have a corresponding MPK261 Preset, configure the Loop button in Edit Mode so it communicates properly with your software.
28.Transport Control Buttons: These five buttons are dedicated buttons for sending
conventional transport control commands: Rewind,
Rear Panel
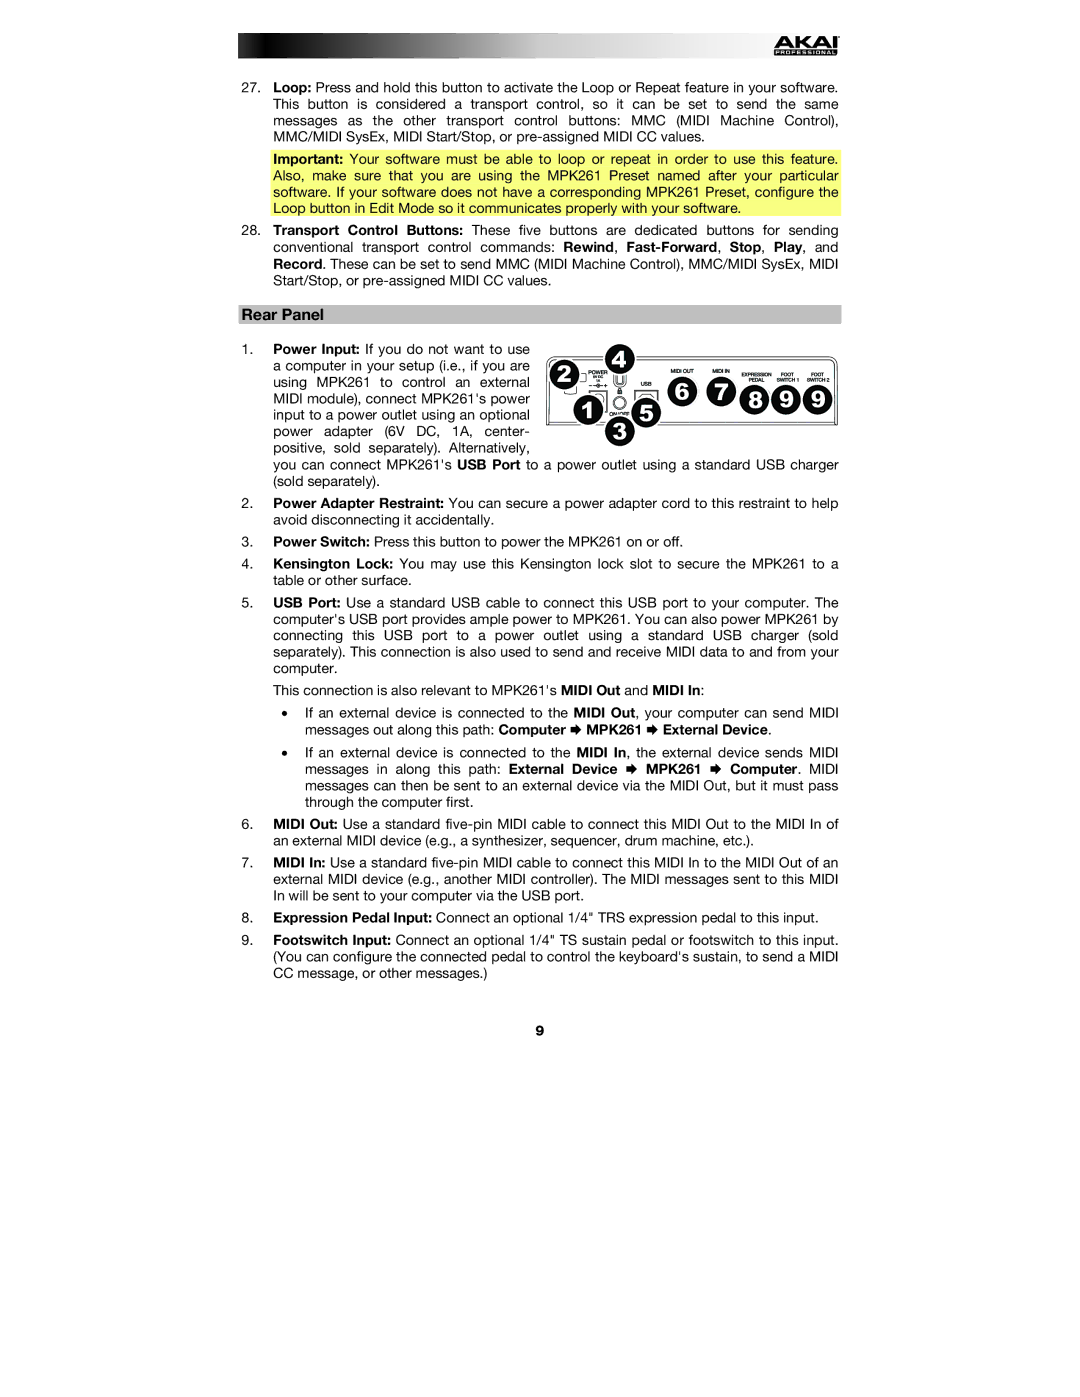
1. Power Input: If you do not want to use |
|
| 4 |
|
|
|
a computer in your setup (i.e., if you are | 2 |
|
|
|
| |
using MPK261 to control an external |
|
|
| 6 | 7 8 9 9 | |
MIDI module), connect MPK261's power |
| 1 |
| 5 | ||
input to a power outlet using an optional |
| 3 |
|
| ||
power adapter (6V DC, 1A, center- |
|
|
|
|
positive, sold separately). Alternatively,
you can connect MPK261's USB Port to a power outlet using a standard USB charger (sold separately).
2.Power Adapter Restraint: You can secure a power adapter cord to this restraint to help avoid disconnecting it accidentally.
3.Power Switch: Press this button to power the MPK261 on or off.
4.Kensington Lock: You may use this Kensington lock slot to secure the MPK261 to a table or other surface.
5.USB Port: Use a standard USB cable to connect this USB port to your computer. The computer's USB port provides ample power to MPK261. You can also power MPK261 by connecting this USB port to a power outlet using a standard USB charger (sold separately). This connection is also used to send and receive MIDI data to and from your computer.
This connection is also relevant to MPK261's MIDI Out and MIDI In:
•If an external device is connected to the MIDI Out, your computer can send MIDI messages out along this path: Computer MPK261 External Device.
•If an external device is connected to the MIDI In, the external device sends MIDI messages in along this path: External Device MPK261 Computer. MIDI messages can then be sent to an external device via the MIDI Out, but it must pass through the computer first.
6.MIDI Out: Use a standard
7.MIDI In: Use a standard
8.Expression Pedal Input: Connect an optional 1/4" TRS expression pedal to this input.
9.Footswitch Input: Connect an optional 1/4" TS sustain pedal or footswitch to this input. (You can configure the connected pedal to control the keyboard's sustain, to send a MIDI CC message, or other messages.)
9
