Floor Damage
Slide dryer onto cardboard or hardboard More movlng across floor.
Failure to do so may cause damage to tloor coverlng.
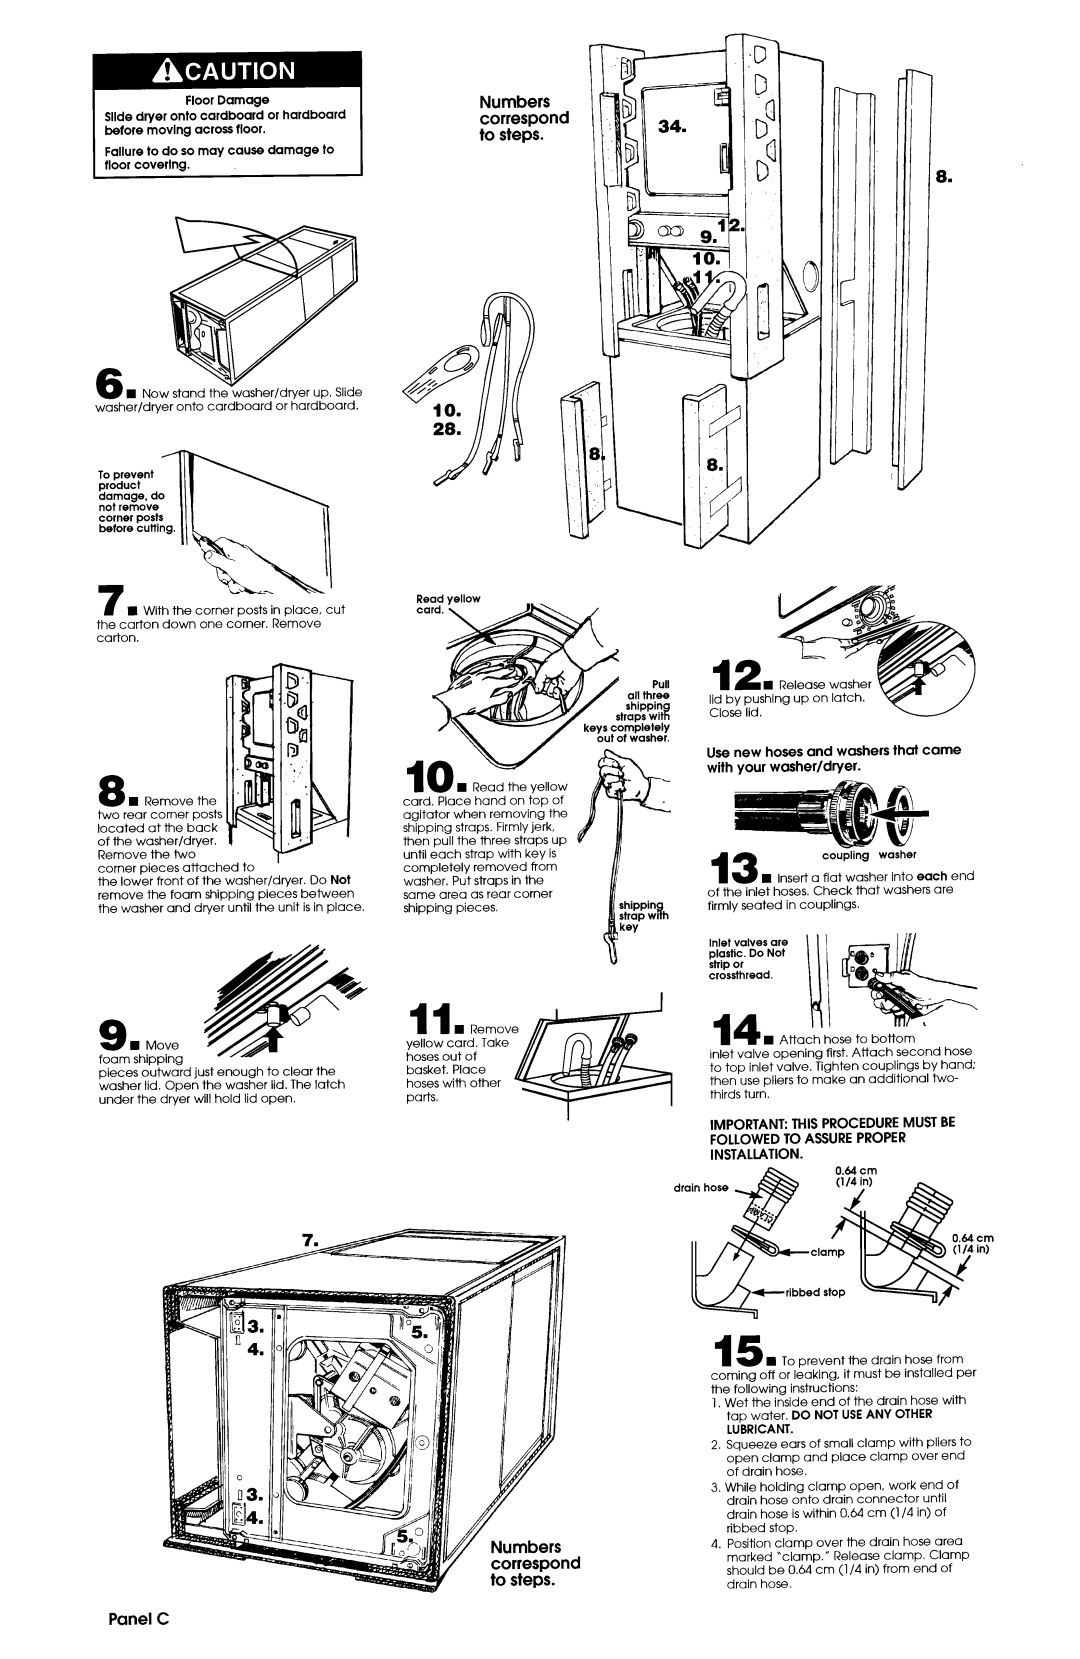
6 H Now stand the washer/dryer up. Slide washer/dryer onto cardboard or hardboard.
To prevent product
damage, do not remove
corner posts betore cutting.
Numbers correspond to steps.
8.
n With the corner posts in place, CI the carton down one corner. Remove carton.
8 H Remove the two rear corner posts located at the back of the washer/dryer. Remove the two
corner pieces attached to
the lower front of the washer/dryer. Do Not remove the foam shipping pieces between the washer and dryer until the unit is in place.
9 H Move foam shipping
pieces outward just enough to clear the washer lid. Open the washer lid. The latch under the dryer will hold lid open,
H Read the yellow
zGd;ace hand on top of agitator when removing the shipping straps. Firmly jerk, then pull the three straps up until each strap with key is completely removed from washer. Put straps in the same area as rear corner shipping pieces.
11
yellow card. Take hoses out of basket. Place hoses with other parts,
12 n Release washer lid by pushing up on latch. Close lid.
out of washer.
Use new hoses and washers that came with your washer/dryer.
|
|
|
| coupling | washer |
|
| 13 n Insert a flat washer into each end | |||||
shippin | of the inlet hoses, Check that washers are | |||||
firmly seated in couplings. |
|
| ||||
strap WIs h |
|
|
|
|
|
|
key |
|
|
|
|
|
|
| Inlet valves | are |
|
|
| |
| plastic. | Do | Not |
|
|
|
| strip or |
|
|
|
| |
| crossthread. |
|
|
|
| |
|
|
|
| Kl |
|
|
| 14- |
| ||||
| inlet valve opening first. Attach second hose | |||||
| to top | inlet valve. | Tighten | couplings | by hand; | |
| then | use | pliers to | make an | additional | two- |
| thirds | turn. |
|
|
| |
IMPORTANT: THIS PROCEDURE MUST BE
FOLLOWED TO ASSURE PROPER
INSTALLATION.
cm in)
15 H To prevent the drain hose from coming off or leaking, it must be installed per the following instructions:
1.Wet the inside end of the drain hose with tap water. DO NOT USEANY OTHER LUBRICANT.
2.Squeeze ears of small clamp with pliers to open clamp and place clamp over end of drain hose.
3.While holding clamp open, work end of drain hose onto drain connector until drain hose is within 0.64 cm (l/4 in) of ribbed stop.
4.Position clamp over the drain hose area marked “clamp.” Release clamp. Clamp should be 0.64 cm (l/4 in) from end of drain hose.
