
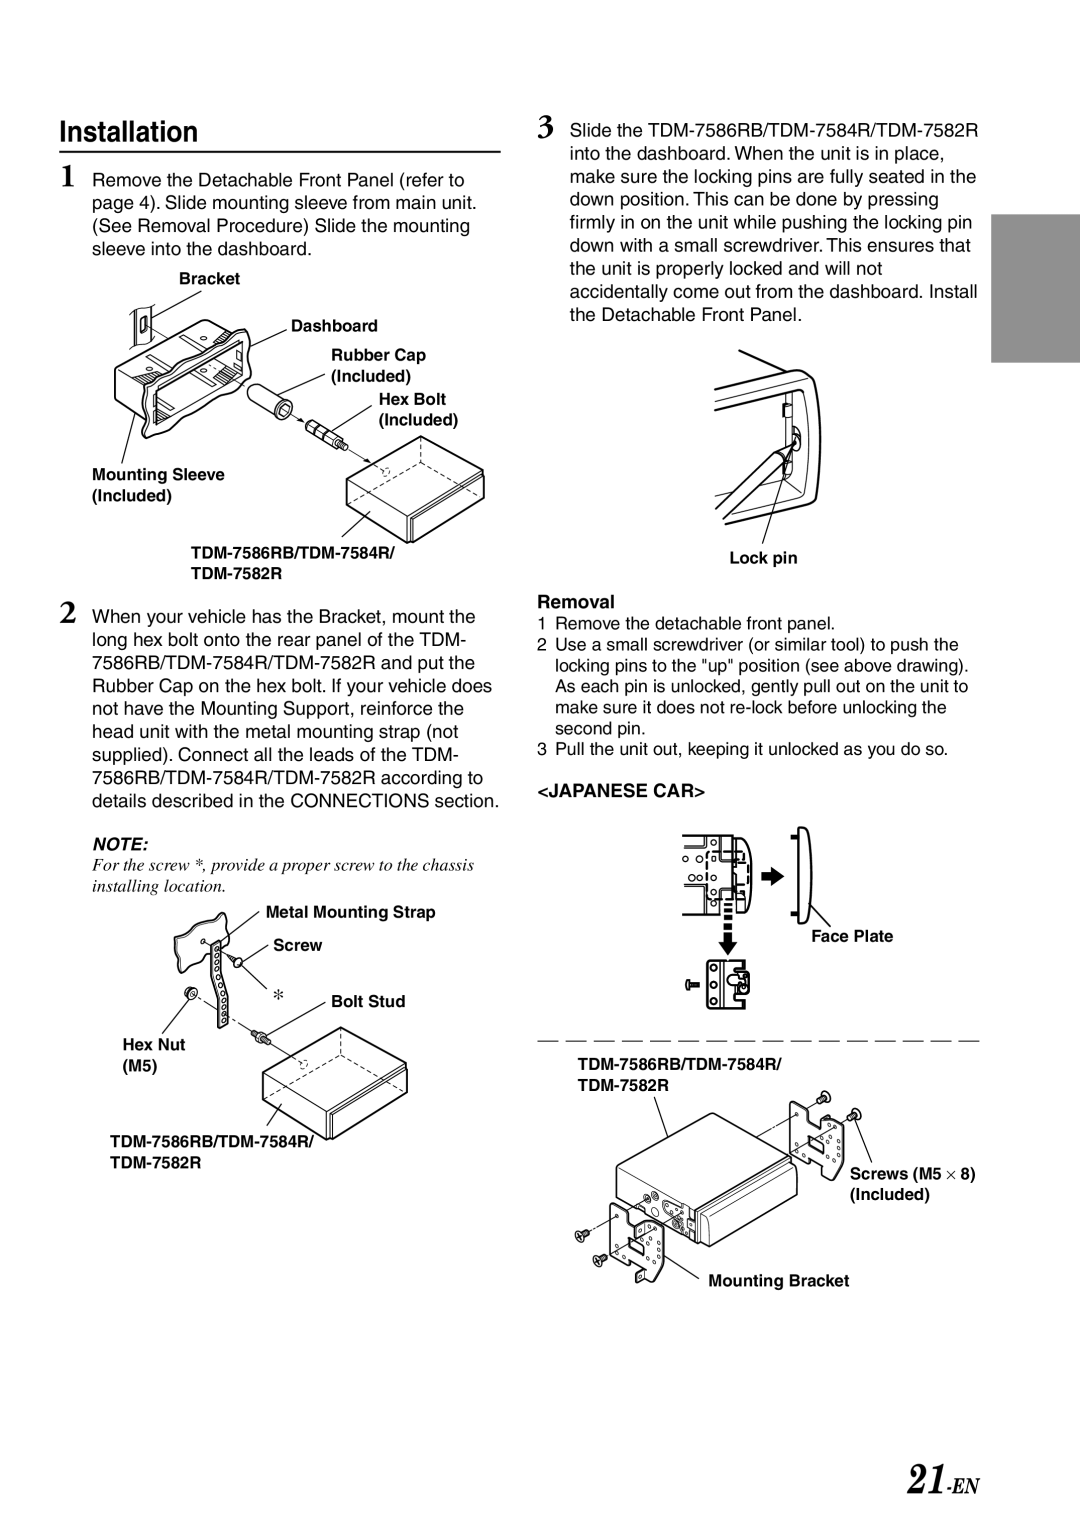
TDM-7582R, TDM-7584R, TDM-7586RB specifications
The Alpine TDM-7586RB, TDM-7584R, and TDM-7582R are high-performance multimedia receivers that stand out in the automotive audio market. These models are designed to enhance the driving experience by delivering superior sound quality, versatile connectivity, and user-friendly interfaces.One of the prominent features of these receivers is their advanced audio processing capabilities. The TDM-7586RB, for instance, incorporates a high-resolution DAC (Digital-to-Analog Converter) that ensures precise audio reproduction, delivering clear highs and deep bass. The TDM-7584R and TDM-7582R also inherit this feature, providing a premium audio experience no matter the genre of music. Additionally, built-in sound adjustment tools allow users to tailor the sound output to their preference, making it possible to adjust the equalizer settings according to individual taste.
Connectivity is a key highlight of these Alpine models. Each receiver supports Bluetooth technology for wireless audio streaming from smartphones and other devices. The inclusion of USB ports allows for direct playback from flash drives, while auxiliary inputs offer further versatility for connecting various external devices. Compatibility with both Android and iOS systems ensures that all users can easily integrate their smartphones for hands-free calling and navigation.
The TDM-7586RB features a larger, high-resolution touchscreen display that facilitates easy navigation through menus and settings, making it user-friendly. The TDM-7584R and TDM-7582R, while slightly smaller, maintain high visibility and responsiveness, ensuring that drivers can operate the receiver without distraction.
The receivers are also equipped with advanced radio functionality, providing access to FM and AM stations, as well as support for digital radio services in certain regions. The built-in tuner enhances the listening experience by delivering clear reception even in challenging environments.
In terms of build quality, the TDM series is designed to withstand the rigors of automotive environments. They feature durable materials and components that ensure long-lasting performance and reliability.
Overall, the Alpine TDM-7586RB, TDM-7584R, and TDM-7582R offer a blend of advanced audio technology, connectivity options, and user-oriented features, making them ideal choices for those looking to elevate their in-car entertainment experience.