Manuals
/
Alto-Shaam
/
Kitchen Appliance
/
Refrigerator
Alto-Shaam
Mobile Refrigerated Cart
manual
Scheduled Maintenance, Monthly Inspection & Service
Models:
Mobile Refrigerated Cart
1
7
17
17
Download
17 pages
13.92 Kb
4
5
6
7
8
9
10
11
Install
Error codes
Electrical Diagram
Warranty
Maintenance
Symptoms
Start Up Procedure
Operation / Cleaning
Door Handle Replacement
MR2 SERVICE PARTS
Page 7
Image 7
Page 6
Page 8
Page 7
Image 7
Page 6
Page 8
Contents
1000-MR2
Model
Installation Operation Maintenance
Mobile Refrigerated Cart Double Compartment
mobile refrigerated cart
1000-MR2
Factory installed Options
ITEM NO
253 ± 10 kg
220-240
net 557 ± 22 lb
ship 693 ± 22 lb
1.0 INTRODUCTION
ALTO-SHAAM MOBIL E REFRIGERATED CARTS
3.0 START UP PROCEDURE
3.1 SHUT-DOWN PROCEDURE
3.4 ERROR CODES
PROCEDURES
3.3 EXTENDED PERIOD OF INACTIVITY
5.1 CLEANING
OPERATION / CLEANING
4.0 OPERATING PROCEDURE
5.0 CLEANING and MAINTENANCE
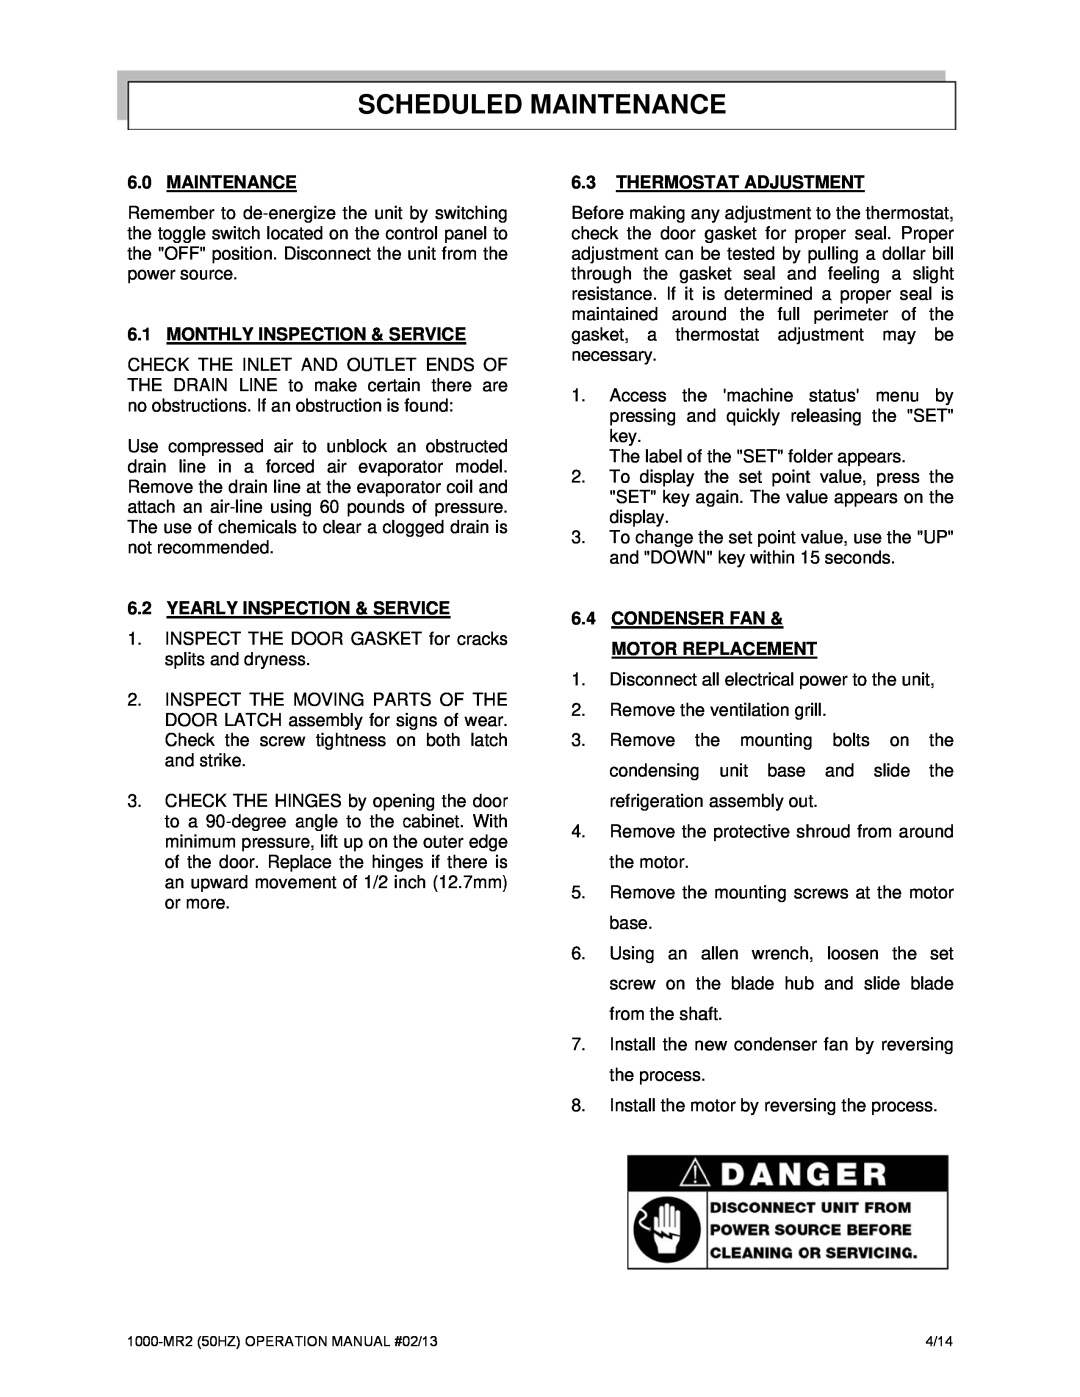
6.2 YEARLY INSPECTION & SERVICE
SCHEDULED MAINTENANCE
6.0 MAINTENANCE
6.1 MONTHLY INSPECTION & SERVICE
6.9 POWER SWITCH REPL ACEMENT
6.6 DOOR HANDLE REPLACEMENT
6.7 DOOR GASKET REPLACEMENT
6.8 DOOR HINGE REPLACEMENT
POSSIBLE FAILURE
CO RRECTIVE MAINTENANCE TROUBLE S HOOTING GUIDE
SYMPTOMS
SOLUTION
7/14
CO RRECTIVE MAINTENANCE TROUBLE SHOOTING GUIDE
8/14
MR2 SERVICE PARTS
10/14
11/14
PARTS IDENTIFICATION
ELECTRICAL DIAGRAM
Suction Line Discharge Line Electric Box COMPRESSOR FOR MR2
13/14
transPortatIon DaMaGe and claIMs
lIMIteD WarrantY
Voltage Purchased From
Top
Page
Image
Contents