3
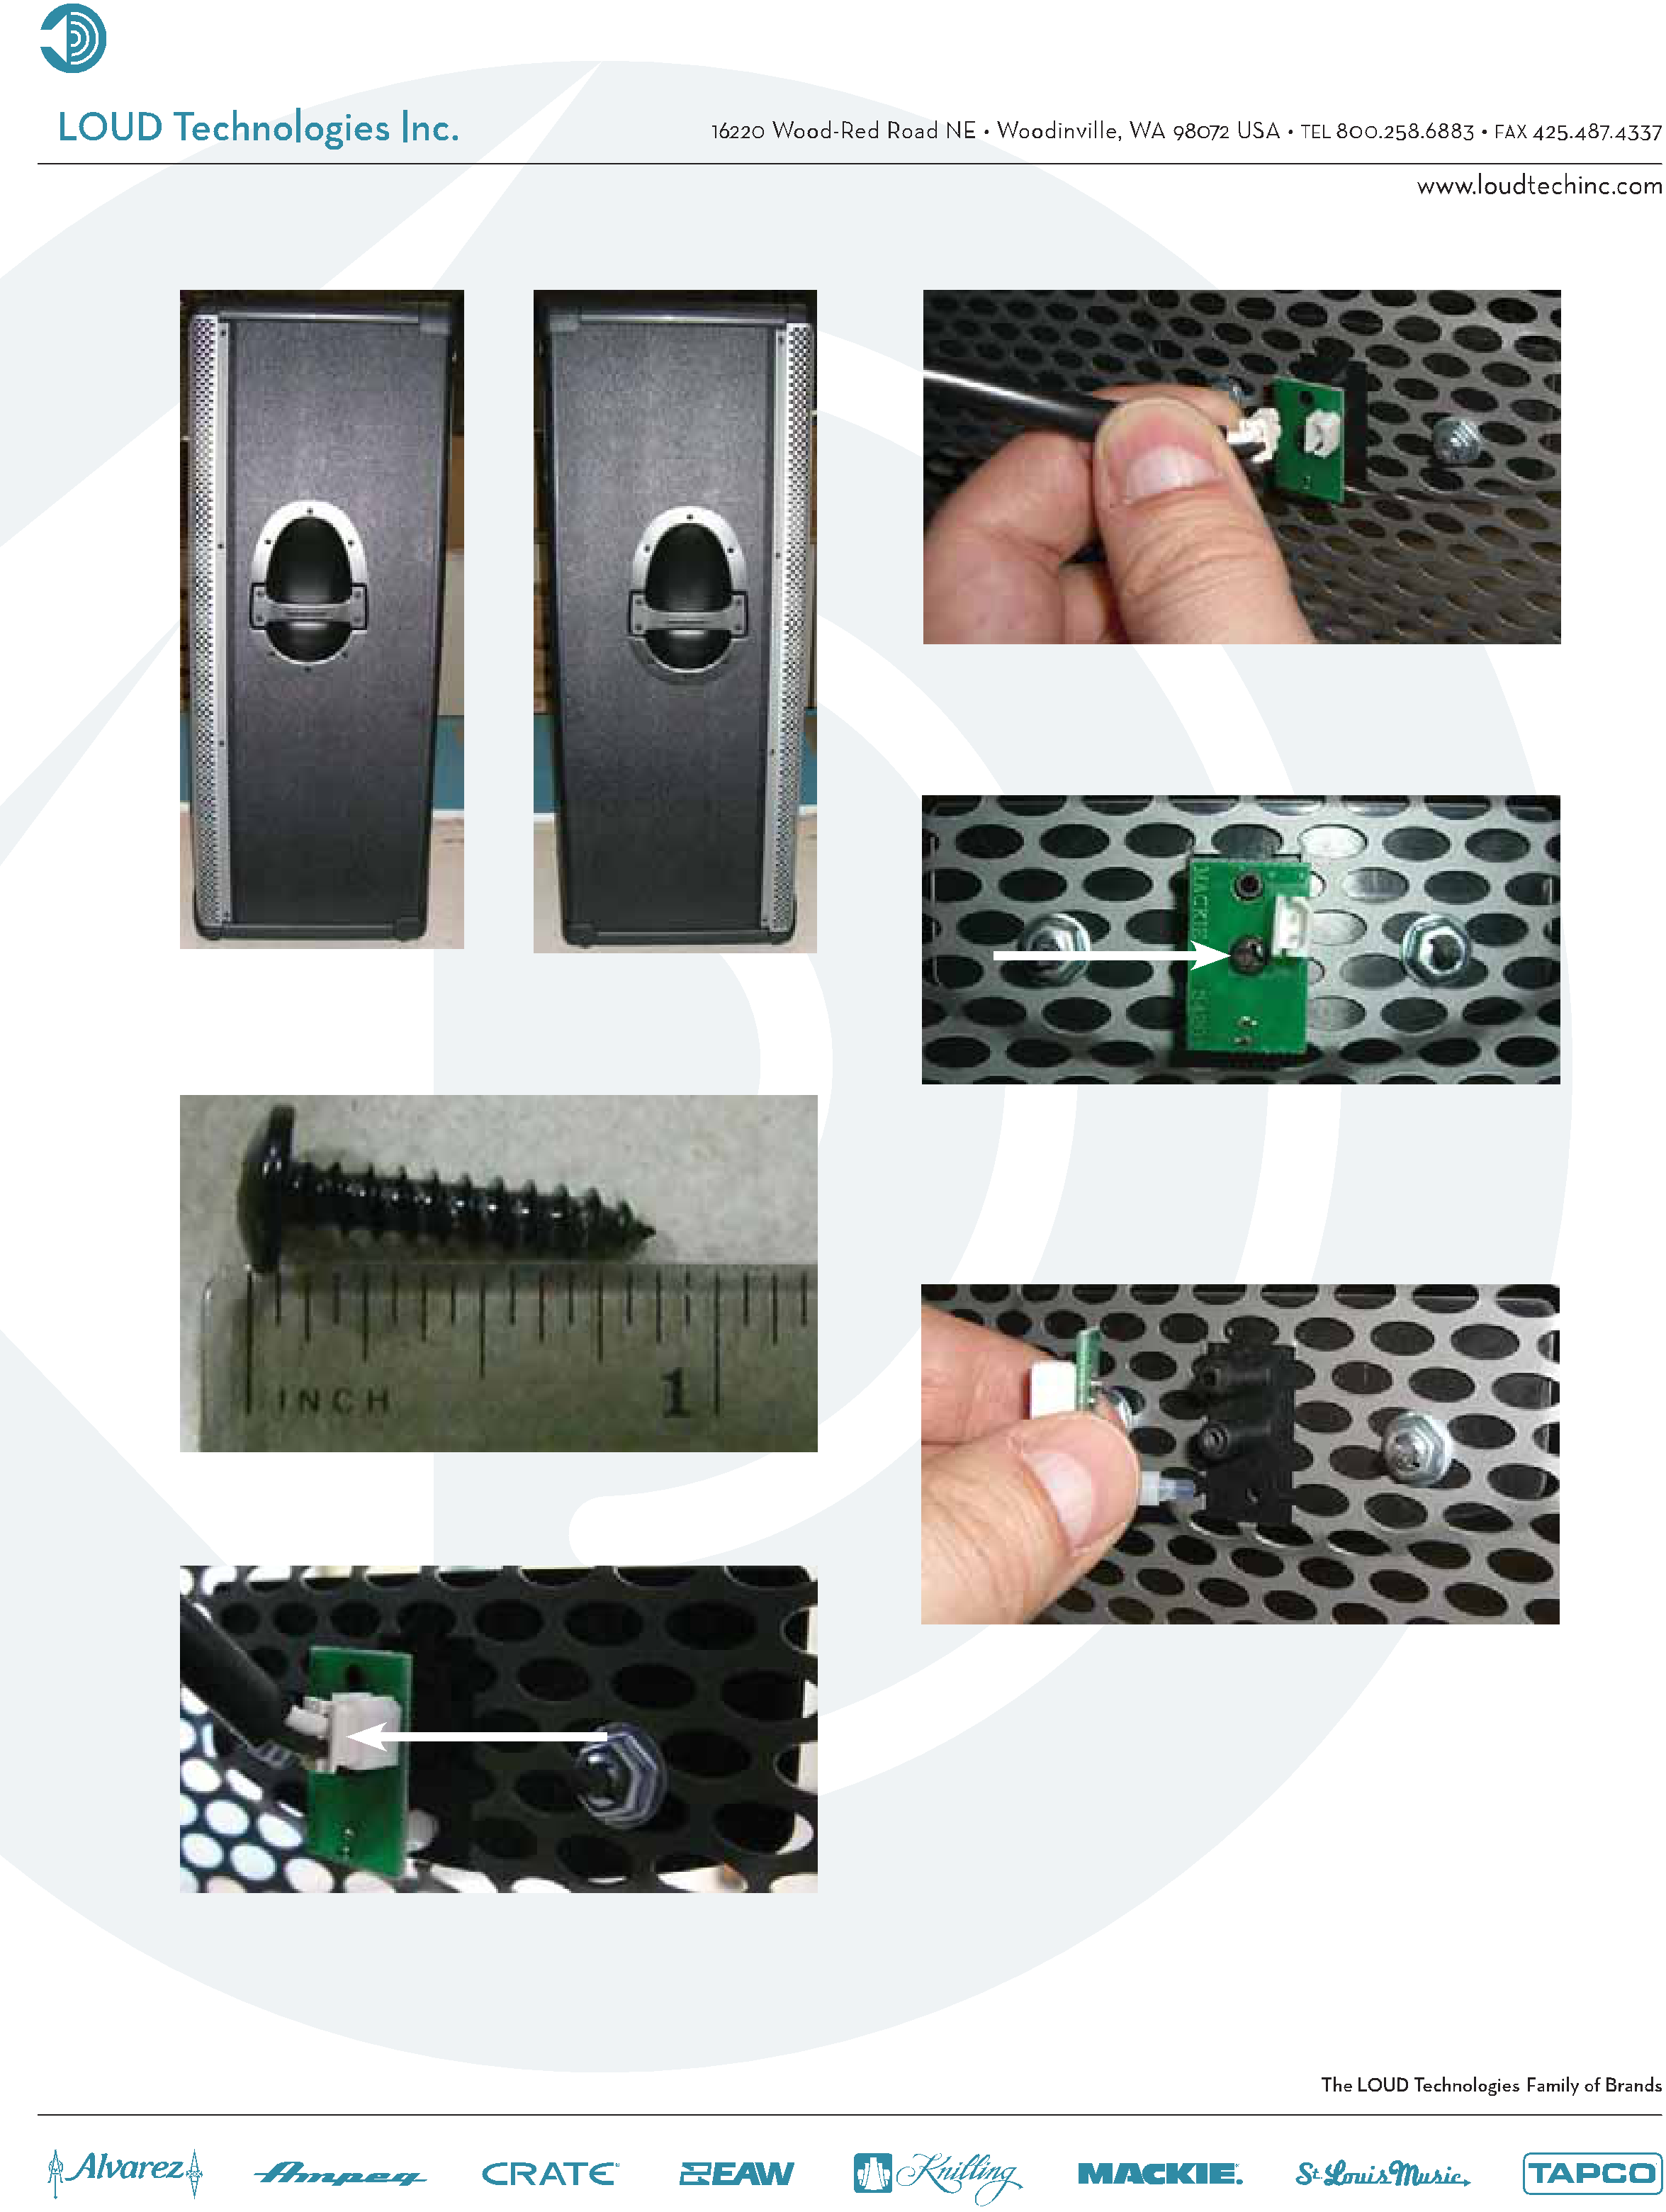
Led PCB replacement:
1 | 5 |
2 | 6 |
3 | 7 |
4 | 8 |
1 Four screws need to be removed from each side of the grill (eight screws total) using the phillips head screwdriver.
2 Keep the eight screws in a safe place.
3 Carefully begin to remove the grill. Do not fully remove the grill as the cable is still firmly attached to the led PCB assembly. A flat head screwdriver may aid in loosening the grill from the cabinet.
4 Carefully remove the cable attached to the led PCB assembly.
5 Use the phillips head screwdriver to remove one screw near the center of the led PCB assembly.
6
7 The hard part is done, the rest is easy! Place the new led PCB assembly (part #0007334) where the old one was. Follow the same steps as above, but backwards 6 to 1. Power up the SA1530z and the led should light up. Congratulations, you just replaced an led PCB assembly...now go play some shows!