•User password
Change, set, or disable password. It allows you to limit access to the system.
•IDE HDD auto detection
Automatically configure hard disk parameters.
•Save & Exit Setup
Save CMOS value settings to CMOS and exit setup.
•Exit Without Saving
Abandon all CMOS value changes and exit setup.
Standard CMOS Setup
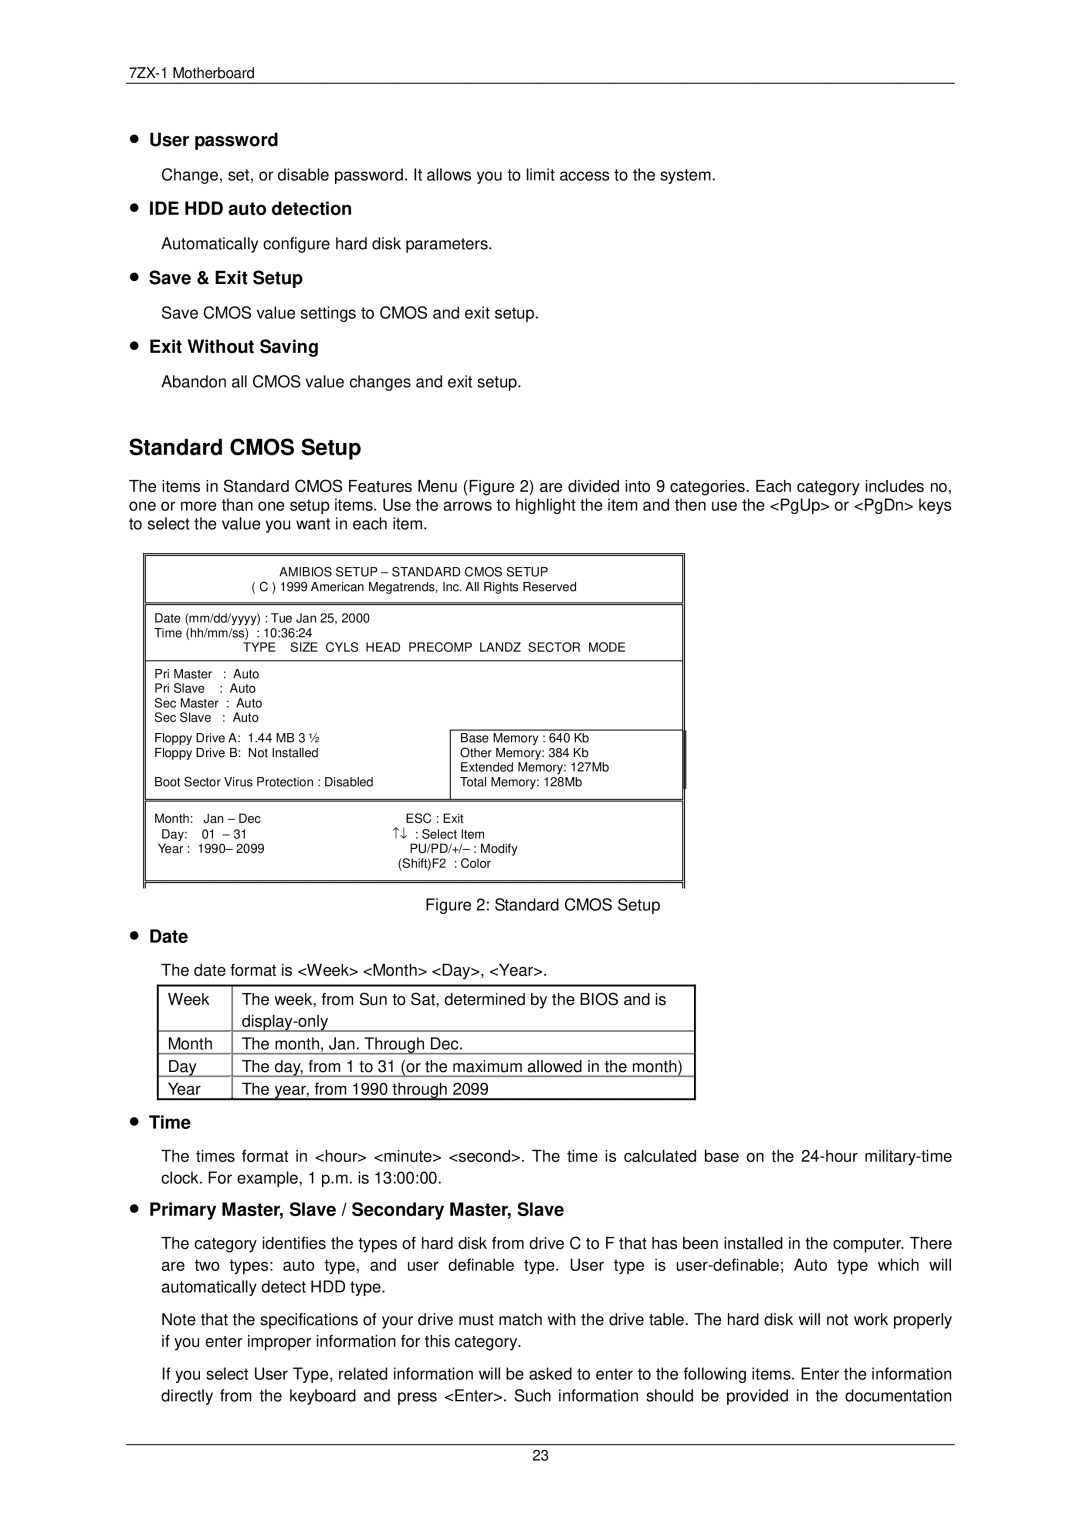
The items in Standard CMOS Features Menu (Figure 2) are divided into 9 categories. Each category includes no, one or more than one setup items. Use the arrows to highlight the item and then use the <PgUp> or <PgDn> keys to select the value you want in each item.
AMIBIOS SETUP – STANDARD CMOS SETUP
( C ) 1999 American Megatrends, Inc. All Rights Reserved
Date (mm/dd/yyyy) : Tue Jan 25, 2000
Time (hh/mm/ss) : 10:36:24
TYPE SIZE CYLS HEAD PRECOMP LANDZ SECTOR MODE
Pri Master : Auto
Pri Slave : Auto
Sec Master : Auto
Sec Slave : Auto
Floppy Drive A: 1.44 MB 3 ½
Floppy Drive B: Not Installed
Boot Sector Virus Protection : Disabled
Base Memory : 640 Kb
Other Memory: 384 Kb
Extended Memory: 127Mb
Total Memory: 128Mb
Month: | Jan – Dec | ESC : Exit |
Day: | 01 – 31 | ↑↓ : Select Item |
Year : 1990– 2099 | ||
|
| (Shift)F2 : Color |
|
|
|
|
|
|
Figure 2: Standard CMOS Setup
•Date
The date format is <Week> <Month> <Day>, <Year>.
Week
Month
Day
Year
![]() The week, from Sun to Sat, determined by the BIOS and is
The week, from Sun to Sat, determined by the BIOS and is
![]()
![]() The month, Jan. Through Dec.
The month, Jan. Through Dec.
![]() The day, from 1 to 31 (or the maximum allowed in the month)
The day, from 1 to 31 (or the maximum allowed in the month)
The year, from 1990 through 2099
•Time
The times format in <hour> <minute> <second>. The time is calculated base on the
•Primary Master, Slave / Secondary Master, Slave
The category identifies the types of hard disk from drive C to F that has been installed in the computer. There are two types: auto type, and user definable type. User type is
Note that the specifications of your drive must match with the drive table. The hard disk will not work properly if you enter improper information for this category.
If you select User Type, related information will be asked to enter to the following items. Enter the information directly from the keyboard and press <Enter>. Such information should be provided in the documentation
23