| Operation |
in the
4The optional MINI/C Blackout Controller may be used in this mode to control blackout.
Note:
1.Using standard XLR microphone cables, as described on pages fi ve and six, daisy chain your units together via the XLR connectors on the rear of the units. Remember the Male XLR connector is the input and the Female XLR connector is the output. The fi rst unit in the chain (master) will use the female XLR connector only. The last unit in the chain will use the male XLR connector only. For longer cable runs we suggest a terminator at the last fixture.
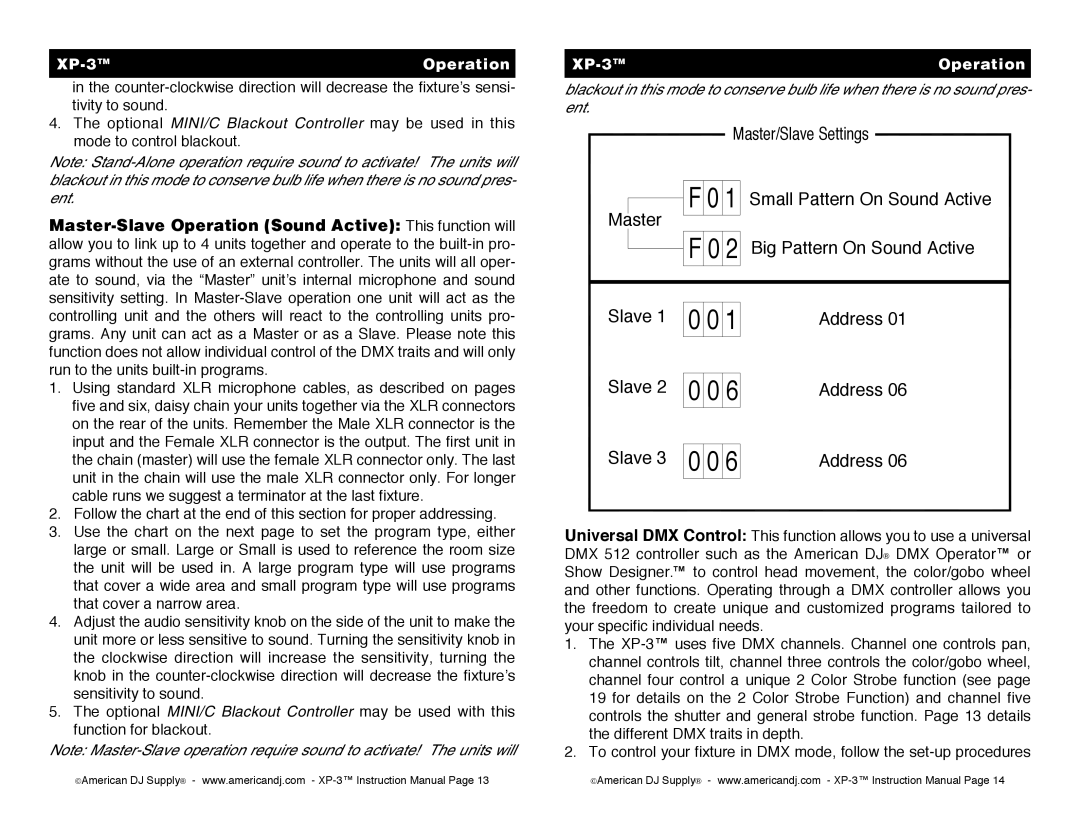
2.Follow the chart at the end of this section for proper addressing.
3.Use the chart on the next page to set the program type, either large or small. Large or Small is used to reference the room size the unit will be used in. A large program type will use programs that cover a wide area and small program type will use programs that cover a narrow area.
4.Adjust the audio sensitivity knob on the side of the unit to make the unit more or less sensitive to sound. Turning the sensitivity knob in the clockwise direction will increase the sensitivity, turning the knob in the
5.The optional MINI/C Blackout Controller may be used with this function for blackout.
Note:
©American DJ Supply® - www.americandj.com -
Operation |
blackout in this mode to conserve bulb life when there is no sound pres-
ent.
Master/Slave Settings
Master | F 0 1 | Small Pattern On Sound Active |
|
| |
| F 0 2 | Big Pattern On Sound Active |
Slave 1 | 0 0 1 | Address 01 |
Slave 2 | 0 0 6 | Address 06 |
Slave 3 | 0 0 6 | Address 06 |
Universal DMX Control: This function allows you to use a universal DMX 512 controller such as the American DJ® DMX Operator™ or Show Designer.™ to control head movement, the color/gobo wheel and other functions. Operating through a DMX controller allows you the freedom to create unique and customized programs tailored to your specific individual needs.
1.The
2.To control your fixture in DMX mode, follow the
©American DJ Supply® - www.americandj.com -
