d.Open main door. The dryer must stop and ALL output indicator lights on the back side of the micro- processor (computer) board must go out. (Refer to the illustration on previous page [page 46].)
e. Try to restart the dryer with the main door open.
f.The microprocessor (computer) board's L.E.D. display must read "DOOR." g. Close the main door and restart the dryer.
h.Functional check of microprocessor (computer) board is complete.
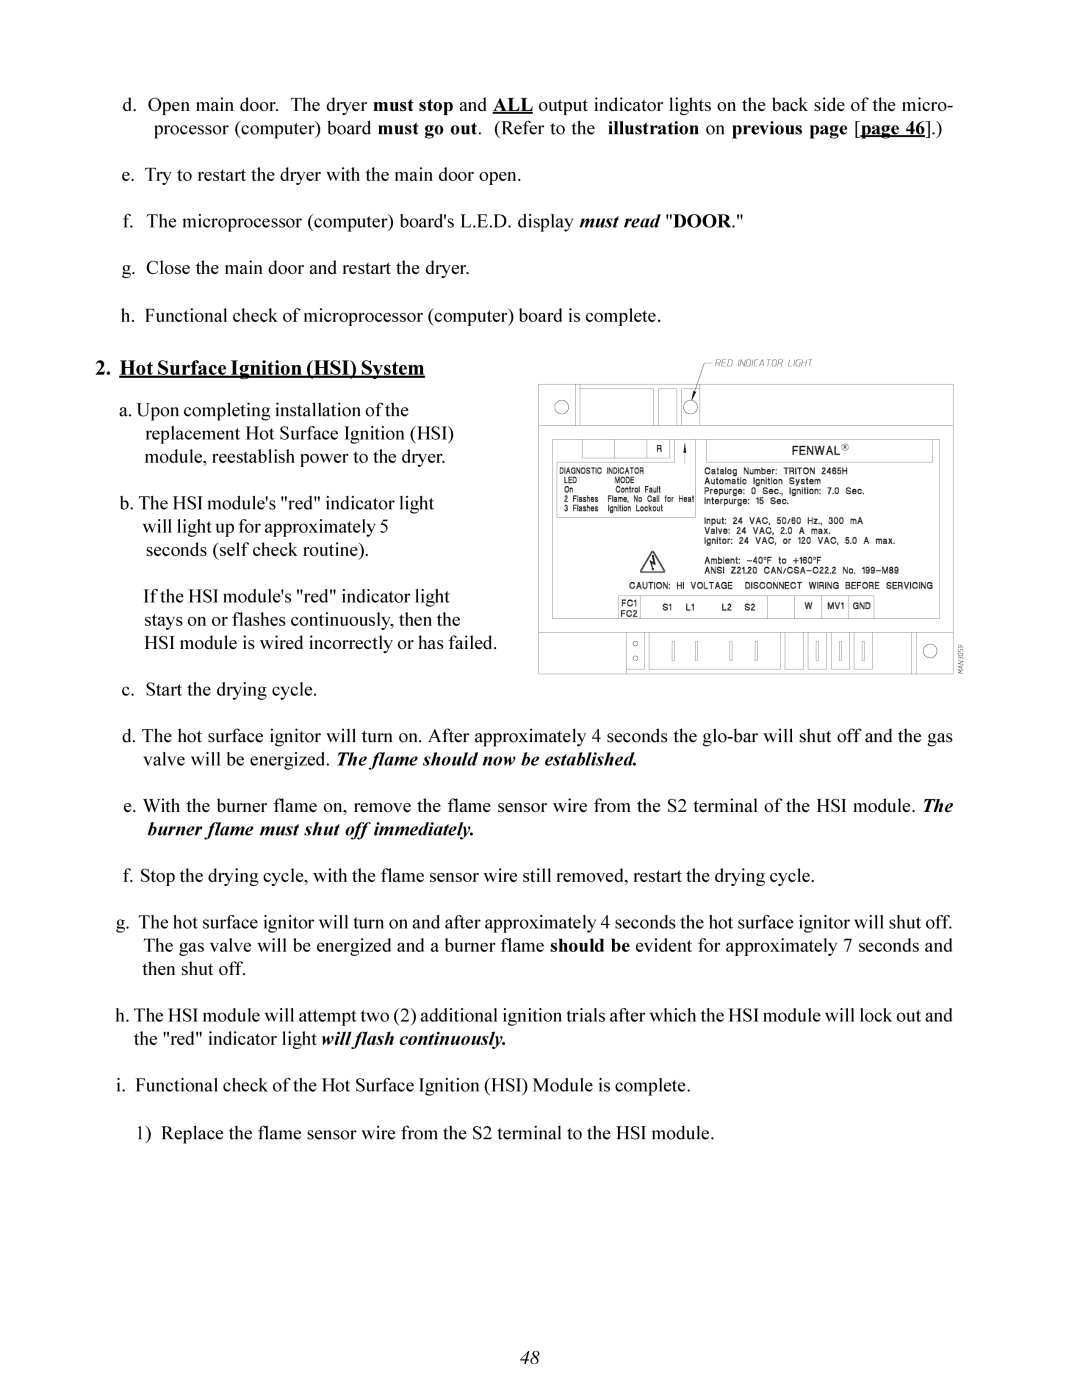
2.Hot Surface Ignition (HSI) System a. Upon completing installation of the
replacement Hot Surface Ignition (HSI) module, reestablish power to the dryer.
b. The HSI module's "red" indicator light will light up for approximately 5 seconds (self check routine).
If the HSI module's "red" indicator light stays on or flashes continuously, then the HSI module is wired incorrectly or has failed.
c.Start the drying cycle.
d.The hot surface ignitor will turn on. After approximately 4 seconds the
e.With the burner flame on, remove the flame sensor wire from the S2 terminal of the HSI module. The burner flame must shut off immediately.
f.Stop the drying cycle, with the flame sensor wire still removed, restart the drying cycle.
g.The hot surface ignitor will turn on and after approximately 4 seconds the hot surface ignitor will shut off. The gas valve will be energized and a burner flame should be evident for approximately 7 seconds and then shut off.
h.The HSI module will attempt two (2) additional ignition trials after which the HSI module will lock out and the "red" indicator light will flash continuously.
i.Functional check of the Hot Surface Ignition (HSI) Module is complete.
1)Replace the flame sensor wire from the S2 terminal to the HSI module.
48