Initial Inspection
Inspect the APC PowerStack 450 UPS upon receipt. Notify the carrier and dealer if there is damage. The packaging is recyclable; save it for reuse or dispose of it properly.
Warning: Changes or modifications to this unit not expressly approved by the party responsible for compliance could void
the warranty.
Installation
Placement
Install the UPS in a protected area that is free of excessive dust and has adequate air flow. Do not operate the UPS where the temperature and humidity is outside the specified limits.
Wall Mounting
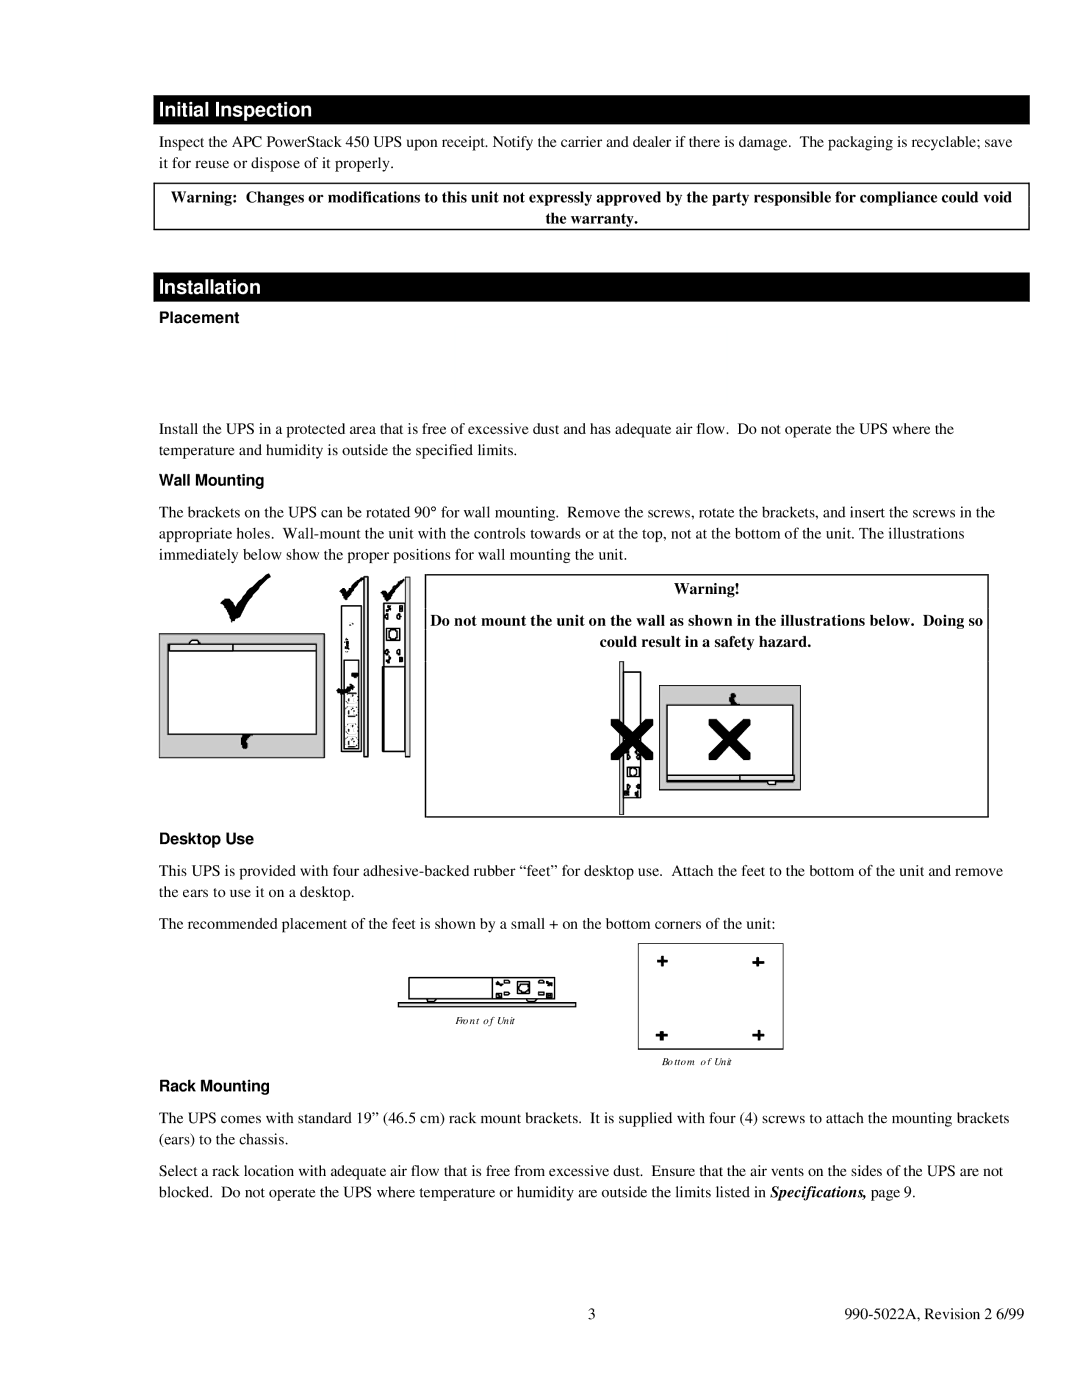
The brackets on the UPS can be rotated 90° for wall mounting. Remove the screws, rotate the brackets, and insert the screws in the appropriate holes.
Warning!
Do not mount the unit on the wall as shown in the illustrations below. Doing so
could result in a safety hazard.
Desktop Use
This UPS is provided with four
The recommended placement of the feet is shown by a small + on the bottom corners of the unit:
Front of Unit
Bottom of Unit
Rack Mounting
The UPS comes with standard 19” (46.5 cm) rack mount brackets. It is supplied with four (4) screws to attach the mounting brackets (ears) to the chassis.
Select a rack location with adequate air flow that is free from excessive dust. Ensure that the air vents on the sides of the UPS are not blocked. Do not operate the UPS where temperature or humidity are outside the limits listed in Specifications, page 9.
3 |
|
