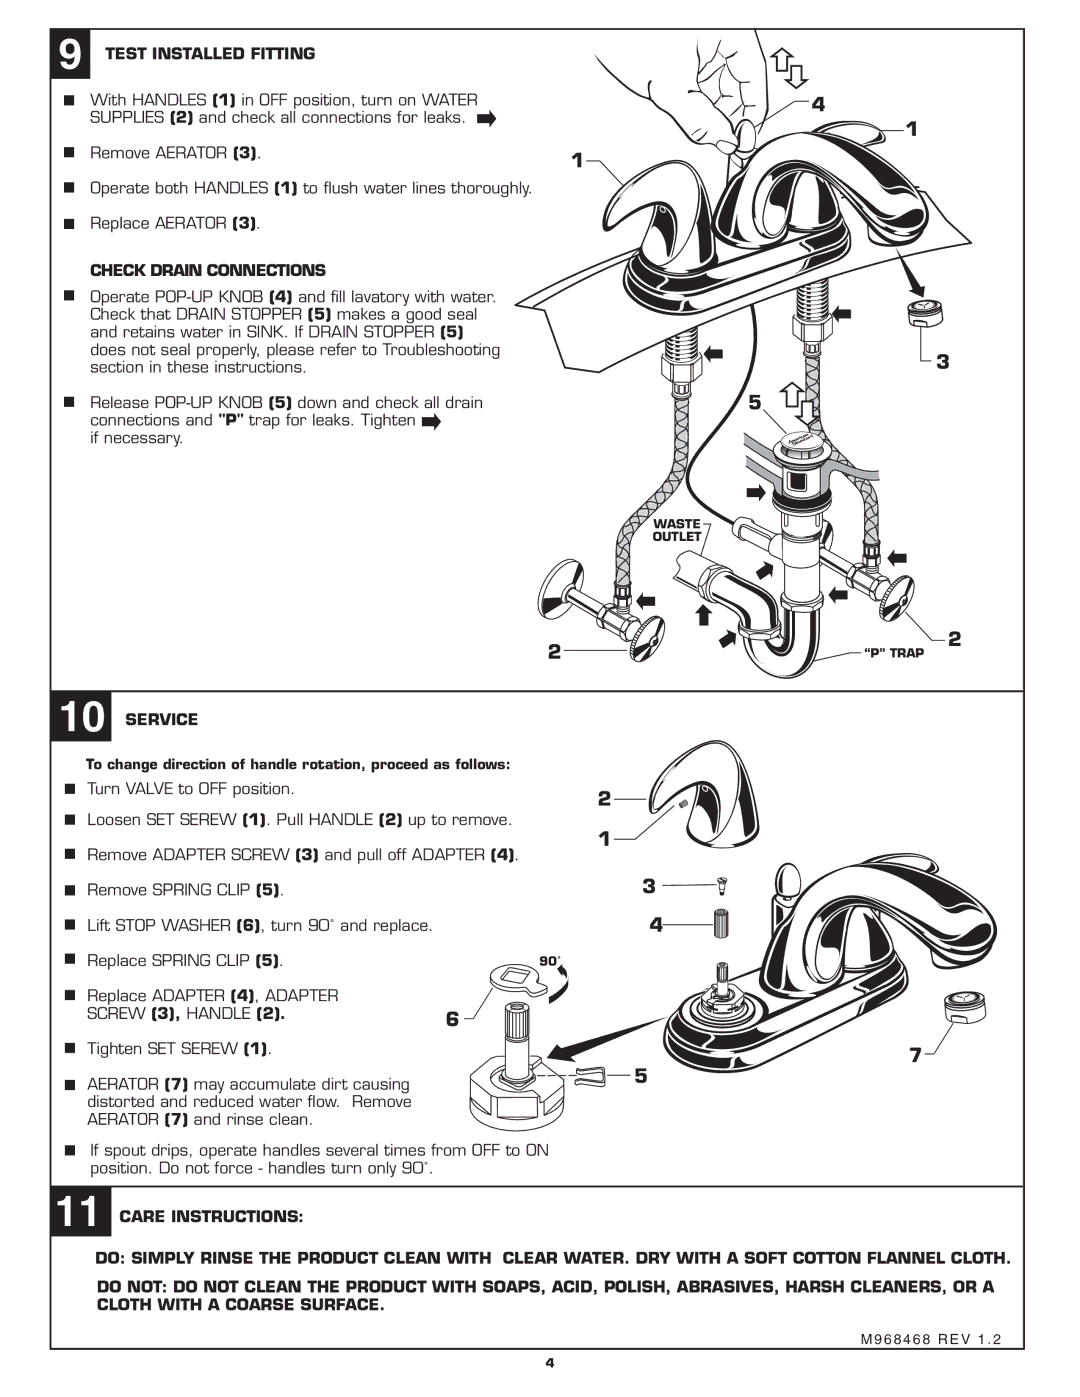
9 TEST INSTALLED FITTING |
|
With HANDLES (1) in OFF position, turn on WATER | 4 |
SUPPLIES (2) and check all connections for leaks. | 1 |
| |
Remove AERATOR (3). | 1 |
| |
Operate both HANDLES (1) to flush water lines thoroughly. |
|
Replace AERATOR (3). |
|
CHECK DRAIN CONNECTIONS |
|
Operate |
|
Check that DRAIN STOPPER (5) makes a good seal |
|
and retains water in SINK. If DRAIN STOPPER (5) |
|
does not seal properly, please refer to Troubleshooting | 3 |
section in these instructions. | |
Release | 5 |
connections and "P" trap for leaks. Tighten |
|
if necessary. |
|
WASTE
OUTLET
2 | 2 |
“P” TRAP |
10 SERVICE
To change direction of handle rotation, proceed as follows:
Turn VALVE to OFF position.
2
Loosen SET SEREW (1). Pull HANDLE (2) up to remove.
| 1 |
Remove ADAPTER SCREW (3) and pull off ADAPTER (4). | |
Remove SPRING CLIP (5). | 3 |
Lift STOP WASHER (6), turn 90˚ and replace. | 4 |
Replace SPRING CLIP (5). | 90˚ |
Replace ADAPTER (4), ADAPTER |
|
SCREW (3), HANDLE (2). | 6 |
Tighten SET SEREW (1). | 7 |
AERATOR (7) may accumulate dirt causing | 5 |
| |
distorted and reduced water flow. Remove AERATOR (7) and rinse clean.
If spout drips, operate handles several times from OFF to ON position. Do not force - handles turn only 90˚.
11 CARE INSTRUCTIONS:
DO: SIMPLY RINSE THE PRODUCT CLEAN WITH CLEAR WATER. DRY WITH A SOFT COTTON FLANNEL CLOTH.
DO NOT: DO NOT CLEAN THE PRODUCT WITH SOAPS, ACID, POLISH, ABRASIVES, HARSH CLEANERS, OR A CLOTH WITH A COARSE SURFACE.
M968468 REV 1 . 2
4