1 | SINK INSTALLATION |
| B |
| Mark |
| SIDE |
X | VIEW |
|
COUNTERTOP
A
22
(559mm)
XSHOULD BE MAXIMUM 25mm (1")
CABINET
FACE
SINK UPSIDE DOWN
CENTER MARK ON | C | A CENTER OF MOUNTING | |
BACKSIDE OF SINK | ALIGN MARKS | ||
LOCATION MARKED ON | |||
| |||
|
| COUNTERTOP | |
|
| C | |
|
| SINK PLACED | |
COUNTERTOP |
| UPSIDE DOWN | |
| ON COUNTERTOP | ||
TOP |
| ||
VIEW | C/L | E | |
| |||
|
| ||
|
| TRACE | |
|
| THIS EDGE | |
|
| D | |
APRON |
| CABINET | |
| FACE | ||
EDGE |
| ||
|
|
![]() X
X
APRON
PORTION
OF SINK
B
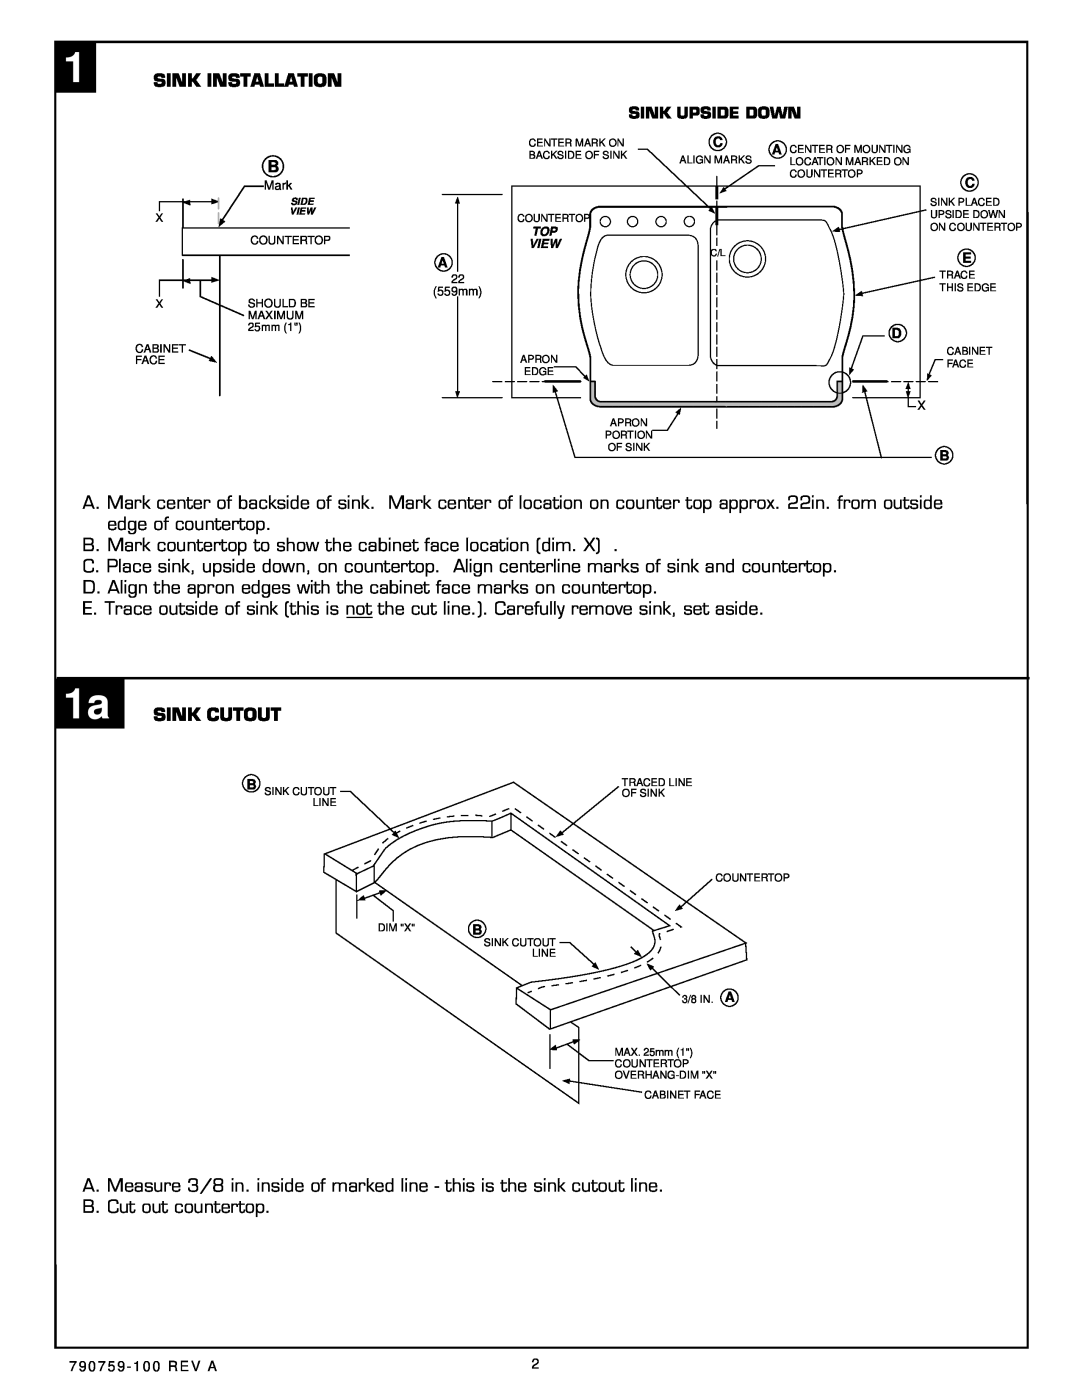
A. Mark center of backside of sink. Mark center of location on counter top approx. 22in. from outside edge of countertop.
B. Mark countertop to show the cabinet face location (dim. X) .
C. Place sink, upside down, on countertop. Align centerline marks of sink and countertop. D. Align the apron edges with the cabinet face marks on countertop.
E. Trace outside of sink (this is not the cut line.). Carefully remove sink, set aside.
1a SINK CUTOUT
B SINK CUTOUT | TRACED LINE |
OF SINK | |
LINE |
|
COUNTERTOP
DIM "X" | B |
SINK CUTOUT
LINE
3/8 IN. A
MAX. 25mm (1")
COUNTERTOP
CABINET FACE
A. Measure 3/8 in. inside of marked line - this is the sink cutout line.
B. Cut out countertop.
7 9 0 7 5 9 - 1 0 0 R E V A | 2 |