Windows XP | 1. | Logon to the PC with an account that has system administrative |
|
| privileges. |
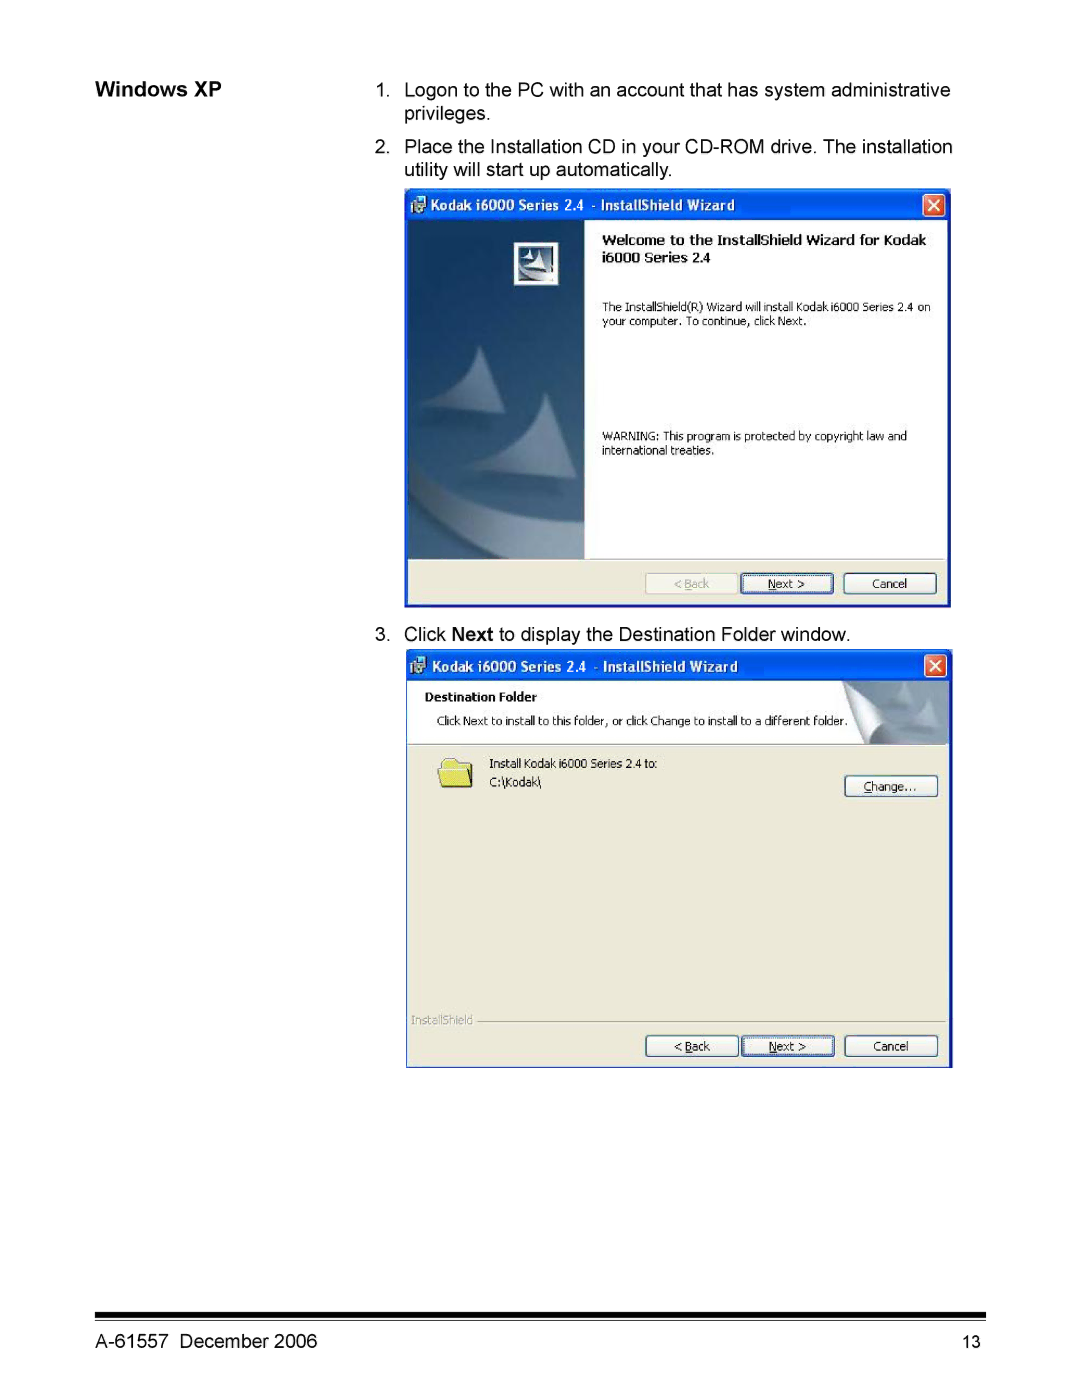
| 2. | Place the Installation CD in your |
|
| utility will start up automatically. |
3. Click Next to display the Destination Folder window.
13 |
Windows XP | 1. | Logon to the PC with an account that has system administrative |
|
| privileges. |
| 2. | Place the Installation CD in your |
|
| utility will start up automatically. |
3. Click Next to display the Destination Folder window.
13 |