16 INSTALL SINK APRON
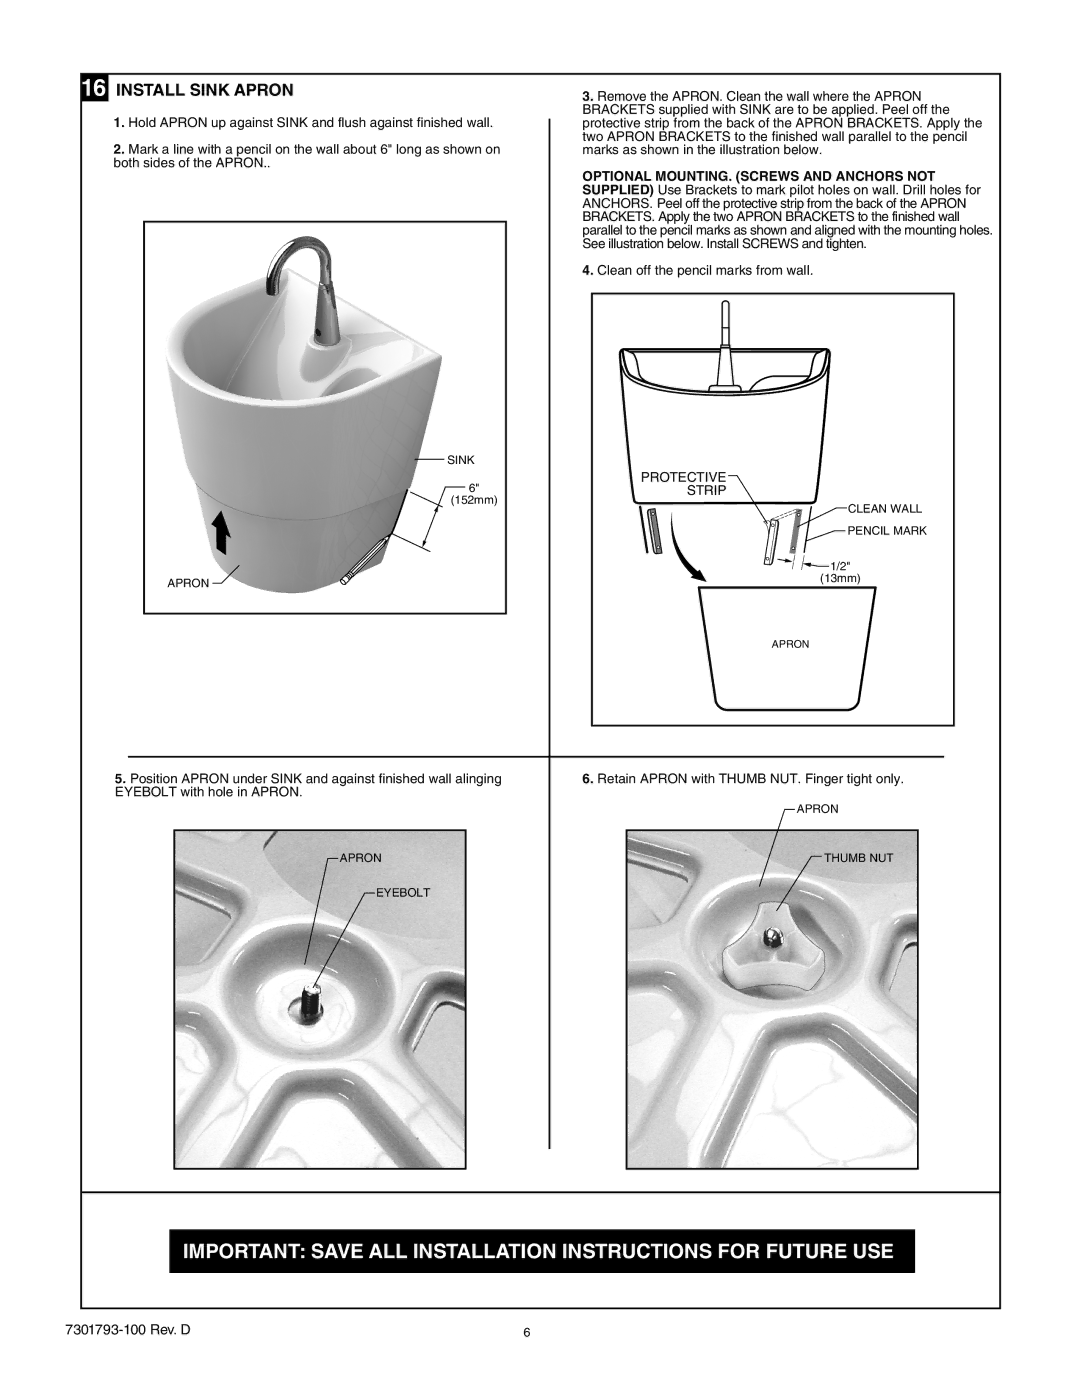
1.Hold APRON up against SINK and flush against finished wall.
2.Mark a line with a pencil on the wall about 6" long as shown on both sides of the APRON..
SINK
6"
(152mm)
APRON ![]()
3.Remove the APRON. Clean the wall where the APRON BRACKETS supplied with SINK are to be applied. Peel off the protective strip from the back of the APRON BRACKETS. Apply the two APRON BRACKETS to the finished wall parallel to the pencil marks as shown in the illustration below.
OPTIONAL MOUNTING. (SCREWS AND ANCHORS NOT SUPPLIED) Use Brackets to mark pilot holes on wall. Drill holes for ANCHORS. Peel off the protective strip from the back of the APRON BRACKETS. Apply the two APRON BRACKETS to the finished wall parallel to the pencil marks as shown and aligned with the mounting holes. See illustration below. Install SCREWS and tighten.
4.Clean off the pencil marks from wall.
PROTECTIVE
STRIP
CLEAN WALL
![]() PENCIL MARK
PENCIL MARK
![]()
![]() 1/2" (13mm)
1/2" (13mm)
APRON
5.Position APRON under SINK and against finished wall alinging EYEBOLT with hole in APRON.
6.Retain APRON with THUMB NUT. Finger tight only.
APRON
APRON
THUMB NUT
EYEBOLT
IMPORTANT: SAVE ALL INSTALLATION INSTRUCTIONS FOR FUTURE USE
6 |
