
M968641 specifications
The American Standard M968641 is a premier choice for those looking to update their bathroom fixtures with a focus on both aesthetics and functionality. Designed with precision engineering, this faucet component exemplifies the blend of modern design and innovative technology, ensuring reliability and performance.One of the standout features of the M968641 is its compatibility with a variety of American Standard faucets, making it a versatile replacement part. This adaptability is essential for homeowners looking to maintain their existing plumbing setups without the need for extensive renovations. The M968641 is crafted to integrate seamlessly, providing a hassle-free replacement process.
The construction of the M968641 utilizes high-quality materials that ensure durability and longevity. It is designed to resist corrosion, tarnishing, and mineral buildup, which is essential for maintaining the appearance and functionality of bathroom fixtures over time. This durability is further enhanced through American Standard's commitment to quality control and engineering excellence.
Another significant aspect of this product is its technology designed for water efficiency. The M968641 incorporates features aimed at promoting eco-friendliness without compromising on performance. With a flow rate that meets or exceeds federal standards, this product helps conserve water, making it an environmentally responsible choice for today’s consumers. It is an excellent fit for those looking to reduce their carbon footprint while still enjoying a powerful water flow when needed.
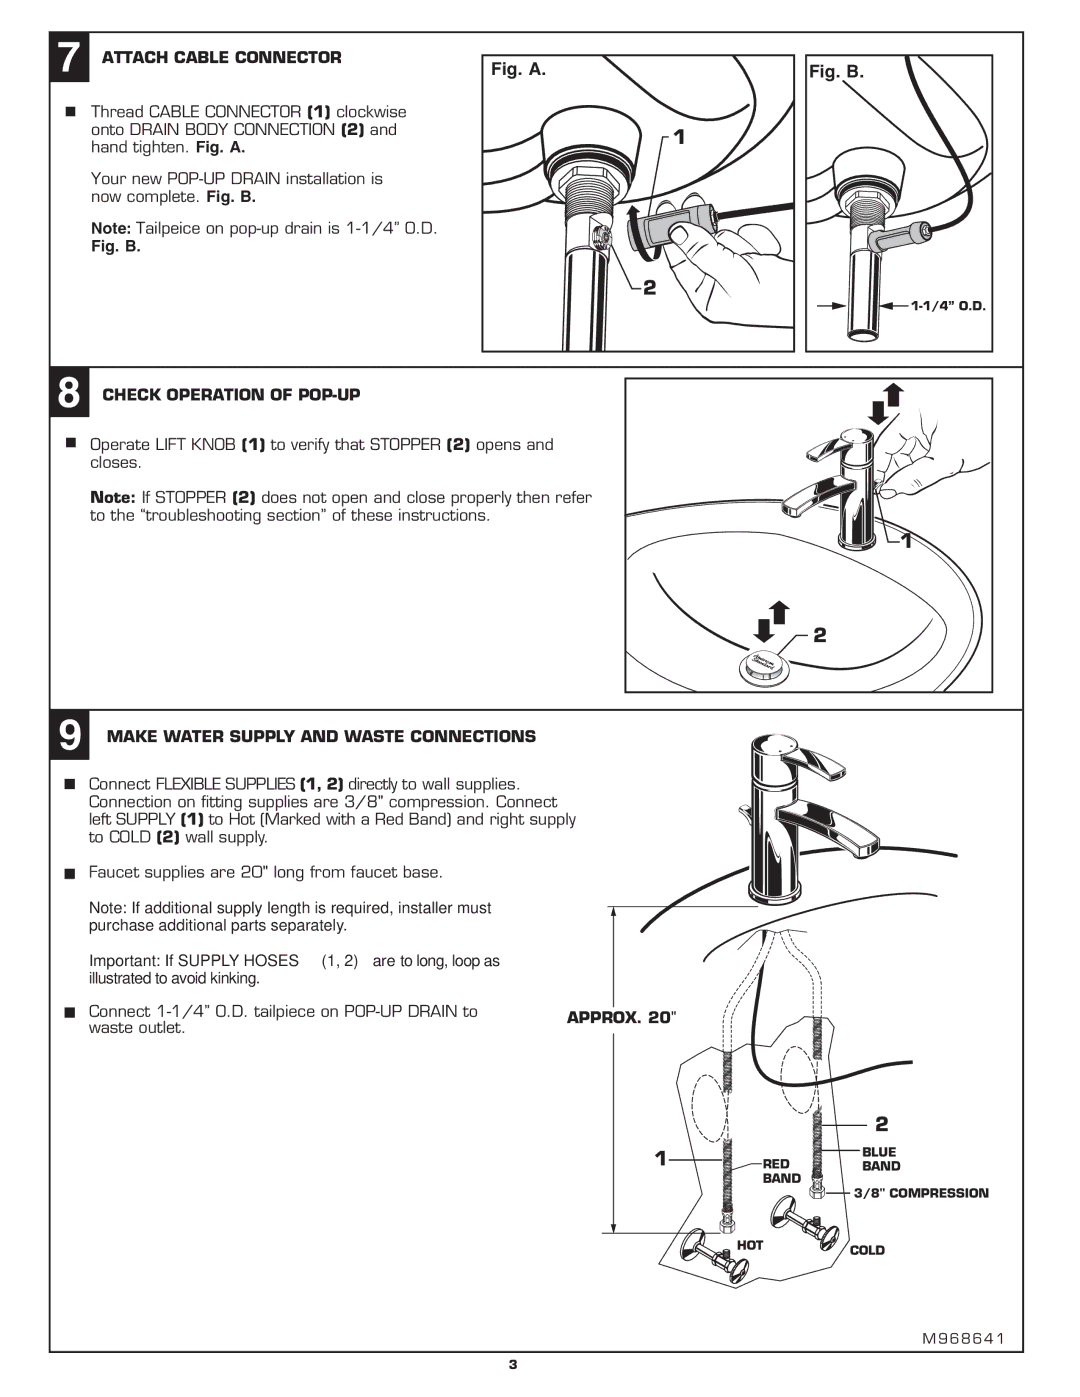
Installation of the M968641 is straightforward, thanks to its user-friendly design. Homeowners can often replace it with minimal tools, making it a practical choice for DIY enthusiasts and average consumers alike. Comprehensive installation instructions accompany the part, ensuring that users have all the information they need for a successful setup.
Overall, the American Standard M968641 is a reliable and efficient component that exemplifies the brand's commitment to quality and innovation. Its durable construction, compatibility with various faucets, and focus on water conservation make it an ideal choice for those looking to enhance their bathroom experience. With this product, consumers can expect both quality and aesthetic appeal, making it a worthwhile investment for modern home bathrooms.