B1RE Bass Amplifier
The Rear Panel
#98689
175W @ 8 OHMS
300W @ 4 OHMS
CAUTION |
RISK OF ELECTRIC SHOCK |
DO NOT OPEN |
AVIS: RISQUE DE CHOC ELECTRIQUE. |
NE PAS OUVRIR. |
WARNING: TO REDUCE THE RISK OF FIRE |
OR ELECTRIC SHOCK, DO NOT EXPOSE THIS |
EQUIPMENT TO RAIN OR MOISTURE. |
MADE IN THE U.S.A. BY
SLM ELECTRONICS
1400 FERGUSON AVENUE
ST. LOUIS, MO 63133
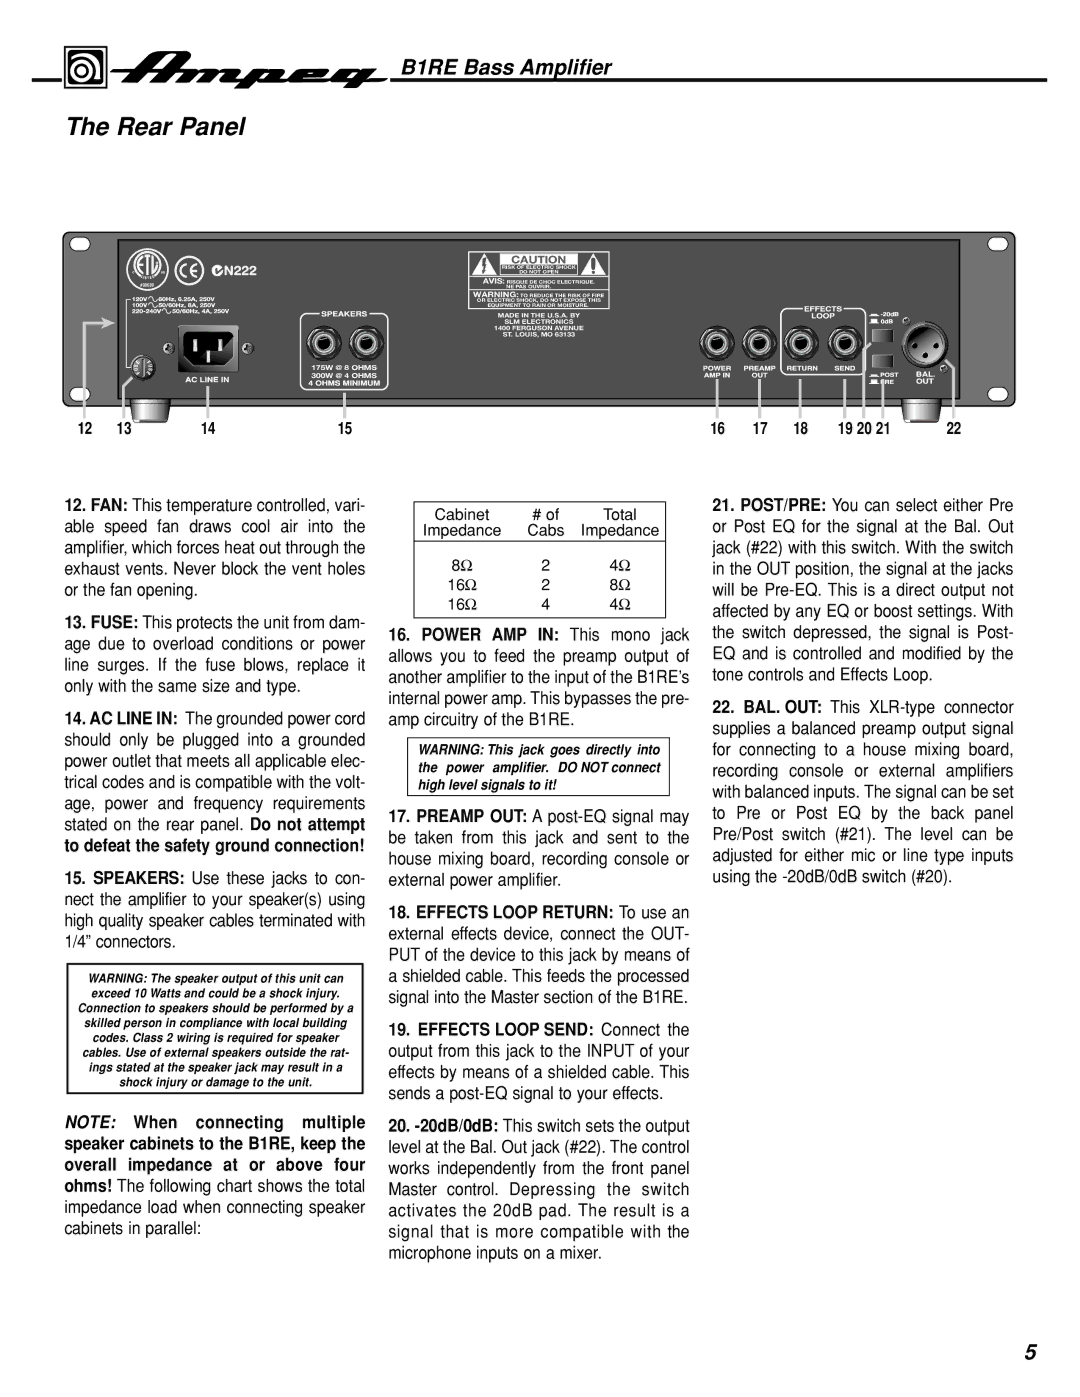
12 | 13 | 14 | 15 | 16 | 17 | 18 | 19 20 21 | 22 |
12.FAN: This temperature controlled, vari- able speed fan draws cool air into the amplifier, which forces heat out through the exhaust vents. Never block the vent holes or the fan opening.
13.FUSE: This protects the unit from dam- age due to overload conditions or power line surges. If the fuse blows, replace it only with the same size and type.
14.AC LINE IN: The grounded power cord should only be plugged into a grounded power outlet that meets all applicable elec- trical codes and is compatible with the volt- age, power and frequency requirements stated on the rear panel. Do not attempt to defeat the safety ground connection!
15.SPEAKERS: Use these jacks to con- nect the amplifier to your speaker(s) using high quality speaker cables terminated with 1/4” connectors.
WARNING: The speaker output of this unit can exceed 10 Watts and could be a shock injury.
Connection to speakers should be performed by a skilled person in compliance with local building codes. Class 2 wiring is required for speaker cables. Use of external speakers outside the rat- ings stated at the speaker jack may result in a shock injury or damage to the unit.
NOTE: When connecting multiple speaker cabinets to the B1RE, keep the overall impedance at or above four ohms! The following chart shows the total impedance load when connecting speaker cabinets in parallel:
Cabinet | # of | Total |
Impedance | Cabs | Impedance |
8Ω | 2 | 4Ω |
16Ω | 2 | 8Ω |
16Ω | 4 | 4Ω |
|
|
|
16.POWER AMP IN: This mono jack allows you to feed the preamp output of another amplifier to the input of the B1RE’s internal power amp. This bypasses the pre- amp circuitry of the B1RE.
WARNING: This jack goes directly into the power amplifier. DO NOT connect high level signals to it!
17.PREAMP OUT: A
18.EFFECTS LOOP RETURN: To use an external effects device, connect the OUT- PUT of the device to this jack by means of a shielded cable. This feeds the processed signal into the Master section of the B1RE.
19.EFFECTS LOOP SEND: Connect the output from this jack to the INPUT of your effects by means of a shielded cable. This sends a
20.
21.POST/PRE: You can select either Pre or Post EQ for the signal at the Bal. Out jack (#22) with this switch. With the switch in the OUT position, the signal at the jacks will be
22.BAL. OUT: This
5