Chapter 1 | ReadyPanel Setup |
Installing Mounting Hardware
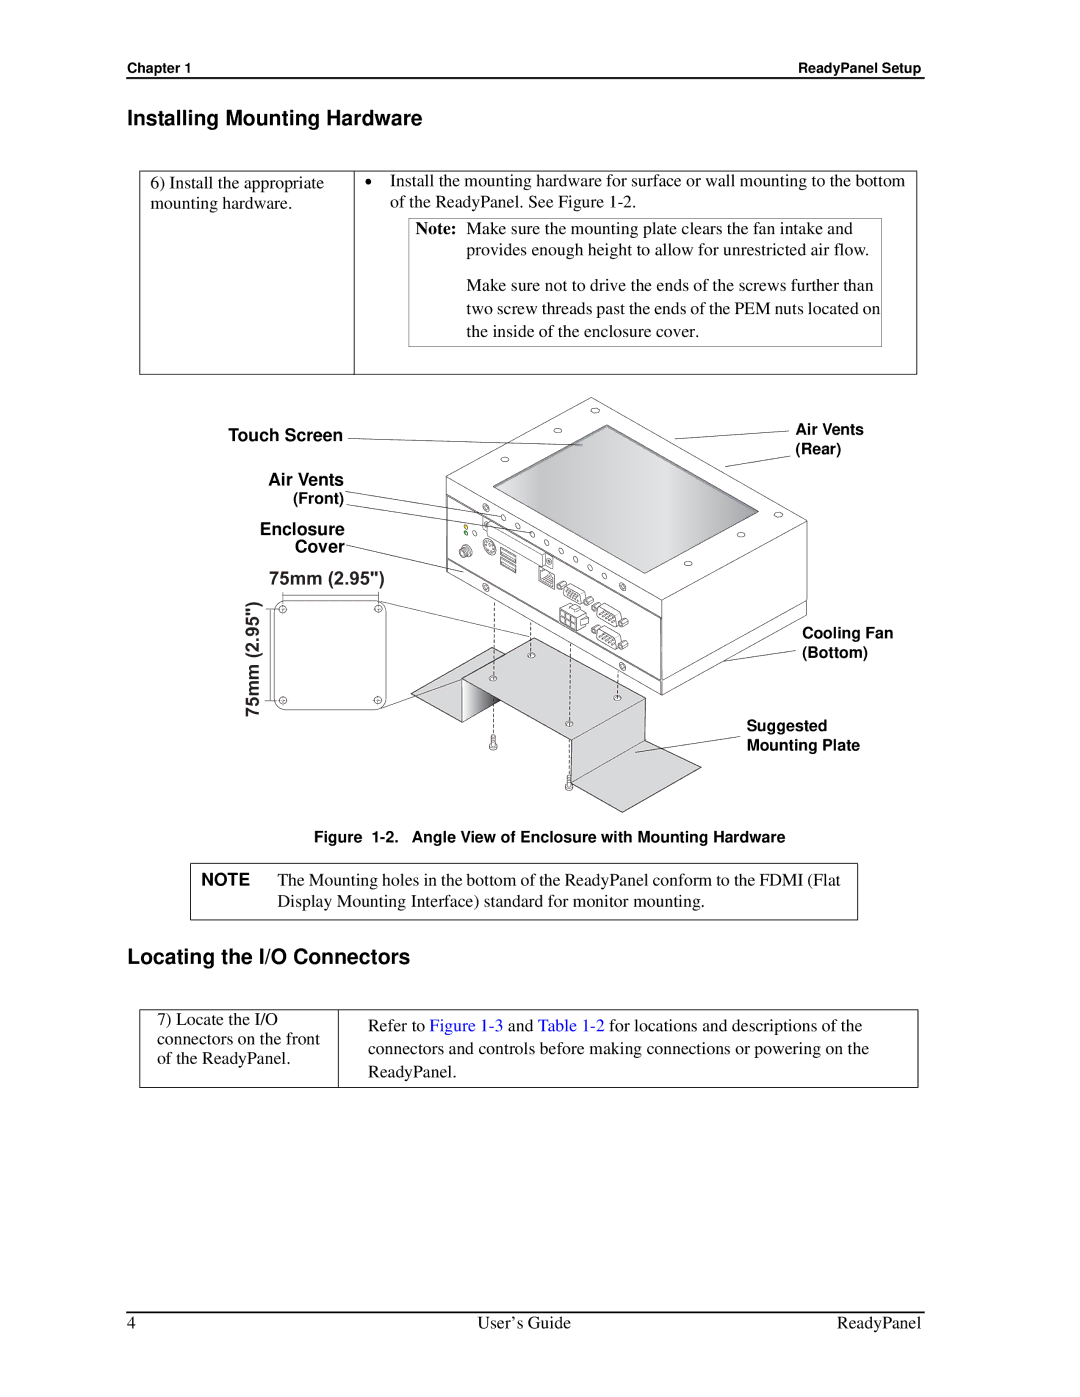
6)Install the appropriate mounting hardware.
•Install the mounting hardware for surface or wall mounting to the bottom of the ReadyPanel. See Figure
Note: Make sure the mounting plate clears the fan intake and provides enough height to allow for unrestricted air flow.
Make sure not to drive the ends of the screws further than two screw threads past the ends of the PEM nuts located on the inside of the enclosure cover.
Touch Screen | Air Vents |
| (Rear) |
Air Vents
(Front)![]()
Enclosure |
|
Cover |
|
75mm (2.95") |
|
(2.95") | Cooling Fan |
(Bottom) | |
75mm | Suggested |
| |
| Mounting Plate |
Figure | Angle View of Enclosure with Mounting Hardware |
NOTE The Mounting holes in the bottom of the ReadyPanel conform to the FDMI (Flat Display Mounting Interface) standard for monitor mounting.
Locating the I/O Connectors
7)Locate the I/O connectors on the front of the ReadyPanel.
Refer to Figure
4 | User’s Guide | ReadyPanel |