Chapter 1 | ReadyPanel Setup |
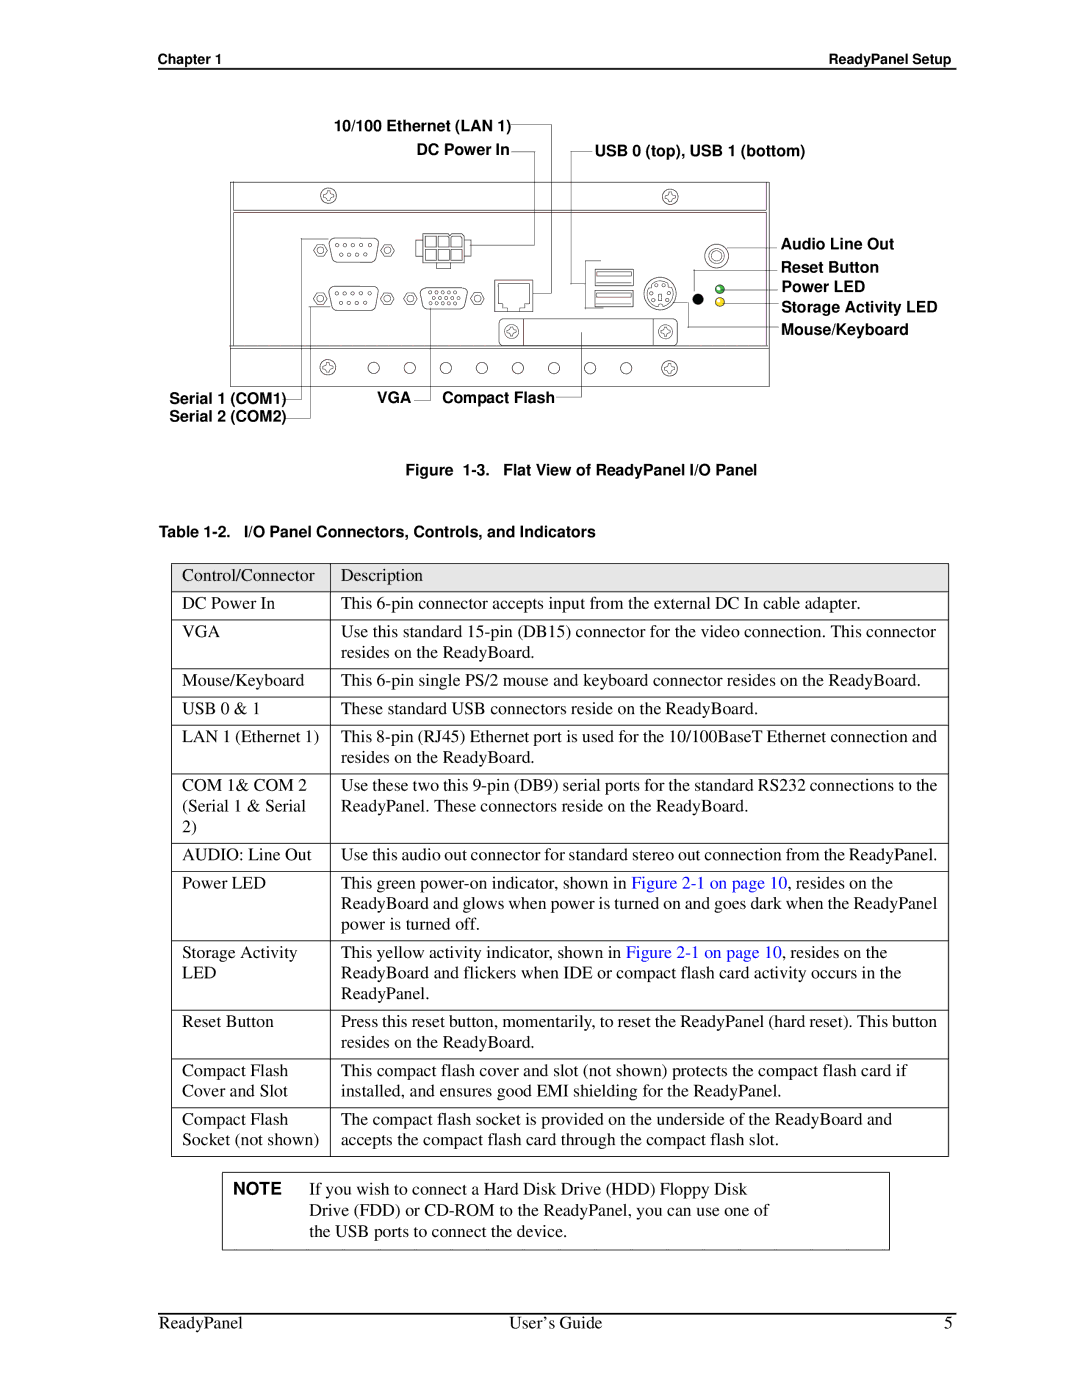
Serial 1 (COM1) Serial 2 (COM2)
10/100 Ethernet (LAN 1) DC Power In
VGA Compact Flash
USB 0 (top), USB 1 (bottom)
Audio Line Out
Reset Button
![]() Power LED
Power LED
![]() Storage Activity LED
Storage Activity LED
Mouse/Keyboard
Figure 1-3. Flat View of ReadyPanel I/O Panel
Table 1-2. I/O Panel Connectors, Controls, and Indicators
Control/Connector | Description |
DC Power In | This |
|
|
VGA | Use this standard |
| resides on the ReadyBoard. |
|
|
Mouse/Keyboard | This |
|
|
USB 0 & 1 | These standard USB connectors reside on the ReadyBoard. |
|
|
LAN 1 (Ethernet 1) | This |
| resides on the ReadyBoard. |
|
|
COM 1& COM 2 | Use these two this |
(Serial 1 & Serial | ReadyPanel. These connectors reside on the ReadyBoard. |
2) |
|
|
|
AUDIO: Line Out | Use this audio out connector for standard stereo out connection from the ReadyPanel. |
|
|
Power LED | This green |
| ReadyBoard and glows when power is turned on and goes dark when the ReadyPanel |
| power is turned off. |
|
|
Storage Activity | This yellow activity indicator, shown in Figure |
LED | ReadyBoard and flickers when IDE or compact flash card activity occurs in the |
| ReadyPanel. |
|
|
Reset Button | Press this reset button, momentarily, to reset the ReadyPanel (hard reset). This button |
| resides on the ReadyBoard. |
|
|
Compact Flash | This compact flash cover and slot (not shown) protects the compact flash card if |
Cover and Slot | installed, and ensures good EMI shielding for the ReadyPanel. |
|
|
Compact Flash | The compact flash socket is provided on the underside of the ReadyBoard and |
Socket (not shown) | accepts the compact flash card through the compact flash slot. |
|
|
NOTE If you wish to connect a Hard Disk Drive (HDD) Floppy Disk Drive (FDD) or
ReadyPanel | User’s Guide | 5 |