Setup Instructions
Connecting the Batteries
The UPS1500EPM ships with the eight batteries installed inside the unit. Before use, you will need to connect the main power connector inside the unit:
1.Remove the Release tabs on the front panel (see FIG. 1) to expose the screws that secure the Battery Compartment Cover.
2.Remove the screws beneath the Release tabs (FIG. 3).
FIG. 3 Remove the screws that secure the Battery Compartment Cover
3.Remove the Battery Compartment Cover to access the Battery Com- partment.
4.Connect the
FIG. 4 Connect the battery cable harness to the matching connector inside the unit
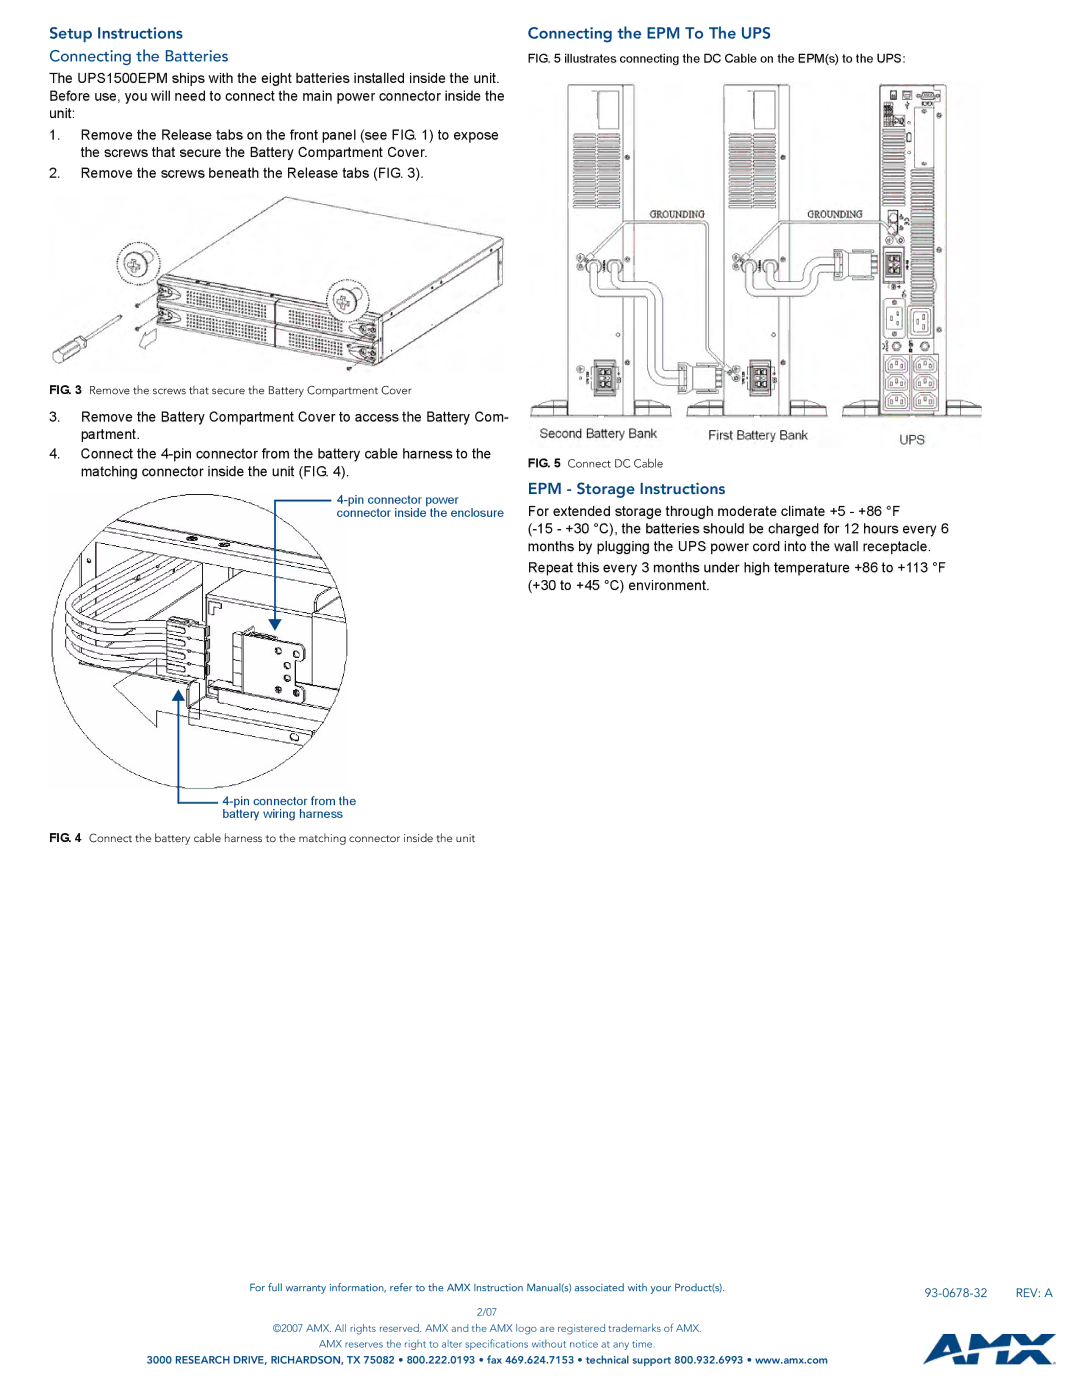
Connecting the EPM To The UPS
FIG. 5 illustrates connecting the DC Cable on the EPM(s) to the UPS:
FIG. 5 Connect DC Cable
EPM - Storage Instructions
For extended storage through moderate climate +5 - +86 °F
Repeat this every 3 months under high temperature +86 to +113 °F (+30 to +45 °C) environment.
For full warranty information, refer to the AMX Instruction Manual(s) associated with your Product(s). |
| REV: A |
|
2/07
©2007 AMX. All rights reserved. AMX and the AMX logo are registered trademarks of AMX.
AMX reserves the right to alter specifications without notice at any time.
3000 RESEARCH DRIVE, RICHARDSON, TX 75082 • 800.222.0193 • fax 469.624.7153 • technical support 800.932.6993 • www.amx.com