Installing Equipment
This section provides information on how to install
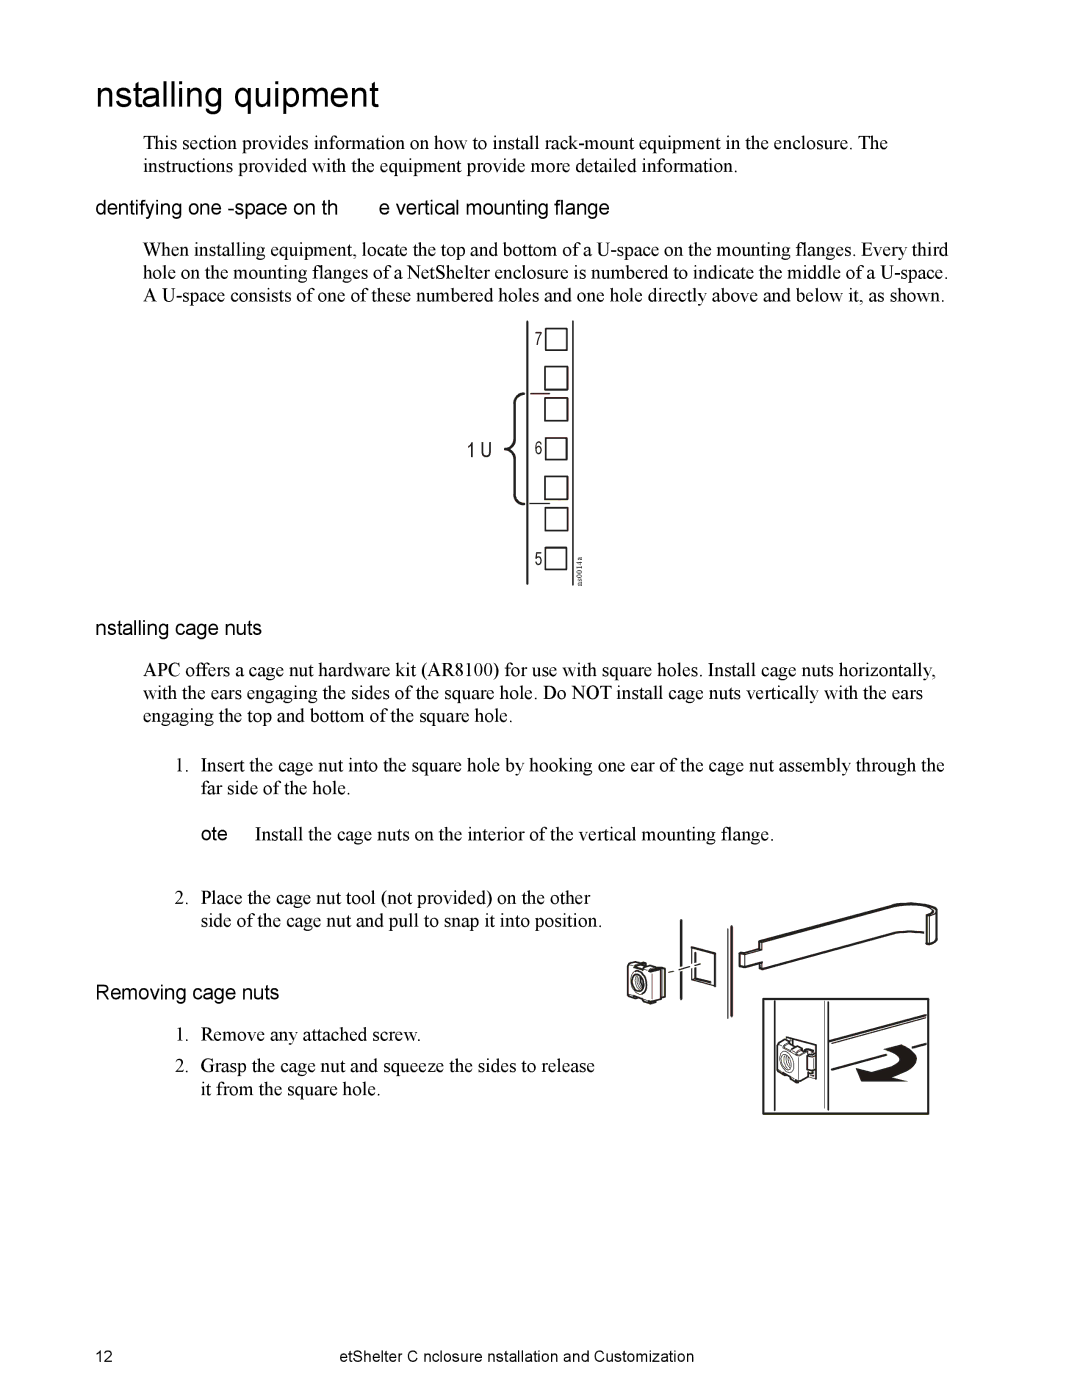
Identifying one U-space on the vertical mounting flange
When installing equipment, locate the top and bottom of a
7![]()
1 U ![]() 6
6![]()
5![]()
ns0014a
Installing cage nuts
APC offers a cage nut hardware kit (AR8100) for use with square holes. Install cage nuts horizontally, with the ears engaging the sides of the square hole. Do NOT install cage nuts vertically with the ears engaging the top and bottom of the square hole.
1.Insert the cage nut into the square hole by hooking one ear of the cage nut assembly through the far side of the hole.
Note: Install the cage nuts on the interior of the vertical mounting flange.
2.Place the cage nut tool (not provided) on the other
side of the cage nut and pull to snap it into position.
Removing cage nuts
1. Remove any attached screw.
2. Grasp the cage nut and squeeze the sides to release it from the square hole.
12 | NetShelter CX Enclosure: Installation and Customization |