Removing the Installed Hard Drive
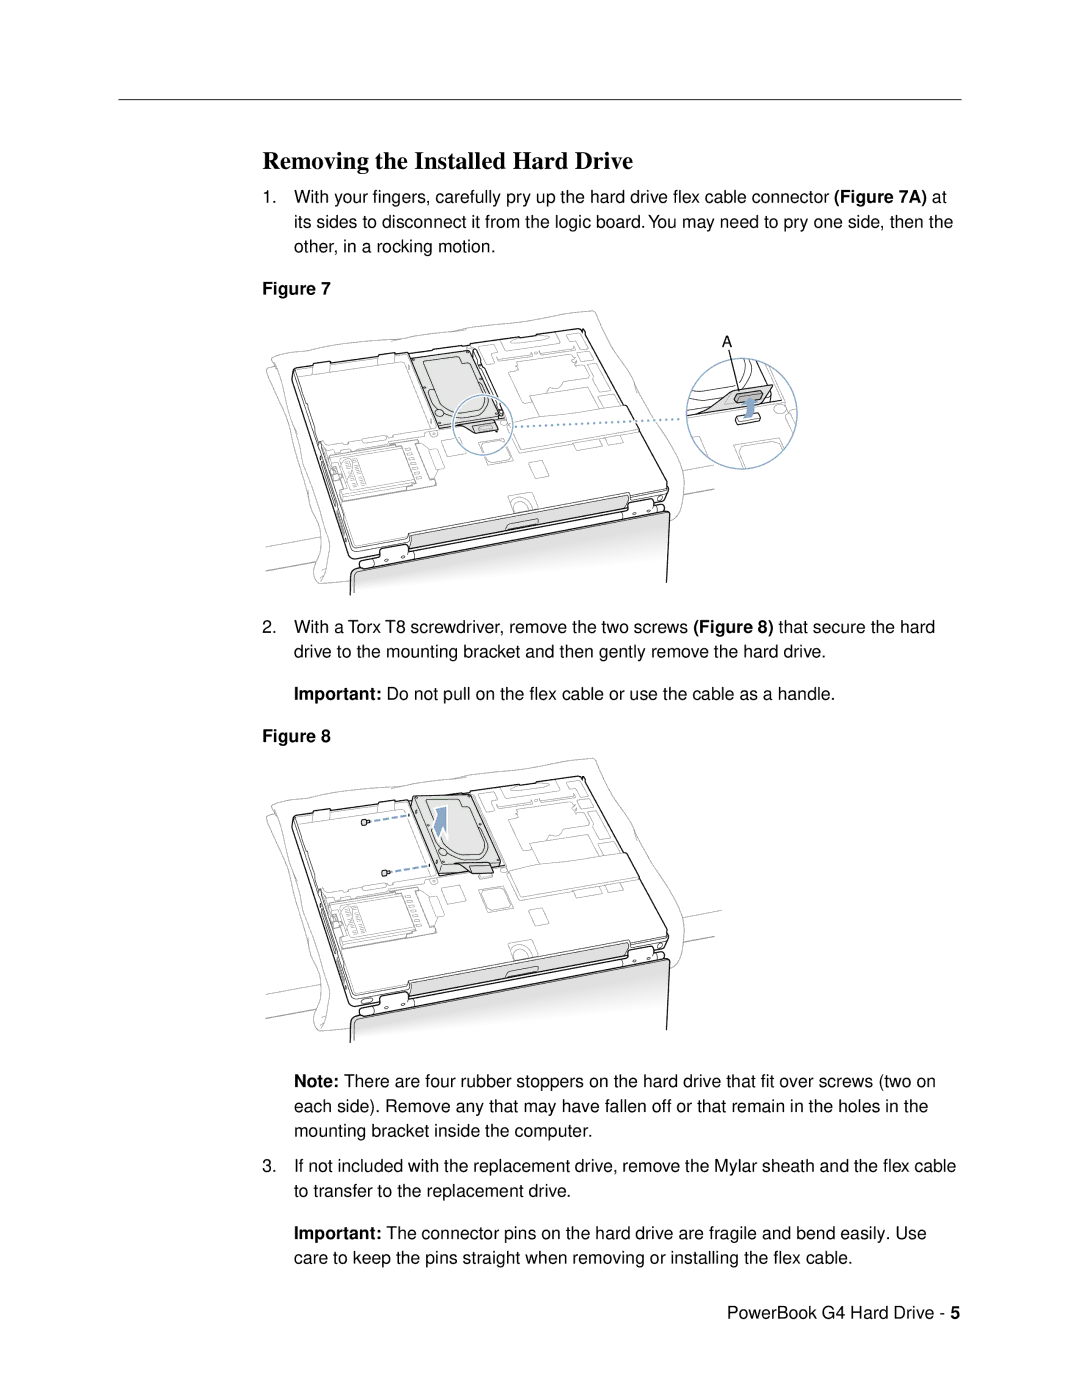
1.With your fingers, carefully pry up the hard drive flex cable connector (Figure 7A) at its sides to disconnect it from the logic board. You may need to pry one side, then the other, in a rocking motion.
Figure 7
A
2.With a Torx T8 screwdriver, remove the two screws (Figure 8) that secure the hard drive to the mounting bracket and then gently remove the hard drive.
Important: Do not pull on the flex cable or use the cable as a handle.
Figure 8
Note: There are four rubber stoppers on the hard drive that fit over screws (two on each side). Remove any that may have fallen off or that remain in the holes in the mounting bracket inside the computer.
3.If not included with the replacement drive, remove the Mylar sheath and the flex cable to transfer to the replacement drive.
Important: The connector pins on the hard drive are fragile and bend easily. Use care to keep the pins straight when removing or installing the flex cable.
PowerBook G4 Hard Drive - 5