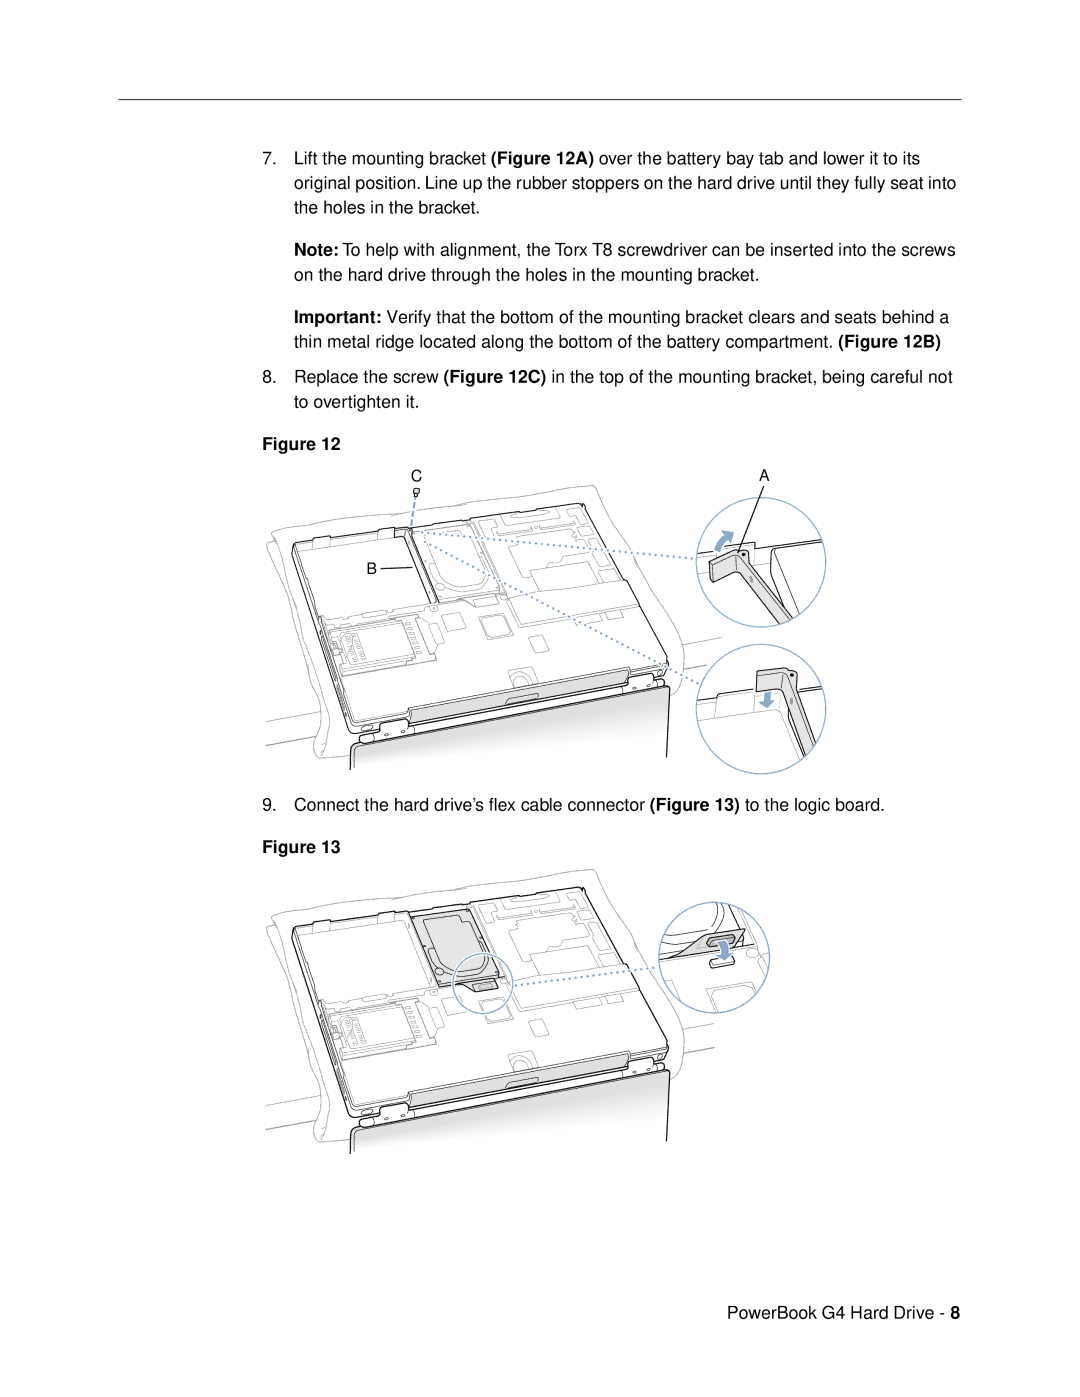
7.Lift the mounting bracket (Figure 12A) over the battery bay tab and lower it to its original position. Line up the rubber stoppers on the hard drive until they fully seat into the holes in the bracket.
Note: To help with alignment, the Torx T8 screwdriver can be inserted into the screws on the hard drive through the holes in the mounting bracket.
Important: Verify that the bottom of the mounting bracket clears and seats behind a thin metal ridge located along the bottom of the battery compartment. (Figure 12B)
8.Replace the screw (Figure 12C) in the top of the mounting bracket, being careful not to overtighten it.
Figure 12
CA
B ![]()
9. Connect the hard drive’s flex cable connector (Figure 13) to the logic board.
Figure 13
PowerBook G4 Hard Drive - 8