Installing the Replacement Hard Drive
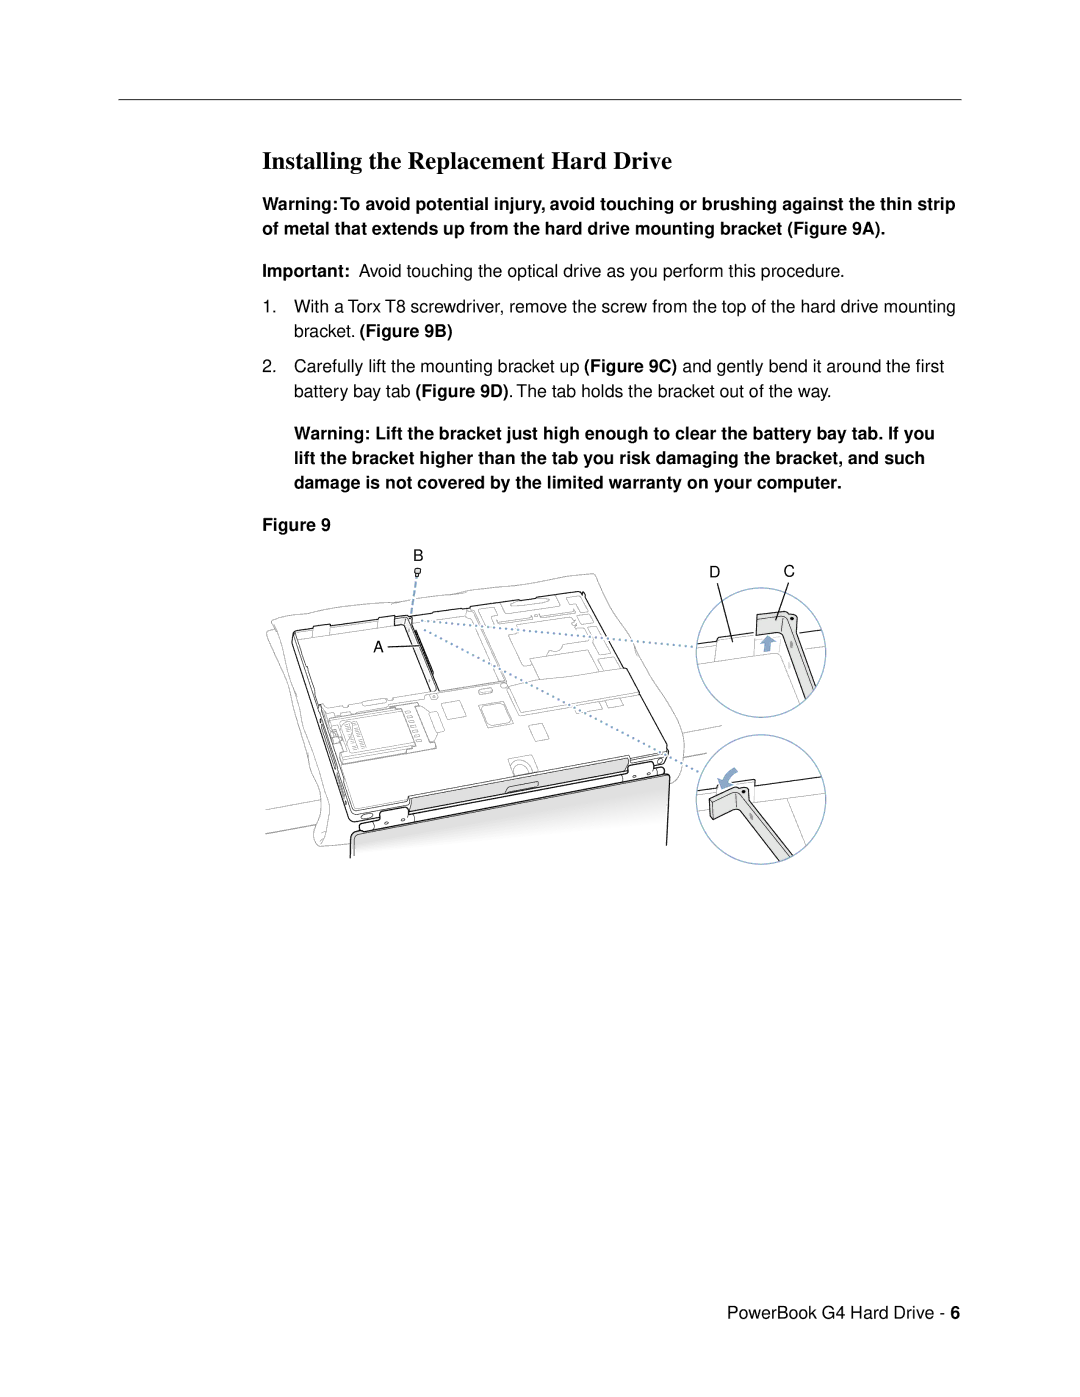
Warning: To avoid potential injury, avoid touching or brushing against the thin strip of metal that extends up from the hard drive mounting bracket (Figure 9A).
Important: Avoid touching the optical drive as you perform this procedure.
1.With a Torx T8 screwdriver, remove the screw from the top of the hard drive mounting bracket. (Figure 9B)
2.Carefully lift the mounting bracket up (Figure 9C) and gently bend it around the first battery bay tab (Figure 9D). The tab holds the bracket out of the way.
Warning: Lift the bracket just high enough to clear the battery bay tab. If you lift the bracket higher than the tab you risk damaging the bracket, and such damage is not covered by the limited warranty on your computer.
Figure 9
B
D C
A ![]()
PowerBook G4 Hard Drive - 6