INSTALL LAMP
1.Remove Lamp from shipping tube. Use ceramic ends of Lamp when handling – do not touch the glass tube of Lamp. Use alcohol to remove any dirt and/or fingerprints from the Lamp.
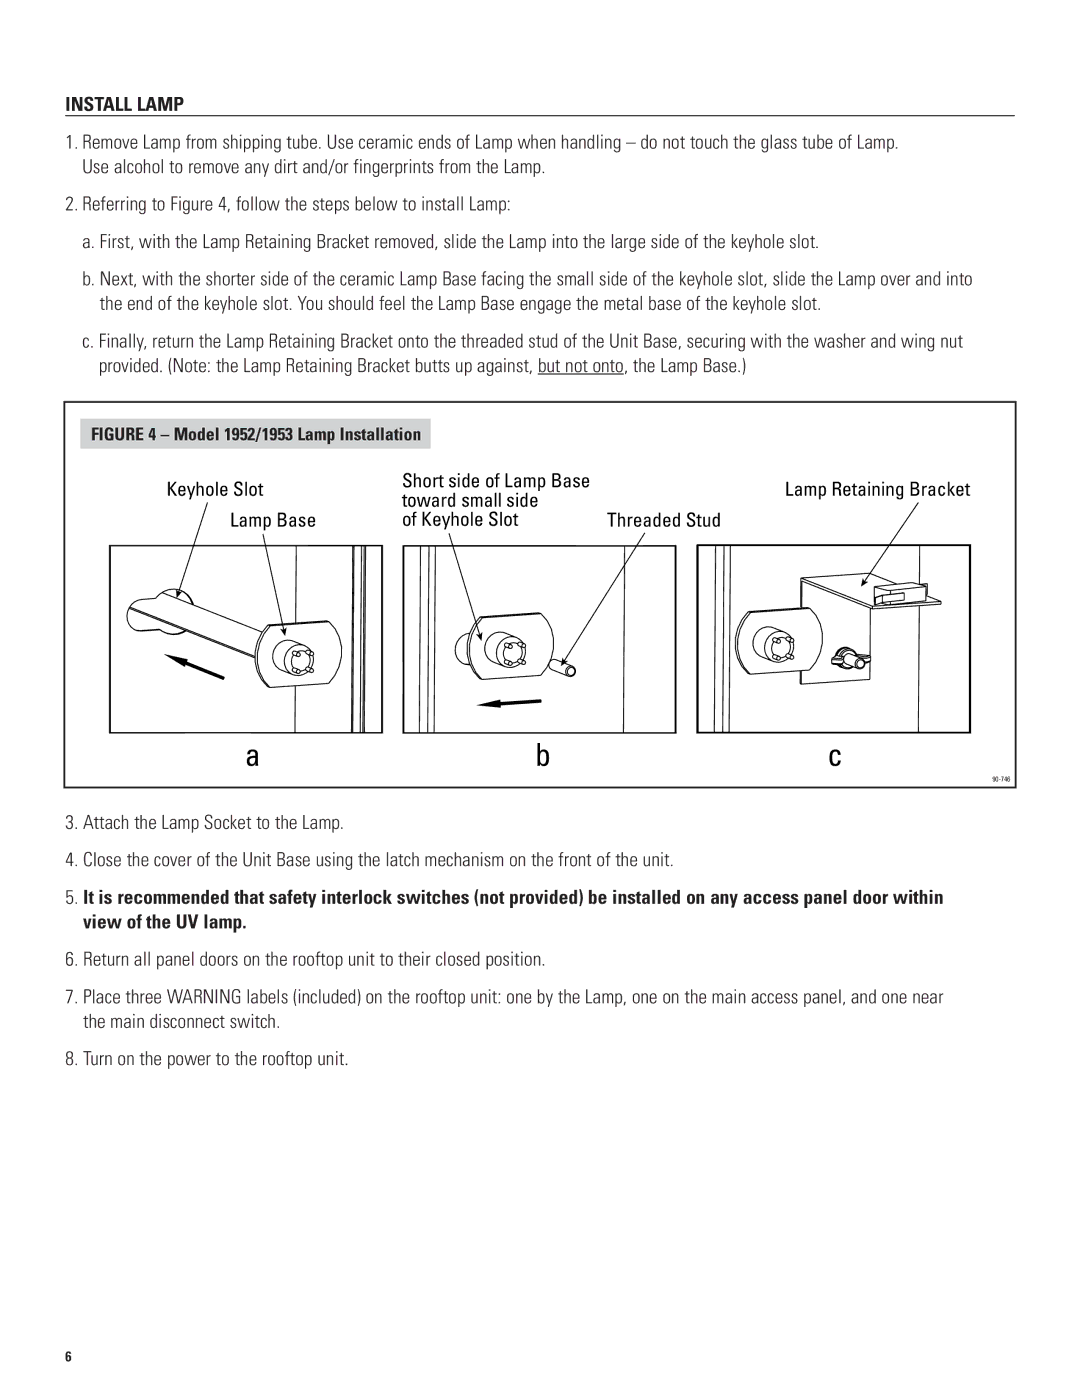
2.Referring to Figure 4, follow the steps below to install Lamp:
a.First, with the Lamp Retaining Bracket removed, slide the Lamp into the large side of the keyhole slot.
b.Next, with the shorter side of the ceramic Lamp Base facing the small side of the keyhole slot, slide the Lamp over and into the end of the keyhole slot. You should feel the Lamp Base engage the metal base of the keyhole slot.
c.Finally, return the Lamp Retaining Bracket onto the threaded stud of the Unit Base, securing with the washer and wing nut provided. (Note: the Lamp Retaining Bracket butts up against, but not onto, the Lamp Base.)
FIGURE 4 – Model 1952/1953 Lamp Installation |
|
| ||
Keyhole Slot | Short side of Lamp Base | Lamp Retaining Bracket | ||
toward small side | ||||
|
| |||
Lamp Base | of Keyhole Slot | Threaded Stud | ||
a | b | c |
3.Attach the Lamp Socket to the Lamp.
4.Close the cover of the Unit Base using the latch mechanism on the front of the unit.
5.It is recommended that safety interlock switches (not provided) be installed on any access panel door within view of the UV lamp.
6.Return all panel doors on the rooftop unit to their closed position.
7.Place three WARNING labels (included) on the rooftop unit: one by the Lamp, one on the main access panel, and one near the main disconnect switch.
8.Turn on the power to the rooftop unit.
6