FRICTION DISC REPLACEMENT (932101, 309)
Remove Friction Disc
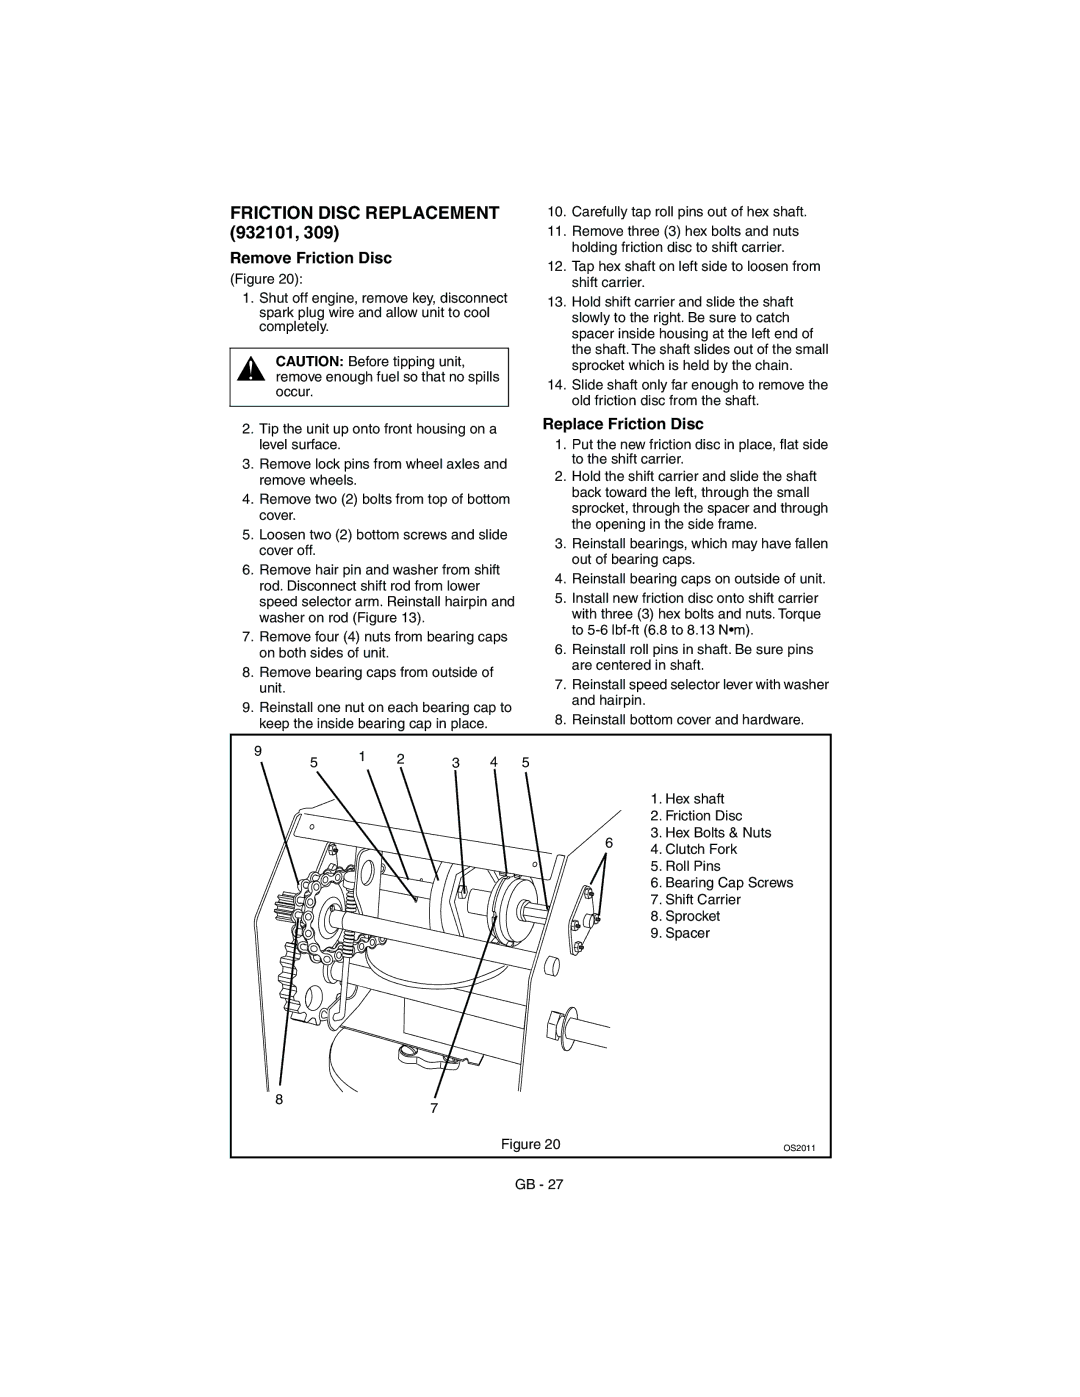
(Figure 20):
1.Shut off engine, remove key, disconnect spark plug wire and allow unit to cool completely.
CAUTION: Before tipping unit, remove enough fuel so that no spills occur.
2.Tip the unit up onto front housing on a level surface.
3.Remove lock pins from wheel axles and remove wheels.
4.Remove two (2) bolts from top of bottom cover.
5.Loosen two (2) bottom screws and slide cover off.
6.Remove hair pin and washer from shift rod. Disconnect shift rod from lower speed selector arm. Reinstall hairpin and washer on rod (Figure 13).
7.Remove four (4) nuts from bearing caps on both sides of unit.
8.Remove bearing caps from outside of unit.
9.Reinstall one nut on each bearing cap to keep the inside bearing cap in place.
10.Carefully tap roll pins out of hex shaft.
11.Remove three (3) hex bolts and nuts holding friction disc to shift carrier.
12.Tap hex shaft on left side to loosen from shift carrier.
13.Hold shift carrier and slide the shaft slowly to the right. Be sure to catch spacer inside housing at the left end of the shaft. The shaft slides out of the small sprocket which is held by the chain.
14.Slide shaft only far enough to remove the old friction disc from the shaft.
Replace Friction Disc
1.Put the new friction disc in place, flat side to the shift carrier.
2.Hold the shift carrier and slide the shaft back toward the left, through the small sprocket, through the spacer and through the opening in the side frame.
3.Reinstall bearings, which may have fallen out of bearing caps.
4.Reinstall bearing caps on outside of unit.
5.Install new friction disc onto shift carrier with three (3) hex bolts and nuts. Torque to
6.Reinstall roll pins in shaft. Be sure pins are centered in shaft.
7.Reinstall speed selector lever with washer and hairpin.
8.Reinstall bottom cover and hardware.
9 | 1 | 2 | 3 | 4 | 5 |
5 |
8
| 1. Hex shaft | |
| 2. Friction Disc | |
6 | 3. Hex Bolts & Nuts | |
4. Clutch Fork | ||
| ||
| 5. Roll Pins | |
| 6. Bearing Cap Screws | |
| 7. Shift Carrier | |
| 8. Sprocket | |
| 9. Spacer |
7
Figure 20 | OS2011 |
GB - 27