The accessories
Your oven offers you many differing cooking modes. These can only be achieved thanks to a certain number of accessories which we have chosen for you.
These accessories slide in and out of the different oven racks inside your oven and can thus be positioned in accordance with the individual cooking requirements of differing foods and dishes.
For each cooking mode and each example suggested, we specify the oven rack to use (from the oven bottom up).
Rung n˚ 5
Rung n˚ 4
Rung n˚ 3
Rung n˚ 2
Rung n˚ 1
Trammels
The dripping pan
Use it:
•as a dish support for all dishes when cooking on one rack only and in Bain Marie cooking,
•as a support for food (mini cup cakes, etc.),
•as a dripping pan to catch juices and fat dripping from food situated on the large grid.
We advise against using the dripping pan on the 4th and 5th racks from the oven bottom.
The large grid
Always use the large grid with the edges upwards and together with the dripping pan.
•When it is positioned on the 2nd rack from the oven bottom, it acts as a meat support, with the dripping pan placed on the 1st rack from the bottom to catch any dripping fat or juices.
•When it is positioned on the top rack (depending on the size of the foodstuff) for grilled food, the dripping pan is to be placed on the 1st rack from the oven bottom to catch any dripping fat or juices.
•When it is positioned on the top rack for cooking on more than one rack.
We advise against placing meat directly onto the dripping pan when using the "gratin" mode as the fat and juices heated from below in this particular cooking mode could in fact char and splash onto the oven inside panels and create smoke.
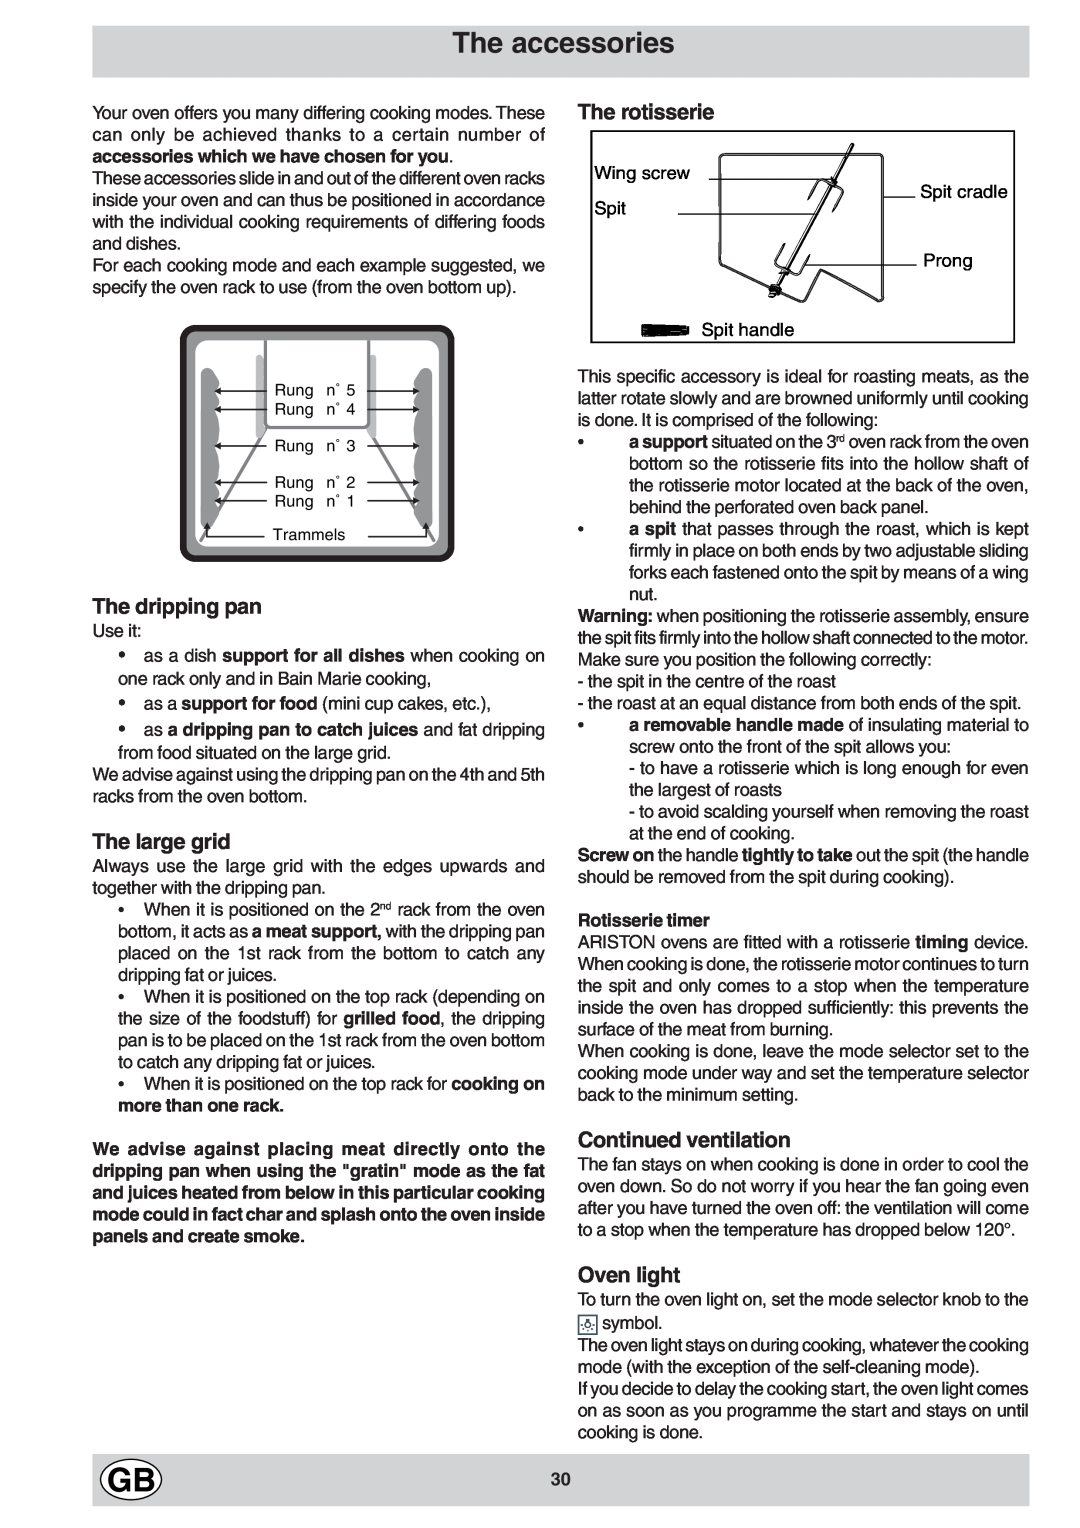
The rotisserie
Wing screw
Spit cradle
Spit
Prong
Spit handle
This specific accessory is ideal for roasting meats, as the latter rotate slowly and are browned uniformly until cooking is done. It is comprised of the following:
•a support situated on the 3rd oven rack from the oven bottom so the rotisserie fits into the hollow shaft of the rotisserie motor located at the back of the oven, behind the perforated oven back panel.
•a spit that passes through the roast, which is kept firmly in place on both ends by two adjustable sliding forks each fastened onto the spit by means of a wing nut.
Warning: when positioning the rotisserie assembly, ensure the spit fits firmly into the hollow shaft connected to the motor. Make sure you position the following correctly:
-the spit in the centre of the roast
-the roast at an equal distance from both ends of the spit.
• a removable handle made of insulating material to screw onto the front of the spit allows you:
-to have a rotisserie which is long enough for even the largest of roasts
-to avoid scalding yourself when removing the roast at the end of cooking.
Screw on the handle tightly to take out the spit (the handle should be removed from the spit during cooking).
Rotisserie timer
ARISTON ovens are fitted with a rotisserie timing device. When cooking is done, the rotisserie motor continues to turn the spit and only comes to a stop when the temperature inside the oven has dropped sufficiently: this prevents the surface of the meat from burning.
When cooking is done, leave the mode selector set to the cooking mode under way and set the temperature selector back to the minimum setting.
Continued ventilation
The fan stays on when cooking is done in order to cool the oven down. So do not worry if you hear the fan going even after you have turned the oven off: the ventilation will come to a stop when the temperature has dropped below 120°.
Oven light
To turn the oven light on, set the mode selector knob to the
![]()
![]() symbol.
symbol.
The oven light stays on during cooking, whatever the cooking mode (with the exception of the
If you decide to delay the cooking start, the oven light comes on as soon as you programme the start and stays on until cooking is done.
30