Wireless Setting
Step | Relocate Camera and Final Test |
1 Unplugged Ethernet
Unplug the RJ45 on both router and the network camera so that you can start to use wireless independently.
3 Test & RUN
You may “Test” if it has been connected and operated smoothly.
1)Set Up your PC on the same WLAN subnet.
2)Use IP Finder to identify the Network Camera.
3)Use IE brower to view the video
4)Check to make sure that wireless signal strength is at least 50%.
5)Check to make sure that the Video Quality is set lower than 1.5Mbps
6)View the video.
Step  Wireless Setting
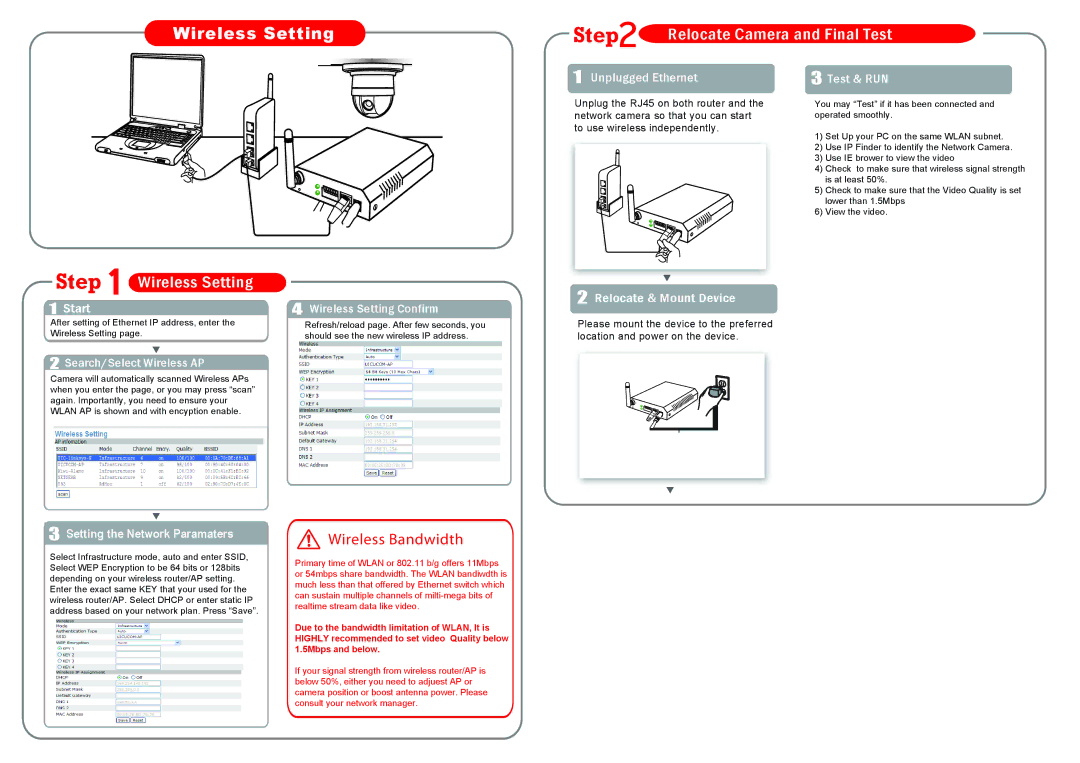
1Start
After setting of Ethernet IP address, enter the Wireless Setting page.
4Wireless Setting Confirm
Refresh/reload page. After few seconds, you should see the new wireless IP address.
2 Relocate & Mount Device.
Please mount the device to the preferred location and power on the device.
2Search/Select Wireless AP
Camera will automatically scanned Wireless APs when you enter the page, or you may press “scan” again. Importantly, you need to ensure your WLAN AP is shown and with encyption enable.
.
3 Setting the Network Paramaters
Select Infrastructure mode, auto and enter SSID, Select WEP Encryption to be 64 bits or 128bits depending on your wireless router/AP setting. Enter the exact same KEY that your used for the wireless router/AP. Select DHCP or enter static IP address based on your network plan. Press “Save”.
Wireless Bandwidth
Primary time of WLAN or 802.11 b/g offers 11Mbps or 54mbps share bandwidth. The WLAN bandiwdth is much less than that offered by Ethernet switch which can sustain multiple channels of
Due to the bandwidth limitation of WLAN, It is HIGHLY recommended to set video Quality below 1.5Mbps and below.
If your signal strength from wireless router/AP is below 50%, either you need to adjuest AP or camera position or boost antenna power. Please consult your network manager.