2.9 eSATAII Interface Introduction
NOTE:
1.If you set “SATA Operation Mode” option in BIOS setup to AHCI or RAID mode, Hot Plug function is supported with eSATAII devices. Therefore, you can insert or remove your eSATAII devices to the eSATAII ports while the system is
2.If you set “SATA Operation Mode” option in BIOS setup to
3.If you want to use the eSATAII HDD as an OS disk, please set “SATA Operation Mode” option in BIOS setup to
4.Please do not configure your eSATAII HDD as a RAID disk; otherwise, it may affect the Hot Plug function that eSATAII HDD should have.
5.Please refer to page 28 to 31 for detailed information of RAID mode,
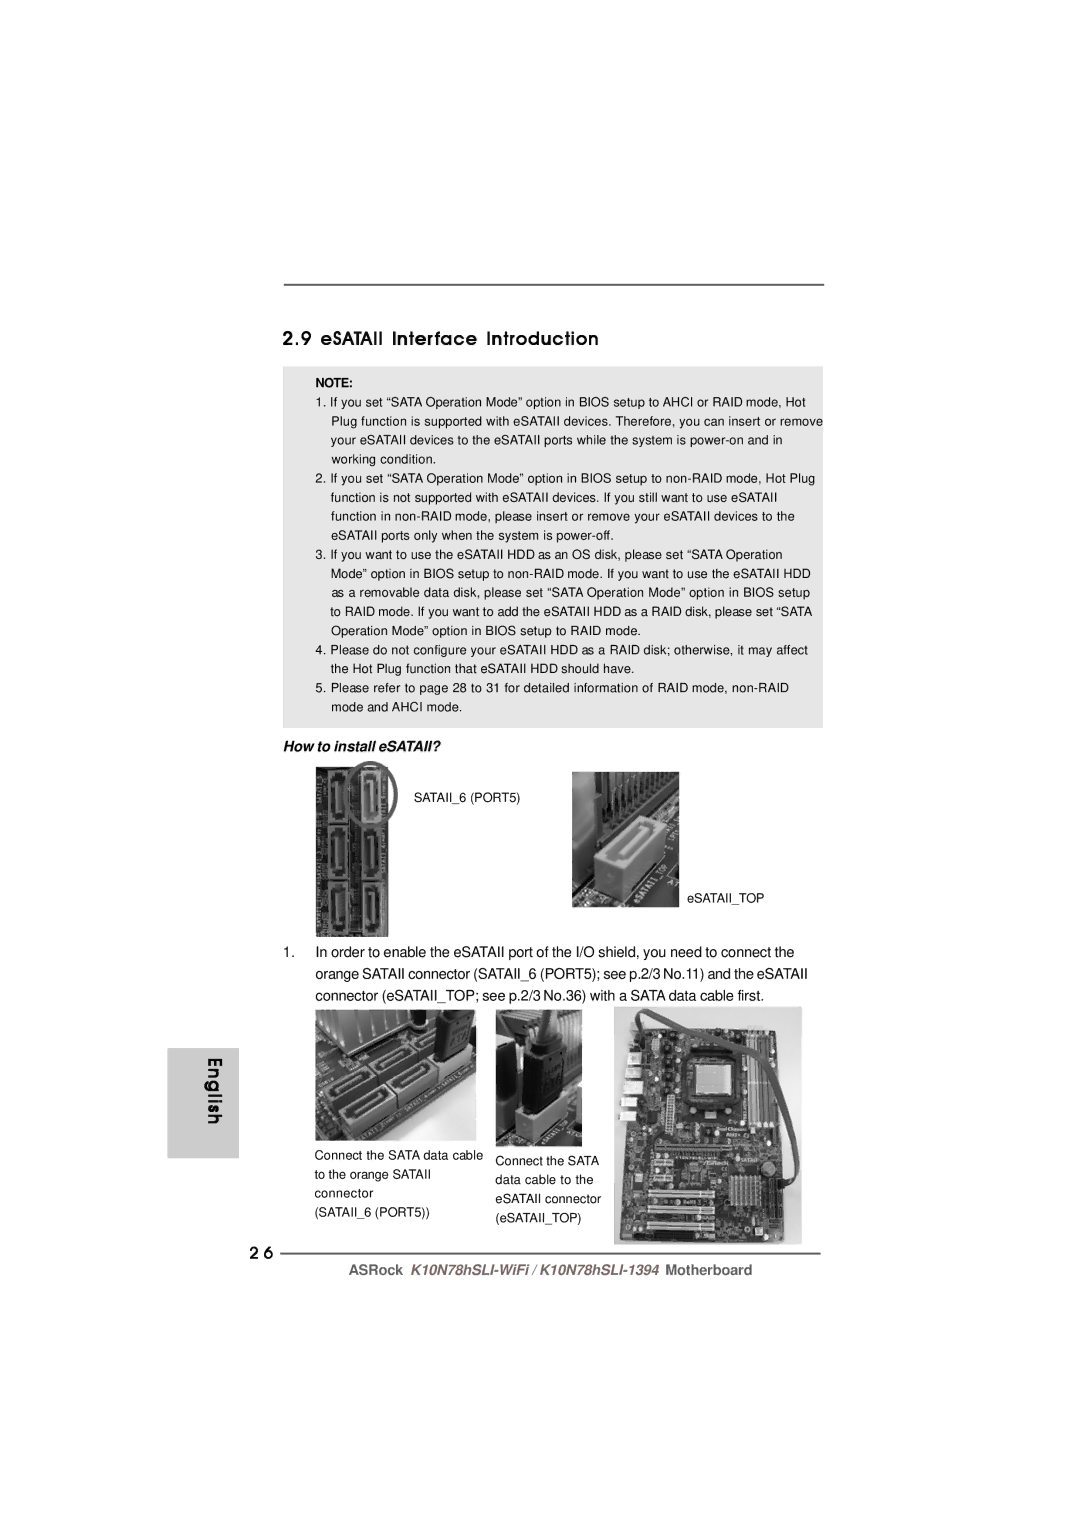
How to install eSATAII?
SATAII_6 (PORT5)
eSATAII_TOP
1.In order to enable the eSATAII port of the I/O shield, you need to connect the orange SATAII connector (SATAII_6 (PORT5); see p.2/3 No.11) and the eSATAII connector (eSATAII_TOP; see p.2/3 No.36) with a SATA data cable first.
English
Connect the SATA data cable Connect the SATA | ||
to the orange SATAII | data cable to the | |
connector | ||
eSATAII connector | ||
(SATAII_6 (PORT5)) | ||
(eSATAII_TOP) | ||
| ||
2 6
ASRock