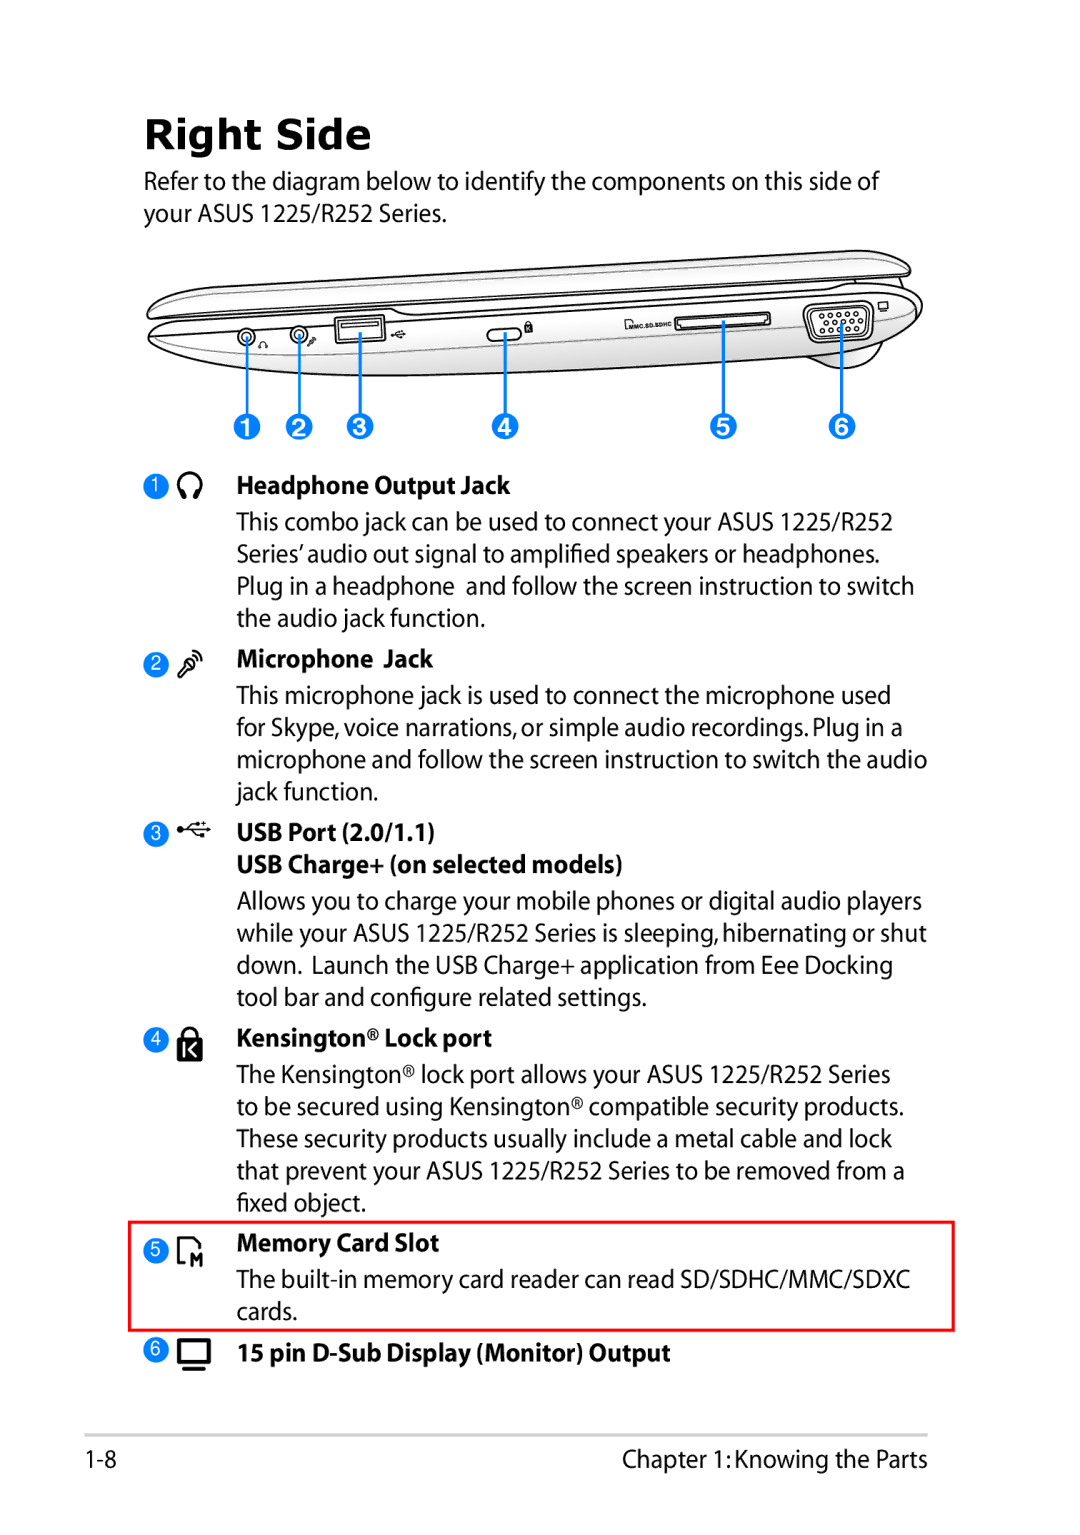
Right Side
Refer to the diagram below to identify the components on this side of your ASUS 1225/R252 Series.
1 | 2 | 3 | 4 | 5 | 6 |
1 Headphone Output Jack
This combo jack can be used to connect your ASUS 1225/R252 Series’ audio out signal to amplified speakers or headphones. Plug in a headphone and follow the screen instruction to switch the audio jack function.
2  Microphone Jack
3
4
This microphone jack is used to connect the microphone used for Skype, voice narrations, or simple audio recordings. Plug in a microphone and follow the screen instruction to switch the audio jack function.
USB Port (2.0/1.1)
USB Charge+ (on selected models)
Allows you to charge your mobile phones or digital audio players while your ASUS 1225/R252 Series is sleeping, hibernating or shut down. Launch the USB Charge+ application from Eee Docking tool bar and configure related settings.
Kensington® Lock port
The Kensington® lock port allows your ASUS 1225/R252 Series to be secured using Kensington® compatible security products. These security products usually include a metal cable and lock that prevent your ASUS 1225/R252 Series to be removed from a fixed object.
5 | Memory Card Slot |
The
6 | 15 pin |
Chapter 1: Knowing the Parts |