Left Side
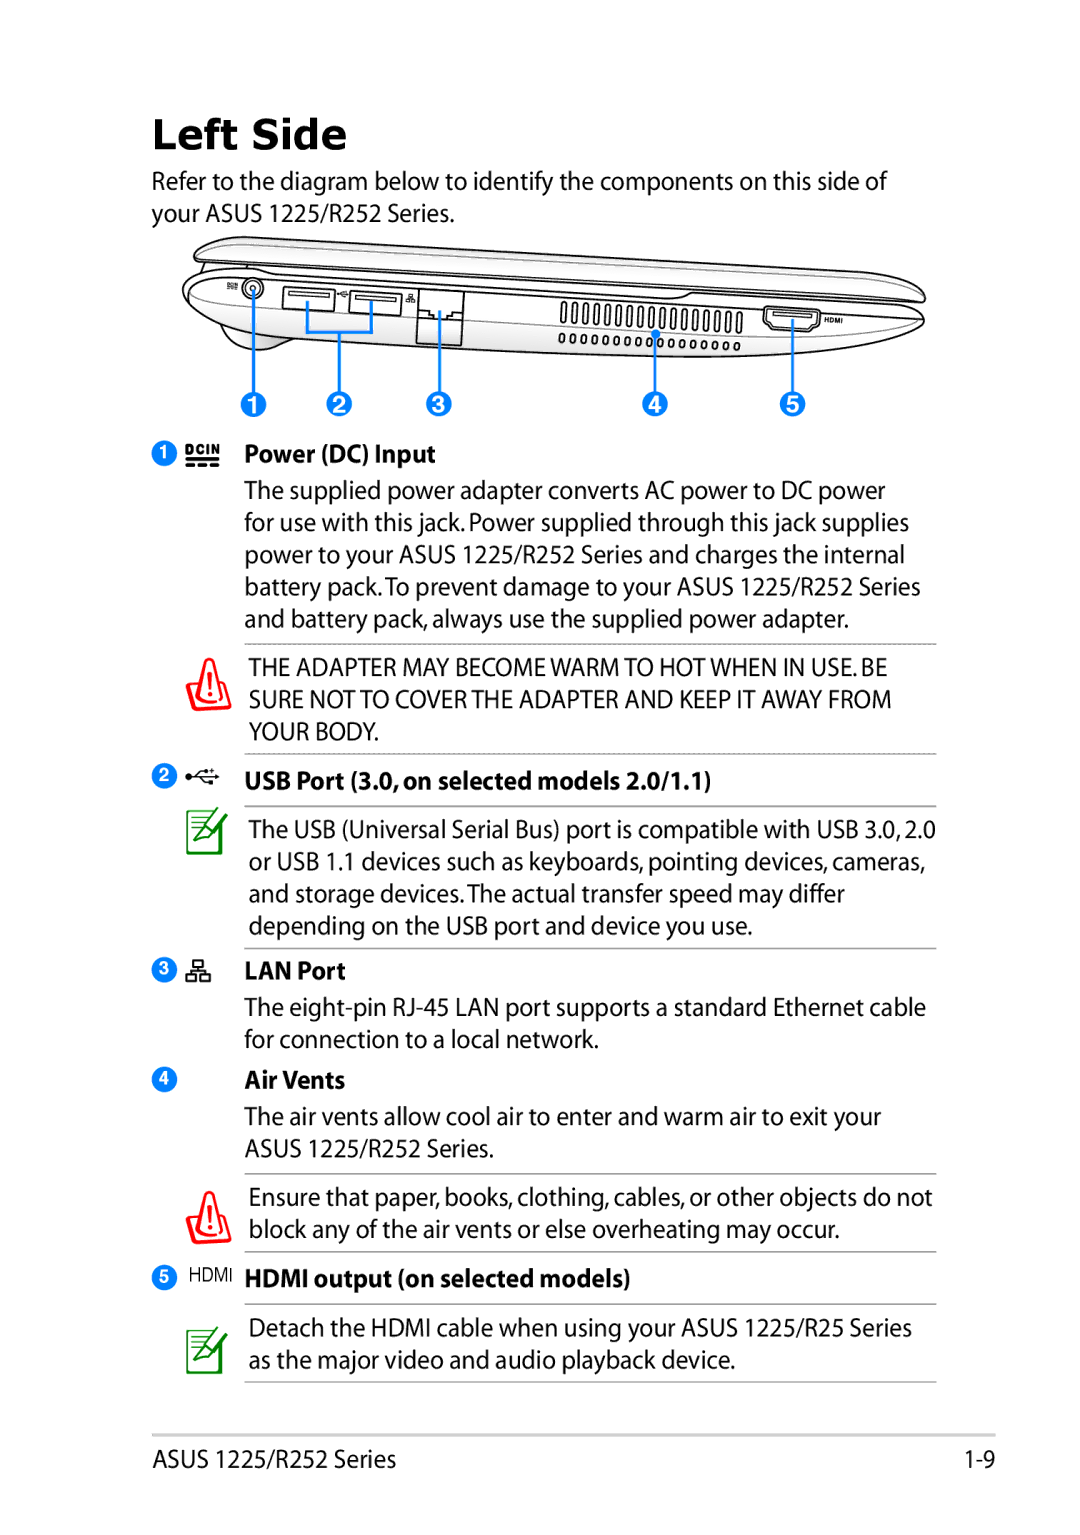
Refer to the diagram below to identify the components on this side of your ASUS 1225/R252 Series.
|
|
|
|
|
|
|
|
|
|
|
|
|
|
|
|
|
|
|
|
|
|
|
|
|
|
|
|
|
|
|
|
| 2 |
|
|
|
|
|
|
1 | 1 | 3 | 4 | 5 | |||||
Power (DC) Input |
|
|
|
| |||||
2
3
The supplied power adapter converts AC power to DC power for use with this jack. Power supplied through this jack supplies power to your ASUS 1225/R252 Series and charges the internal battery pack.To prevent damage to your ASUS 1225/R252 Series and battery pack, always use the supplied power adapter.
THE ADAPTER MAY BECOME WARM TO HOT WHEN IN USE. BE SURE NOT TO COVER THE ADAPTER AND KEEP IT AWAY FROM YOUR BODY.
USB Port (3.0, on selected models 2.0/1.1)
The USB (Universal Serial Bus) port is compatible with USB 3.0, 2.0 or USB 1.1 devices such as keyboards, pointing devices, cameras, and storage devices.The actual transfer speed may differ depending on the USB port and device you use.
LAN Port
The
4Air Vents
The air vents allow cool air to enter and warm air to exit your ASUS 1225/R252 Series.
Ensure that paper, books, clothing, cables, or other objects do not block any of the air vents or else overheating may occur.
5HDMI HDMI output (on selected models)
Detach the HDMI cable when using your ASUS 1225/R25 Series as the major video and audio playback device.
ASUS 1225/R252 Series |
