Installation
1.Connect the source to the HDMI IN on the transmitter
2.Connect the display to the HDMI OUT on the receiver
3.Use a category cable terminated 568B to connect the transmitter and receiver
4.Connect the power sources to the transmitter and receiver
The extenders are now connected. Depending on cable type and distance, some minor adjustments may be needed to ensure the best quality.
Possible Audio/Video Issues and Solutions
If audio or video is not passing, try one of the steps below:
1.Test HDMI and CAT cables to make sure they are certified
2.If using patch panels or wall plates, bypass them to minimize loss
3.Validate 568B termination is used
4.Adjust EQ dial on receiver until the picture stabalizes
5.In the source’s menu turn off auto feature and select a specific resolution
7.If 3D is not passing between source and display, turn the EDID dial on the transmitter to mode 4 or 6
8.If the signal is not stable, use the steps listed below to learn EDID.
Category Cable
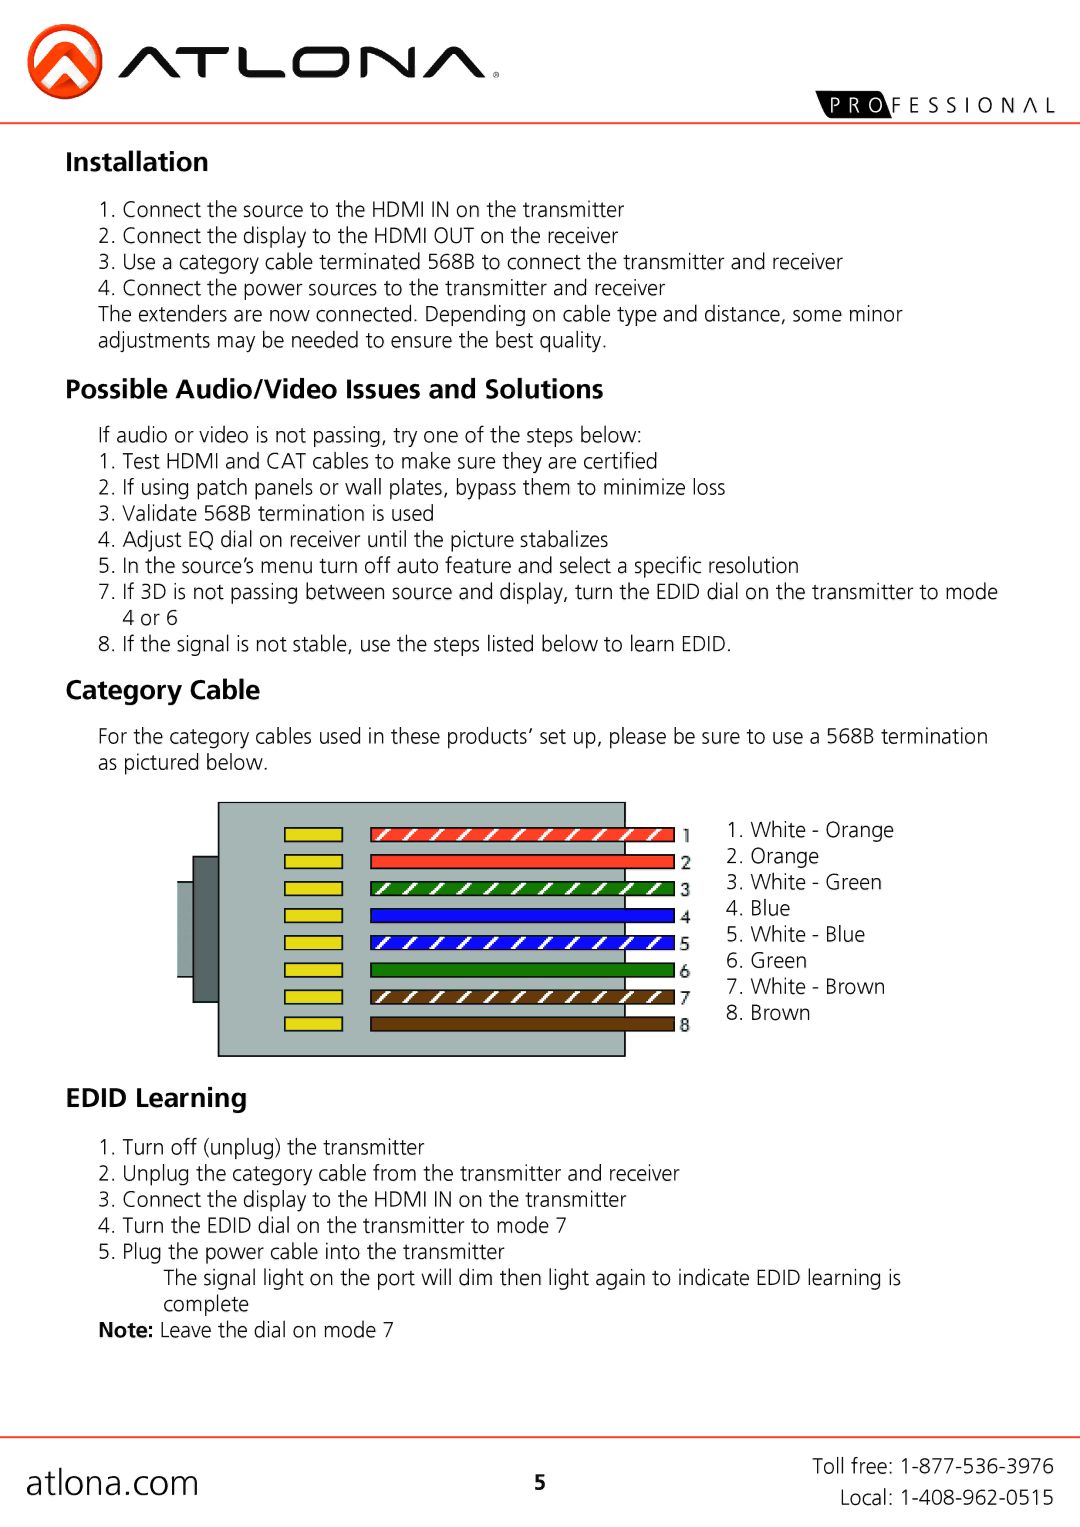
For the category cables used in these products’ set up, please be sure to use a 568B termination as pictured below.
1. White - Orange
2. Orange
3. White - Green
4. Blue
5. White - Blue
6. Green
7. White - Brown
8. Brown
EDID Learning
1.Turn off (unplug) the transmitter
2.Unplug the category cable from the transmitter and receiver
3.Connect the display to the HDMI IN on the transmitter
4.Turn the EDID dial on the transmitter to mode 7
5.Plug the power cable into the transmitter
The signal light on the port will dim then light again to indicate EDID learning is complete
Note: Leave the dial on mode 7
atlona.com | 5 | Toll free: | |
Local: | |||
|
|
