
AT-LP120-USB specifications
The Audio-Technica AT-LP120-USB is a direct-drive turntable that has garnered acclaim for its impressive features and performance, making it a popular choice among vinyl enthusiasts, DJs, and audiophiles alike. Designed to provide a seamless listening experience, this turntable is equipped with a host of advancements that enhance both sound quality and usability.One of the standout features of the AT-LP120-USB is its direct-drive motor. Unlike belt-driven turntables, which can suffer from fluctuations in speed, the direct-drive mechanism offers precise and consistent rotation, ensuring that your records play at the correct speed. This is particularly beneficial for DJs who require a reliable turntable that can handle scratching and beat-matching with ease.
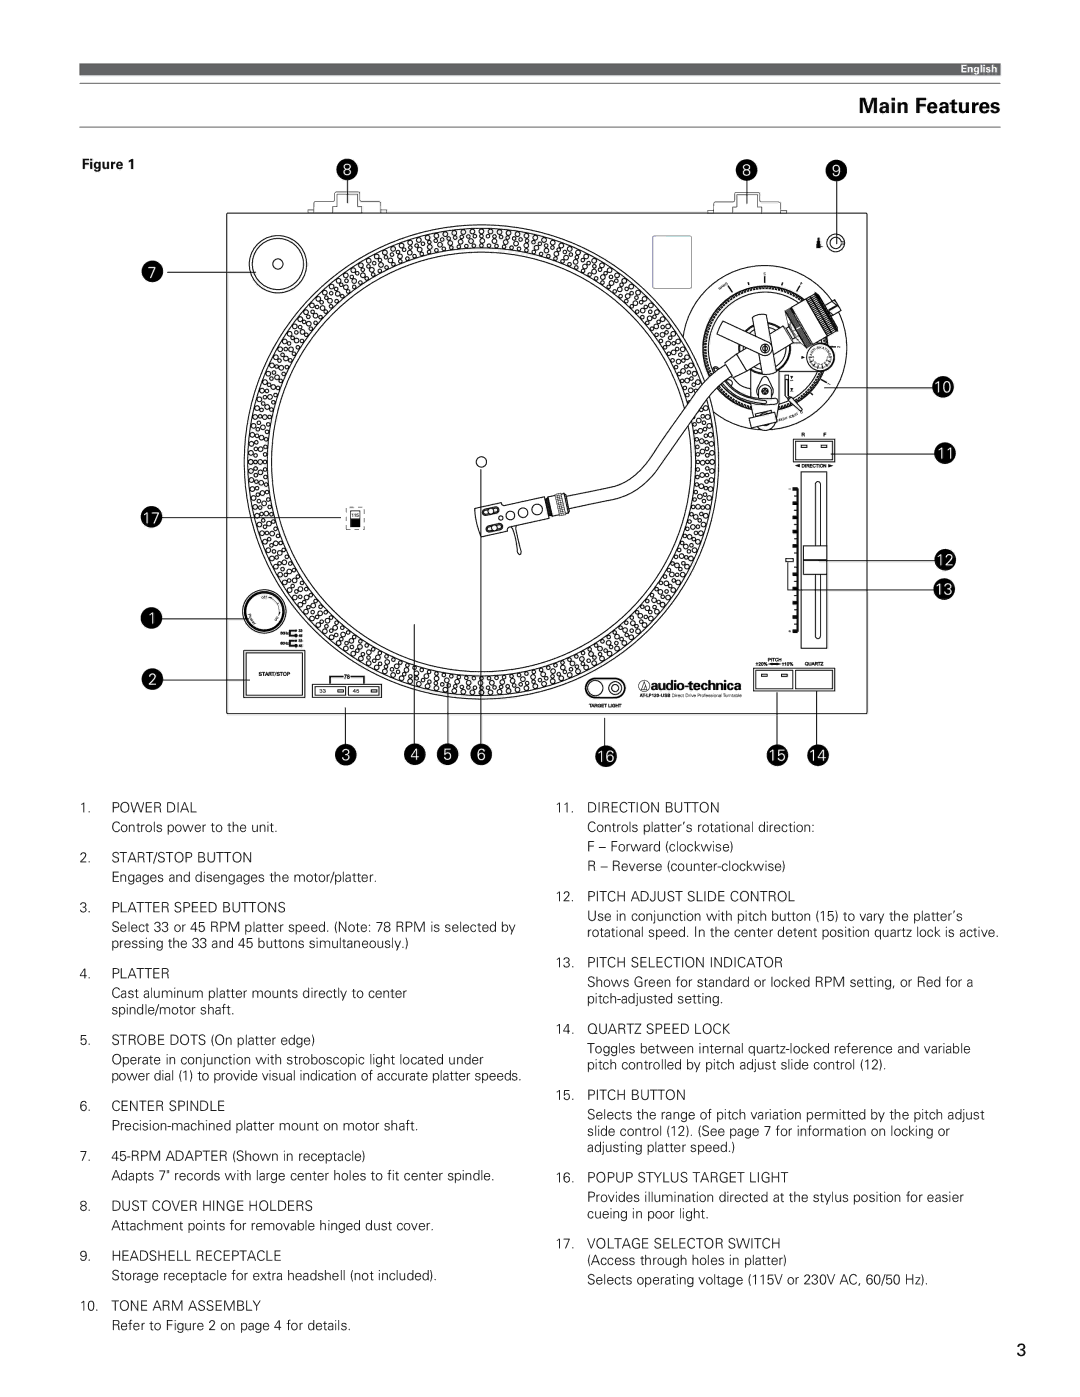
The AT-LP120-USB is equipped with a variable pitch control slider, allowing users to adjust the playback speed by ±10% or ±20%. This feature offers significant flexibility for DJs looking to match the tempo of different tracks, as well as for listeners who prefer to experiment with their record playback.
This turntable also highlights its USB output, which allows for easy digital conversion of vinyl records to digital files. Accompanied by Audacity software, users can conveniently digitize their vinyl collection, preserving their favorite albums in a modern format without losing the rich sound quality inherent in vinyl.
The AT-LP120-USB features a solid aluminum platter that not only adds to the turntable's aesthetic appeal but also contributes to reduced resonance for improved playback quality. The built-in adjustable anti-skate control helps ensure that the stylus tracks smoothly in the grooves of records, further enhancing sound fidelity.
Moreover, the AT-LP120-USB includes a removable headshell, which allows for easy replacement of cartridges. The included AT-95E cartridge produces clear, dynamic sound and can be easily upgraded for users looking for even higher-quality audio performance.
With its sturdy construction and iconic design, the Audio-Technica AT-LP120-USB is equipped with a pre-amplifier, making it compatible with various speaker systems, including those that lack dedicated phono inputs. Overall, the AT-LP120-USB represents a blend of vintage charm and modern technology, appealing to a wide range of users longing for an authentic vinyl experience. Its quality, versatility, and ease of use set it apart as a leading option in the turntable market.