12
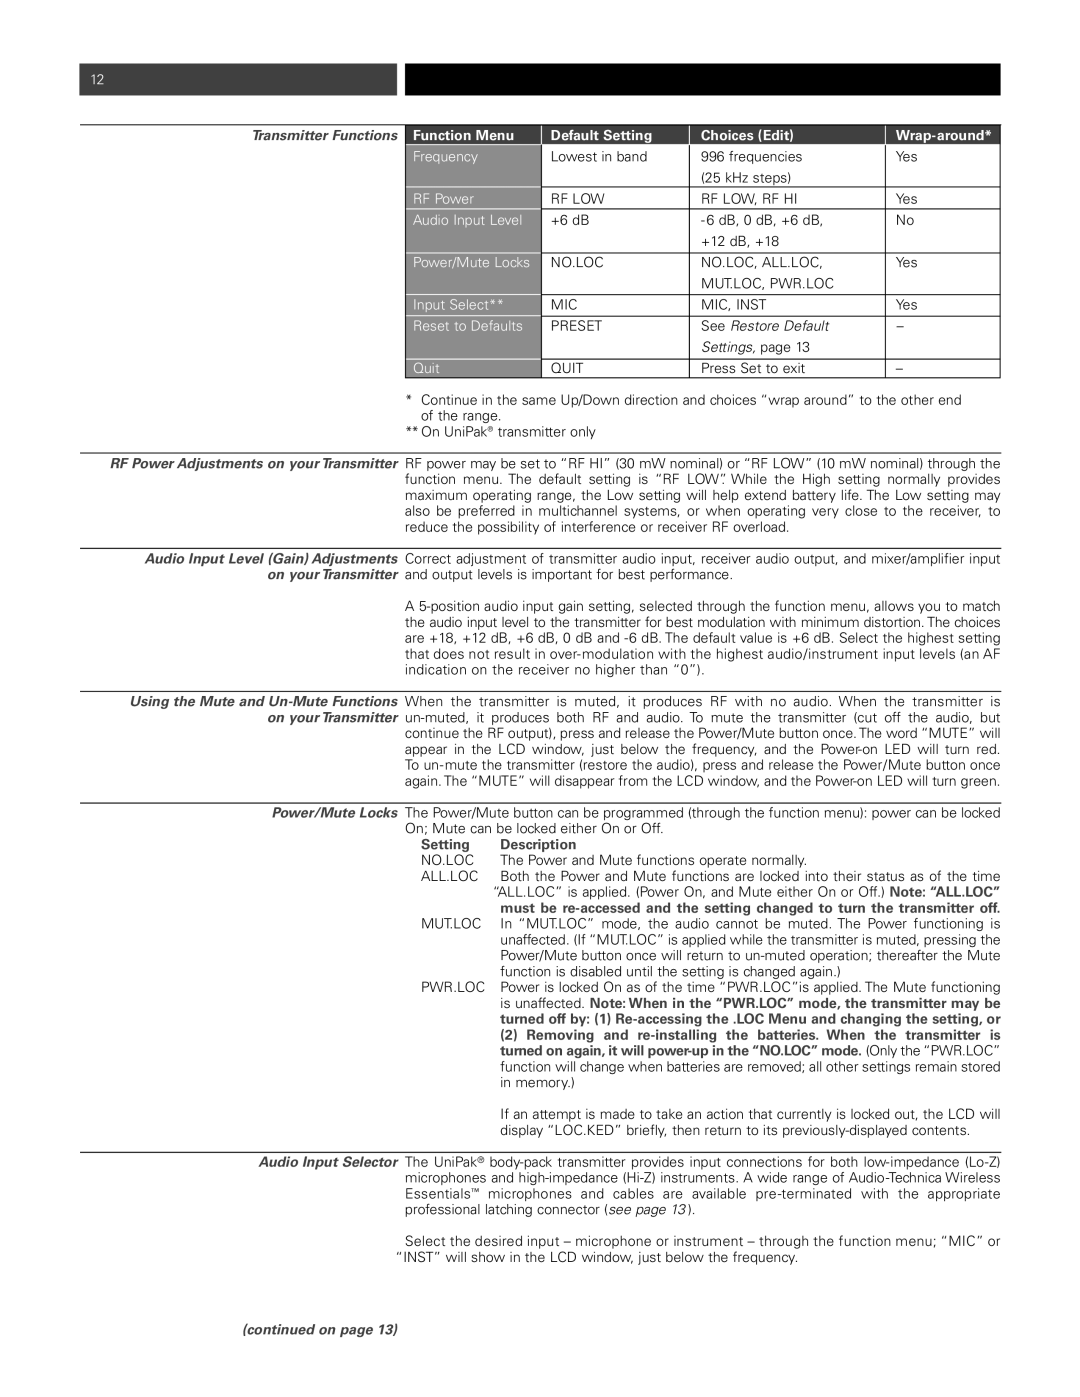
TransmitterFunctions | Function Menu | Default Setting | Choices (Edit) |
|
| Frequency | Lowest in band | 996 frequencies | Yes |
|
|
| (25 kHz steps) |
|
| RF Power | RF LOW | RF LOW, RF HI | Yes |
| Audio Input Level | +6 dB | - 6 dB, 0 dB, +6 dB, | No |
|
|
| +12 dB, +18 |
|
|
|
|
|
|
| Power/Mute Locks | NO.LOC | NO.LOC, ALL.LOC, | Yes |
|
|
| MUT.LOC,PWR.LOC |
|
| Input Select** | MIC | MIC, INST | Yes |
|
|
|
|
|
| Reset to Defaults | PRESET | See Restore Default | – |
|
|
| Settings, page 13 |
|
| Quit |
|
|
|
| QUIT | Press Set to exit | – |
*Continue in the same Up/Down direction and choices “wrap around” to the other end of the range.
**On UniPak® transmitter only
RF Power Adjustments on yourTransmitter RF power may be set to “RF HI” (30 mW nominal) or “RF LOW” (10 mW nominal) through the function menu. The default setting is “RF LOW”.While the High setting normally provides maximum operating range, the Low setting will help extend battery life. The Low setting may also be preferred in multichannel systems, or when operating very close to the receiver, to reduce the possibility of interference or receiver RF overload.
Audio Input Level (Gain) Adjustments Correct adjustment of transmitter audio input, receiver audio output, and mixer/amplifier input on yourTransmitter and output levels is important for best performance.
A
Using the Mute and
To
Power/Mute Locks The Power/Mute button can be programmed (through the function menu): power can be locked On; Mute can be locked either On or Off.
Setting | Description |
NO.LOC | The Power and Mute functions operate normally. |
ALL.LOC | Both the Power and Mute functions are locked into their status as of the time |
| “ALL.LOC” is applied. (Power On, and Mute either On or Off.) Note: “ALL.LOC” |
| must be |
MUT.LOC | In “MUT.LOC” mode, the audio cannot be muted. The Power functioning is |
| unaffected. (If “MUT.LOC”is applied while the transmitter is muted, pressing the |
| Power/Mute button once will return to |
| function is disabled until the setting is changed again.) |
PWR.LOC | Power is locked On as of the time “PWR.LOC”is applied. The Mute functioning |
| is unaffected. Note: When in the “PWR.LOC” mode, the transmitter may be |
| turned off by: (1) |
(2)Removing and
If an attempt is made to take an action that currently is locked out, the LCD will display “LOC.KED” briefly, then return to its
Audio Input Selector The UniPak®
Select the desired input – microphone or instrument – through the function menu; “MIC” or “INST” will show in the LCD window, just below the frequency.
(continued on page 13)