Body-pack Transmitter Setup
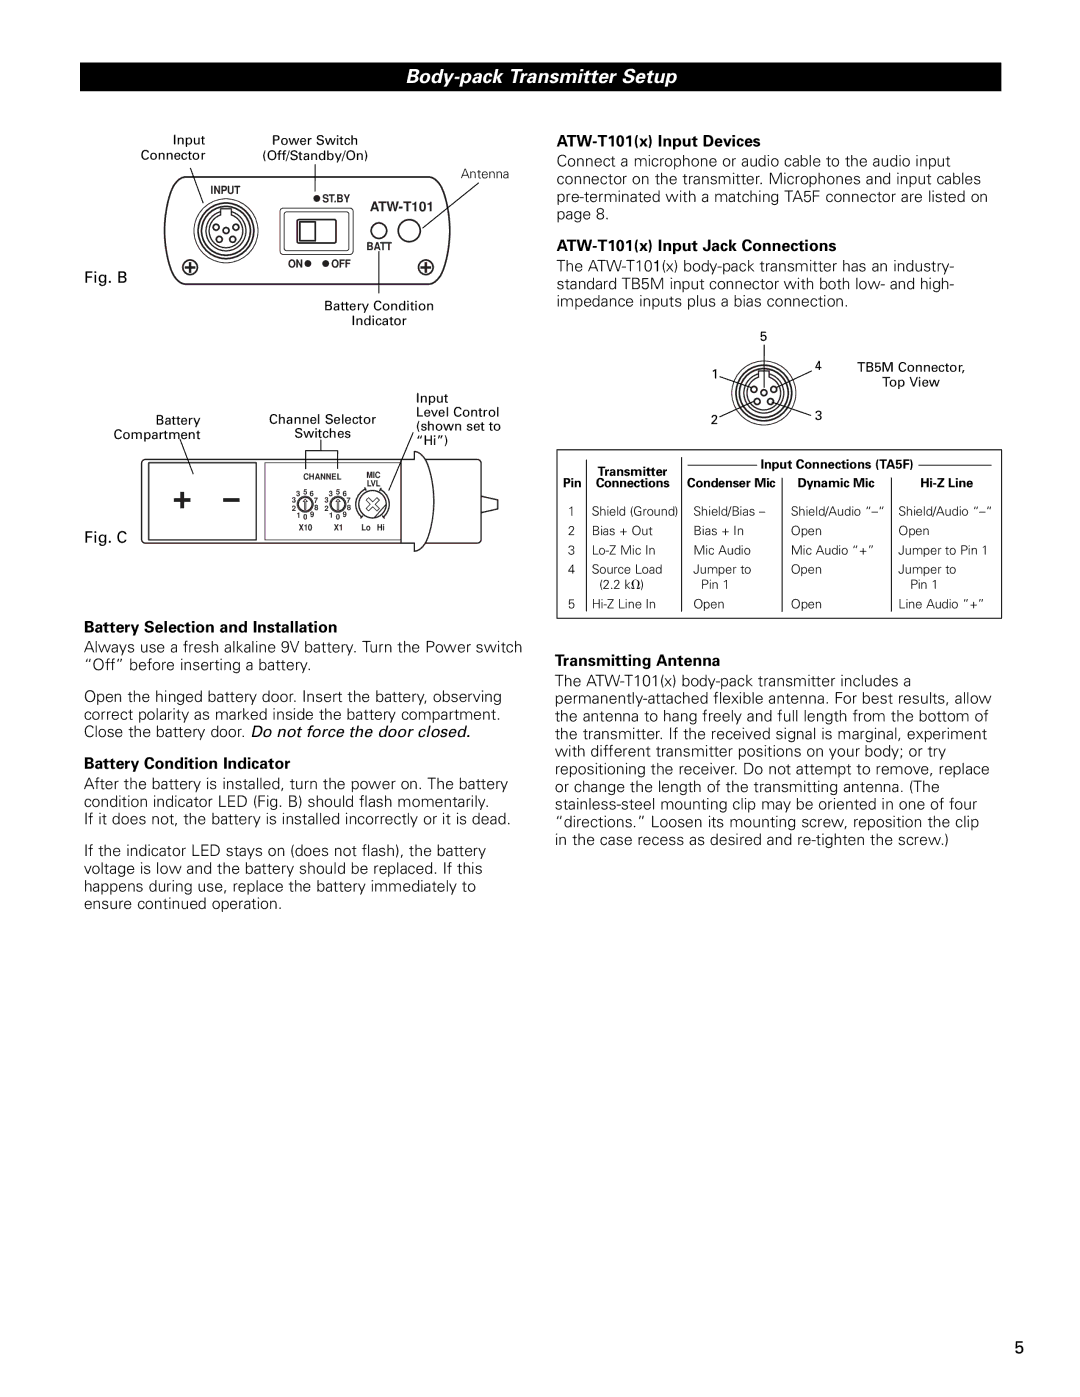
Input Connector
Power Switch
(Off/Standby/On)
ATW-T101(x) Input Devices
Connect a microphone or audio cable to the audio input
INPUT
ST.BY
Antenna
connector on the transmitter. Microphones and input cables
Fig. B
Battery
Compartment
Fig. C
BATT
ON![]()
![]() OFF
OFF
Battery Condition
Indicator
|
|
|
| Input | |
Channel Selector | Level Control | ||||
(shown set to | |||||
Switches | |||||
“Hi”) | |||||
|
|
|
| ||
| CHANNEL | MIC |
| ||
| 3 5 6 | 3 5 6 | LVL |
| |
3 | 7 |
| |||
7 | 3 |
| |||
2 | 8 | 2 | 8 |
| |
| 1 0 9 | 1 0 9 |
|
| |
| X10 | X1 | Lo Hi |
| |
ATW-T101(x) Input Jack Connections
The
|
| 5 |
|
|
|
|
| ||
|
| 1 |
| 4 | TB5M Connector, | ||||
|
|
|
| Top View | |||||
|
|
|
|
|
| ||||
|
| 2 |
| 3 |
|
|
|
| |
|
|
|
|
|
|
|
| ||
|
|
|
|
|
|
| |||
|
|
|
|
|
|
| |||
| Transmitter |
|
| Input Connections (TA5F) |
|
| |||
| |||||||||
|
|
|
| ||||||
|
|
|
|
|
|
|
|
| |
Pin | Connections | Condenser Mic | Dynamic Mic |
|
| ||||
1 | Shield (Ground) |
| Shield/Bias – | Shield/Audio | Shield/Audio | ||||
2 | Bias + Out |
| Bias + In | Open |
| Open | |||
3 |
| Mic Audio | Mic Audio “+” | Jumper to Pin 1 | |||||
4 | Source Load |
| Jumper to | Open |
| Jumper to | |||
| (2.2 kV) |
| Pin 1 |
|
| Pin 1 | |||
5 |
| Open | Open |
| Line Audio ”+” | ||||
|
|
|
|
|
|
|
|
|
|
Battery Selection and Installation
Always use a fresh alkaline 9V battery. Turn the Power switch “Off” before inserting a battery.
Open the hinged battery door. Insert the battery, observing correct polarity as marked inside the battery compartment. Close the battery door. Do not force the door closed.
Battery Condition Indicator
After the battery is installed, turn the power on. The battery condition indicator LED (Fig. B) should flash momentarily.
If it does not, the battery is installed incorrectly or it is dead.
If the indicator LED stays on (does not flash), the battery voltage is low and the battery should be replaced. If this happens during use, replace the battery immediately to ensure continued operation.
Transmitting Antenna
The
5