IF VEHICLE IS NOT EQUIPPED WITH FACTORY REAR A/C AND REAR AUDIO CONTROLS, PROCEED TO STEP 4.
1.Carefully remove the O.E.M. console mounted to inner roof of vehicle by pulling downward on sides to release clips. See Figure 1.
2.Lower console and disconnect wiring at (3) three locations.
Remove andFIGUREretain controls1 from console and lay them in a safe place. Discard console. See Fig. 2.
FIGURE 2
3. Remove and retain (2) two O.E.M. screws which secure plastic panel. Slide panel rearward until front edge of panel can be lowered through headliner.
Slide forward and discard panel. | See Figure 3. |
FIGURE 3
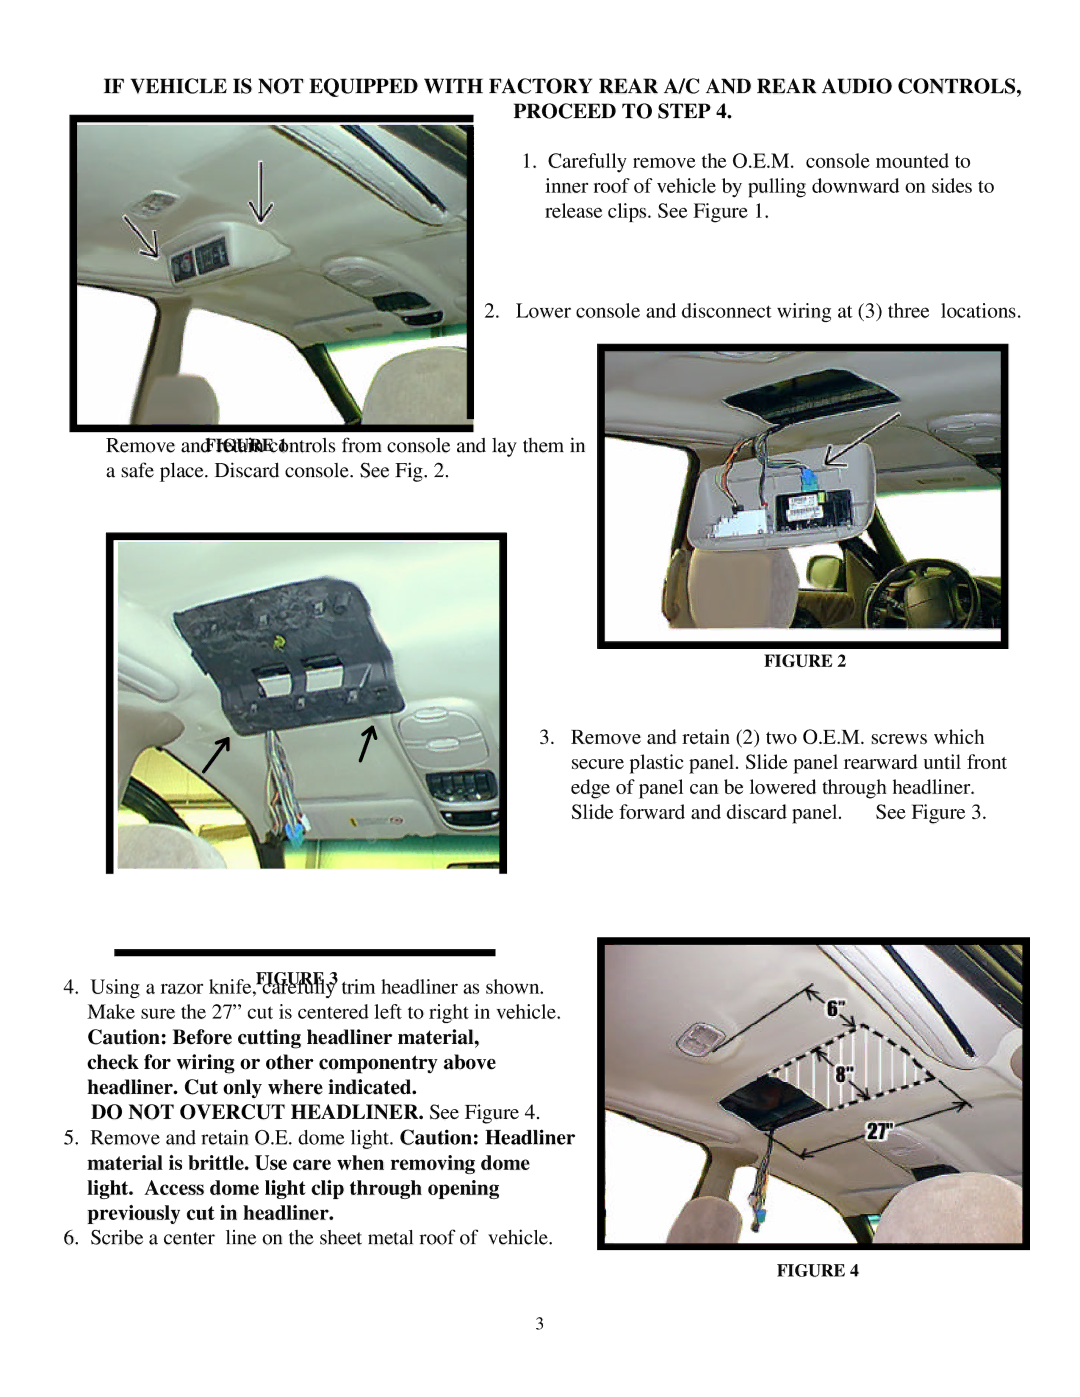
4. Using a razor knife, carefully trim headliner as shown. Make sure the 27” cut is centered left to right in vehicle.
Caution: Before cutting headliner material, check for wiring or other componentry above headliner. Cut only where indicated.
DO NOT OVERCUT HEADLINER. See Figure 4.
5. Remove and retain O.E. dome light. Caution: Headliner material is brittle. Use care when removing dome light. Access dome light clip through opening previously cut in headliner.
6. Scribe a center line on the sheet metal roof of vehicle.
FIGURE 4
3
