Audiovox 50-0246x-015 Series installation instructions Screws

Models: 50-0246x-015 Series

1 6
Download 6 pages 42.73 Kb
Page 5
Image 5

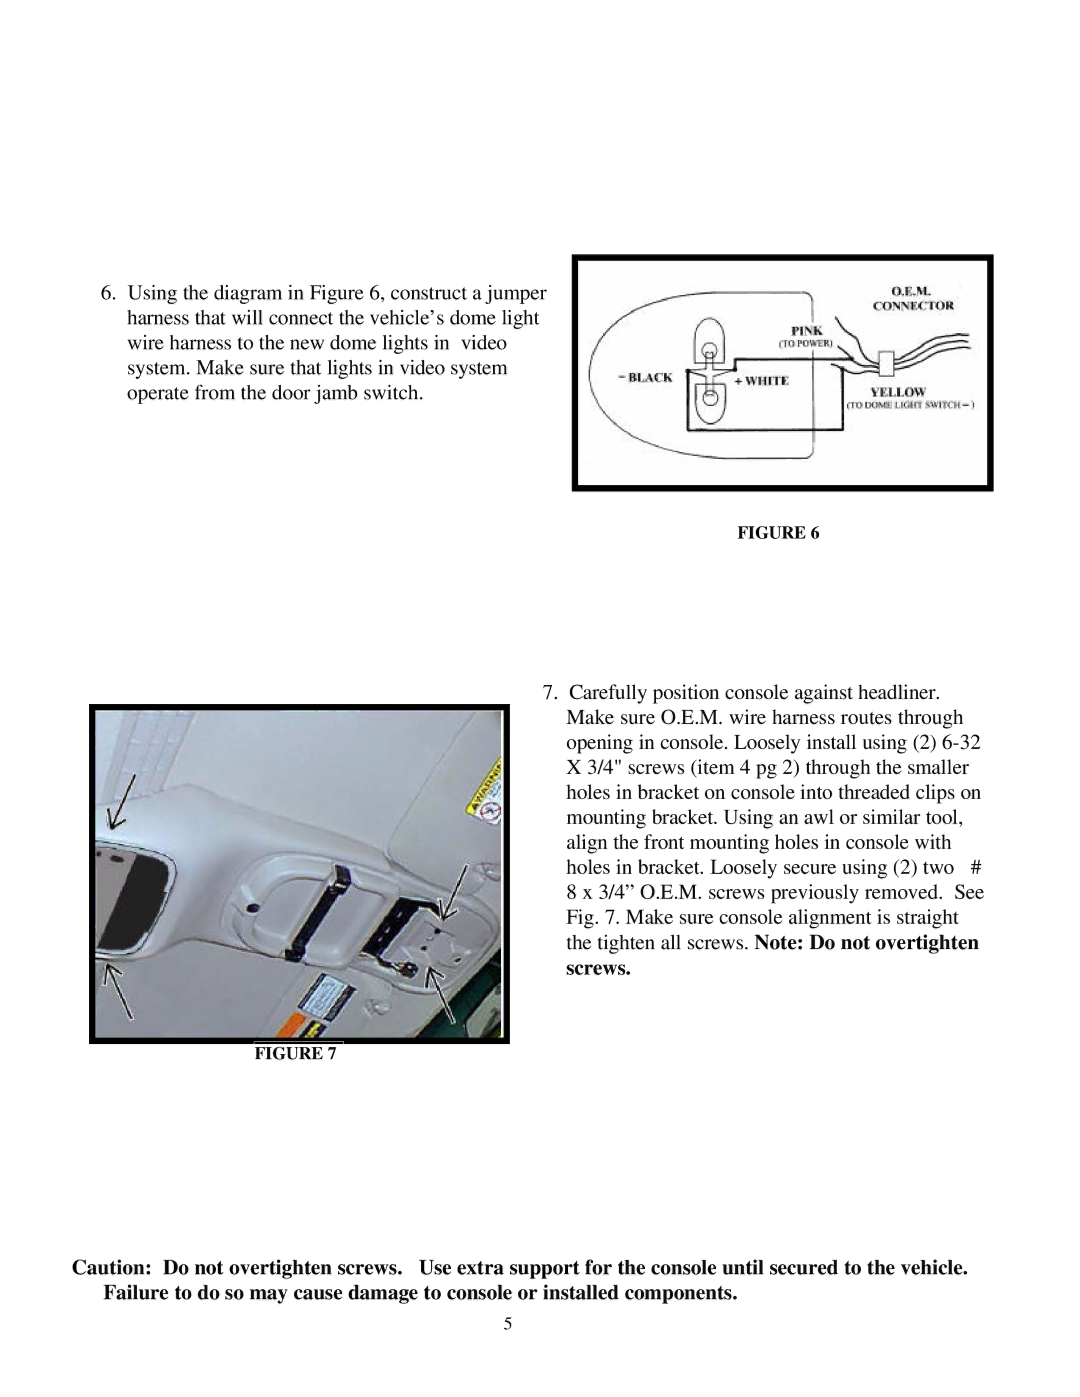
6.Using the diagram in Figure 6, construct a jumper harness that will connect the vehicle’s dome light wire harness to the new dome lights in video system. Make sure that lights in video system operate from the door jamb switch.

FIGURE 6

7. Carefully position console against headliner. Make sure O.E.M. wire harness routes through opening in console. Loosely install using (2) 6-32 X 3/4" screws (item 4 pg 2) through the smaller holes in bracket on console into threaded clips on mounting bracket. Using an awl or similar tool, align the front mounting holes in console with holes in bracket. Loosely secure using (2) two # 8 x 3/4” O.E.M. screws previously removed. See Fig. 7. Make sure console alignment is straight the tighten all screws. Note: Do not overtighten

screws.

FIGURE 7

Caution: Do not overtighten screws. Use extra support for the console until secured to the vehicle. Failure to do so may cause damage to console or installed components.

5

Page 5
Image 5
Audiovox 50-0246x-015 Series installation instructions Screws