Audiovox PEQ-200 Installation Procedures, Under-DashInstallation, Typical In-DashInstallation

Models: PEQ-200

1 12
Download 12 pages 40.76 Kb
Page 4
Image 4
INSTALLATION PROCEDURES

INSTALLATION PROCEDURES

The PEQ-200 should be easily accessible to the operator, and is intended for in-dash (if a location is available), console, or under-dash mounting as shown. To install the unit, proceed as follows:

1.Carefully choose a favorable mounting location prior to wiring the unit. Before deciding on the mounting location, consider these points:

a.Will the unit be accessible for easy operation while driving?

b.Is it a good solid mounting surface?

c.How will the wiring be routed to reach the unit?

d.Will it obstruct or interfere with passengers or other controls?

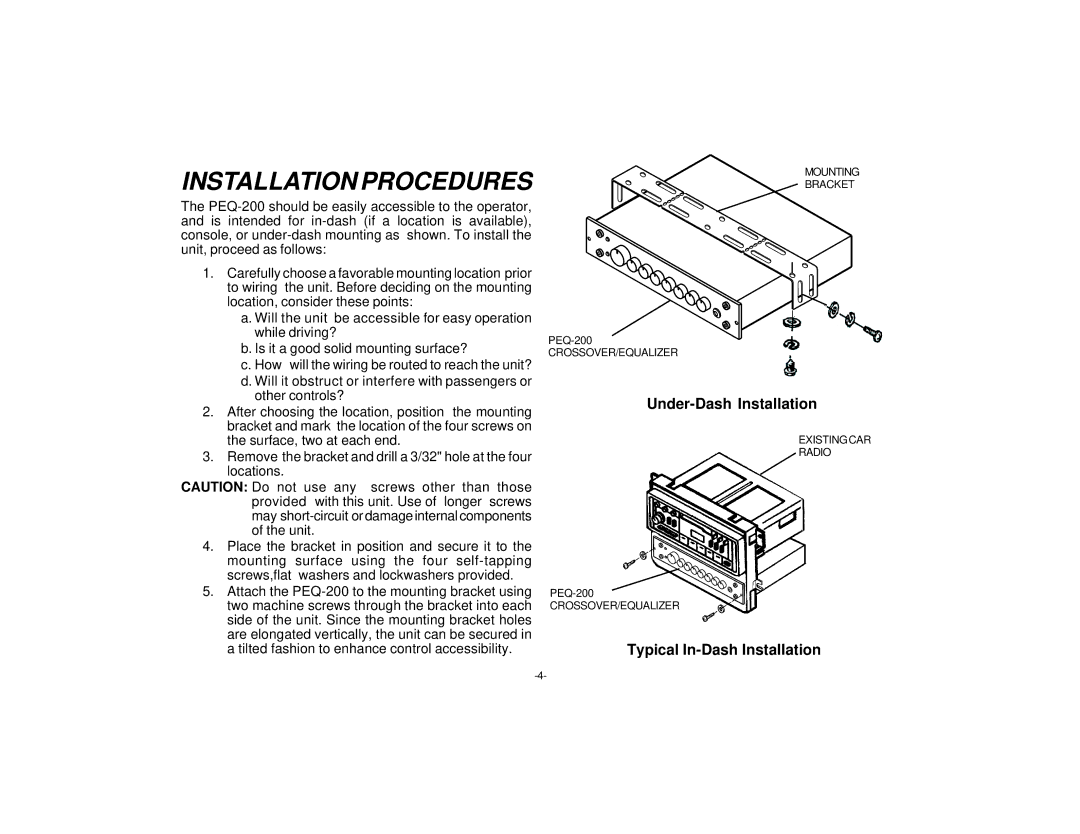
2.After choosing the location, position the mounting bracket and mark the location of the four screws on the surface, two at each end.

3.Remove the bracket and drill a 3/32" hole at the four locations.

CAUTION: Do not use any screws other than those provided with this unit. Use of longer screws may short-circuit or damage internal components of the unit.

4.Place the bracket in position and secure it to the mounting surface using the four self-tapping screws,flat washers and lockwashers provided.

5.Attach the PEQ-200 to the mounting bracket using two machine screws through the bracket into each side of the unit. Since the mounting bracket holes are elongated vertically, the unit can be secured in a tilted fashion to enhance control accessibility.

MOUNTING

BRACKET

PEQ-200

CROSSOVER/EQUALIZER

Under-Dash Installation

EXISTINGCAR

RADIO

PEQ-200

CROSSOVER/EQUALIZER

Typical In-Dash Installation

-4-

Page 4
Image 4
Audiovox PEQ-200 manual Installation Procedures, Under-DashInstallation, Typical In-DashInstallation